Category: minecraft

  • How to Craft Weapons in Minecraft

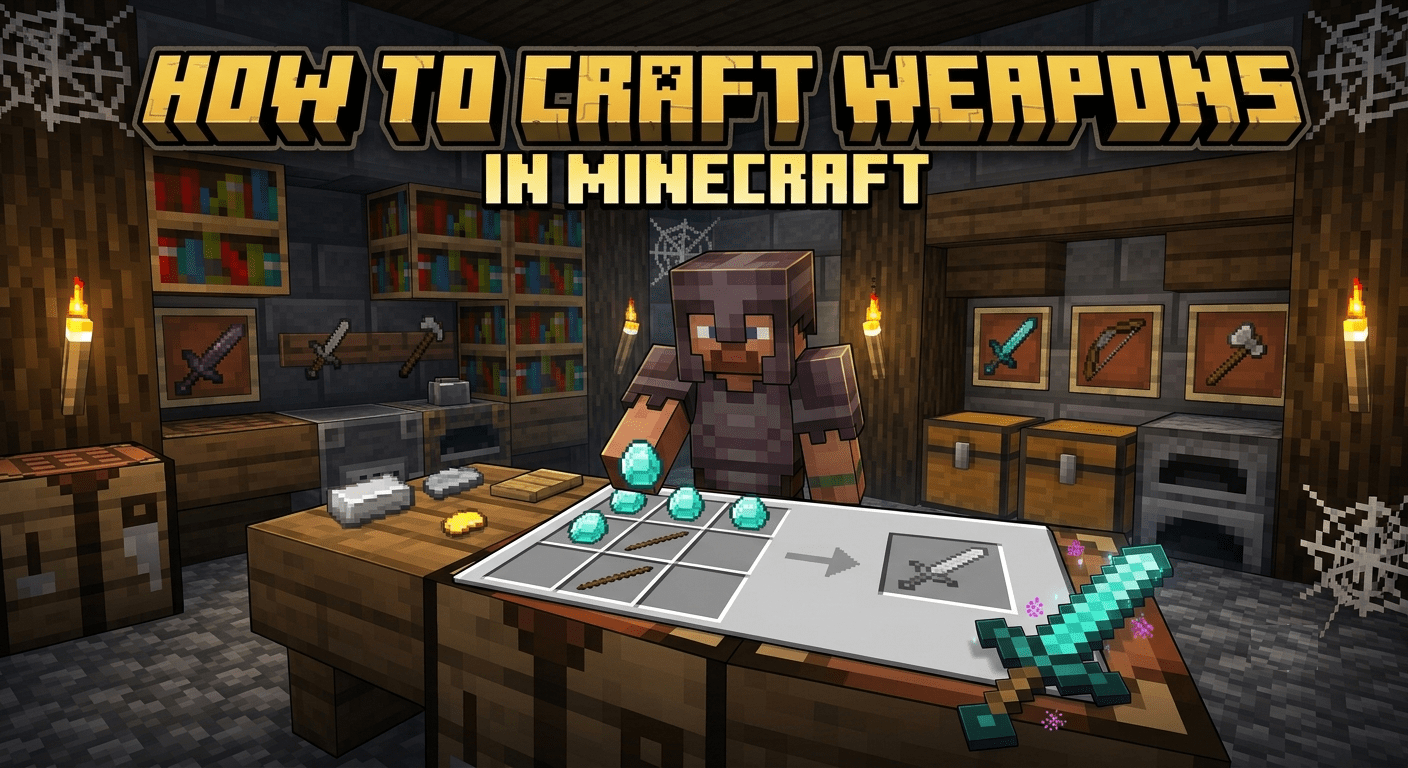
    How to Craft Weapons in Minecraft

    Every Minecraft player starts with the same two weapons their fists and desperation. Fists deal half a heart of damage. A wooden sword deals 4 hearts. The upgrade takes 30 seconds and two sticks. This guide walks you through every craftable weapon in the game, the material progression that makes each one better, and which weapon actually fits how you play.

    Before You Craft Anything: The Crafting Table Rule

    Every weapon in Minecraft requires a Crafting Table your inventory crafting grid is too small. Place a Crafting Table on the ground and right-click it to open a full 3×3 crafting grid. All weapon recipes use this grid.

    The basic pattern for every sword and most weapons is vertical materials stack in a column from top to bottom. Once you understand that pattern, every recipe clicks immediately.

    The Sword: Your Most Important Weapon

    The sword is the backbone of Minecraft combat. Swords offer the highest damage per second in the game with a swift cooldown of 0.6 seconds, outpacing their axe-wielding counterparts by 60%. Their unique sweep attack ability also lets you hit multiple targets, making them a formidable choice.

    The crafting recipe never changes only the material does.

    Place two of your chosen material in a vertical column in the centre of the top two rows. Place one stick directly below them in the bottom centre slot.

    Slot PositionMaterial
    Top centreMaterial (Wood/Stone/Iron/Gold/Diamond)
    Middle centreMaterial (same as above)
    Bottom centreStick

    That is it. Two materials and one stick every single time.

    The Material Progression: Every Sword Tier

    Never stay on wood longer than your first night stone is always within reach. Craftable weapons progress from wood to stone, iron, gold, diamond, and finally netherite. For swords, the progression is Wood Sword, Stone Sword, Iron Sword, Gold Sword, Diamond Sword, and Netherite Sword.

    Here is every sword tier, what it costs, and what it does:

    Sword TierMaterials NeededDamageDurabilityWhen to Use
    Wooden Sword2 Oak Planks + 1 Stick4 HP59 usesDay 1 emergency only
    Stone Sword2 Cobblestone + 1 Stick5 HP131 usesDays 1 to 3
    Iron Sword2 Iron Ingots + 1 Stick6 HP250 usesDays 3 to 15
    Golden Sword2 Gold Ingots + 1 Stick4 HP32 usesSkip entirely
    Diamond Sword2 Diamonds + 1 Stick7 HP1,561 usesEndgame standard
    Netherite SwordDiamond Sword + Netherite Ingot8 HP2,031 usesUltimate weapon

    Skip the Golden Sword entirely. Gold swords are available but deal low damage despite their material cost. Gold durability is only 32 uses your sword breaks before the materials were worth gathering. The only reason to craft gold tools is for Piglin trading in the Nether.

    The Netherite Sword is a special case. Since 1.20, you need a smithing table, your diamond sword, 1x netherite ingot, and a netherite upgrade smithing template found in bastion remnants and other structures. The template requirement is the change most players miss after updating from older versions. You do not craft a Netherite Sword from scratch you upgrade an existing Diamond Sword at a Smithing Table.

    The Axe: The Shield Breaker

    The axe is the sword’s slower, harder-hitting cousin and it has one unique ability no other weapon has. Axes are the only weapon that can disable a player’s shield, which is extremely useful in PvP.

    The crafting recipe for an axe:

    Place two materials in the top-right and middle-right slots. Place one material in the top-centre slot. Place sticks in the middle-centre and bottom-centre slots.

    In Java Edition, axes deal more damage per hit than their sword counterparts but have a slower cooldown. Wooden and stone axes have a cooldown time of 1.2 seconds, 100% slower than swords. Iron axes have a cooldown time of 1.1 seconds. Golden, diamond, and netherite axes have a cooldown time of 1 second, 60% slower than swords.

    Sword vs Axe: Which Should You Use?

    Bedrock Edition players should favour swords for combat, as axes deal less damage in this version. On Java Edition, axes deal more per hit but swords win on sustained damage-per-second. In PvP specifically, the axe wins because it disables shields in PvE against mobs, the sword is faster and more consistent.

    The Bow: Your Ranged Foundation

    Every Minecraft player needs a bow it is the safest way to fight Skeletons, Creepers, and the Ender Dragon.

    The crafting recipe for a Bow:

    Place three sticks in a diagonal line from top-right to middle-left to bottom-right. Place three strings in a vertical line filling the left column gaps.

    Crafting GridLeftCentreRight
    Top rowEmptyEmptyStick
    Middle rowStringEmptyEmpty
    Bottom rowEmptyEmptyStick

    Wait that is not quite right. Here is the correct layout:

    Place sticks in top-centre, middle-right, and bottom-centre positions. Place strings in top-right, middle-right… Actually the clearest way to remember it: three sticks form a vertical curve on the left side, three strings connect them on the right side.

    Bows can be charged by pressing the use control arrows go the farthest and deal the most damage when shot from a fully charged bow. Bows can be crafted using sticks and string, but are also a rare drop from skeletons and strays.

    Always pull the bowstring to full charge before releasing. A partially drawn bow does significantly less damage and travels shorter distance patience wins the ranged fight every time.

    Crafting Arrows: The Bow’s Ammunition

    A bow without arrows is a stick with string. Always craft arrows in bulk.

    The crafting recipe for Arrows (4 at a time):

    Place one Flint in the top-centre slot. Place one Stick directly below it in the middle-centre slot. Place one Feather directly below that in the bottom-centre slot.

    Crafting SlotItem
    Top centreFlint
    Middle centreStick
    Bottom centreFeather

    Where to get the materials: Flint drops from Gravel blocks with a 10% chance per block broken mine Gravel near rivers and beaches. Feathers drop from chickens. Sticks come from wood planks.

    Craft at least 64 arrows before attempting any boss fight. Running out of arrows mid-Ender Dragon fight is one of the most avoidable deaths in the game.

    The Crossbow: Power Over Speed

    The Crossbow trades fire rate for raw power and unique features. Crossbows have a longer range than bows and deal more damage, but take longer to charge when unenchanted. Unlike the bow, crossbows cannot fire a partially charged attack the player must fully charge a crossbow to load it and fire.

    The crafting recipe for a Crossbow:

    You need 3 Sticks, 2 Strings, 1 Iron Ingot, and 1 Tripwire Hook. The recipe is: 3 sticks plus 1 iron ingot plus 2 strings plus 1 tripwire hook equals 1 crossbow.

    Place it like this in the crafting grid:

    Crafting GridLeftCentreRight
    Top rowStickIron IngotStick
    Middle rowStringEmptyString
    Bottom rowEmptyStickEmpty

    Place the Tripwire Hook in the middle-centre slot completing the recipe.

    The Crossbow’s unique feature: A fun feature is that you can shoot fireworks with a crossbow. Load a Firework Rocket instead of arrows for explosive area damage one of the most devastating ranged attacks in the game against grouped mobs.

    The Mace: The Newest Weapon (1.21)

    The Mace was added in the 1.21 Tricky Trials update and it is unlike anything else in the game. The mace was added in 1.21 Tricky Trials and is the first new melee Minecraft weapon in years. It has the slowest attack speed of all weapons with a 1.67 second cooldown but makes up for it with its signature mechanic: the smash attack. If you hit a target while falling more than 2 blocks, the mace deals bonus damage equal to 0.5 HP per fallen block, scaling infinitely with height.

    How to craft the Mace:

    You need a Breeze Rod and a Heavy Core both obtained from Trial Chambers. The Breeze Rod drops from the Breeze mob. The Heavy Core comes from Ominous Vaults inside Trial Chambers with approximately a 7.5% chance.

    Place the Heavy Core in the top-centre slot and the Breeze Rod directly below it in the middle-centre slot.

    The smash attack mechanic changes how you think about height. Jump off a cliff, fall 20 blocks, and hit an enemy at the bottom the damage is catastrophic. Players have been using this to one-shot bosses from height, and it works in every difficulty.

    The Spear: Brand New in 1.21.11 (December 2025)

    The Spear arrived in the Mounts of Mayhem update in December 2025 and fills a completely new combat niche. The spear arrived in 1.21.11 Mounts of Mayhem in December 2025 and fills a niche no other weapon covers: a melee weapon built around movement and reach.

    Crafted using a Breeze Rod and materials from Trial Chambers, the Spear is designed for players who want a weapon that works with movement rather than stationary combat. It is the newest addition to the weapon roster and the community is still discovering optimal uses for it.

    The Trident: Cannot Be Crafted Only Obtained

    This is the most important thing to know about the Trident: The only downside to a trident is its rarity. You cannot craft it you can only obtain it from drowned or in the trial chambers.

    How to get one: Find Drowned enemies in ocean and river biomes. Only Drowned that are already holding a Trident have a chance of dropping it on death roughly 8.5% chance on Java Edition. It takes patience but the Trident is worth hunting for.

    Tridents can be swung to deal 9HP damage, the same as an unenchanted stone, iron, or diamond axe in Java Edition. Tridents can also be thrown to deal 8HP damage. Unlike most other projectiles, they are not slowed down in water.

    The enchantments are what make it extraordinary:

    Loyalty makes the thrown Trident return to your hand like a boomerang. Channeling summons lightning during thunderstorms when the Trident hits an enemy. Riptide propels you through water or rain when you throw it effectively turning it into a movement tool. Impaling increases damage against aquatic mobs significantly.

    Best Enchantments for Every Weapon

    Crafting the weapon is step one. Enchanting it is what makes it genuinely powerful.

    WeaponPriority EnchantmentsWhat They Do
    SwordSharpness V, Looting III, Mending, Unbreaking IIIMore damage, better drops, self-repair, longer life
    AxeSharpness V, Efficiency V, MendingDamage boost, faster chopping, self-repair
    BowPower V, Infinity, Flame, Unbreaking IIIMassive damage boost, unlimited arrows, fire arrows
    CrossbowQuick Charge III, Multishot, Piercing IVFaster reload, three arrows at once, arrow passes through enemies
    TridentLoyalty III, Channeling, MendingReturns when thrown, summons lightning, self-repair
    MaceSmite V, Density V, Breach IVExtra undead damage, more smash damage, armour penetration

    Mending is the enchantment that every weapon needs above everything else. Different swords are good for different situations, but Looting, Mending, Sharpness, and Sweeping Edge should be on every sword. A weapon with Mending repairs itself using XP orbs meaning it essentially lasts forever as long as you keep earning experience.

    Which Weapon Should You Use?

    The answer depends entirely on what you are fighting and how you play. Here is the honest breakdown:

    SituationBest WeaponWhy
    General mob fightingDiamond Sword with Sharpness VFastest DPS, sweep attack hits multiple mobs
    PvP against playersAxeDisables shields, higher damage per hit
    Fighting from distanceBow with Power VSafest combat, essential against Skeletons and Ghasts
    Boss fightsMace from heightSmash attack scales infinitely, one-shots with enough fall distance
    Water combatTrident with LoyaltyNot slowed by water, returns when thrown
    Grouped enemiesCrossbow with MultishotThree arrows per shot, devastating against crowds
    Undead mobs (Zombies, Skeletons)Sword or Axe with Smite VSmite deals extra damage specifically to undead

    Quick Crafting Reference: Every Weapon at a Glance

    WeaponMaterials RequiredObtainable By Crafting?
    Wooden Sword2 Oak Planks + 1 StickYes
    Stone Sword2 Cobblestone + 1 StickYes
    Iron Sword2 Iron Ingots + 1 StickYes
    Diamond Sword2 Diamonds + 1 StickYes
    Netherite SwordDiamond Sword + Netherite Ingot + Smithing TemplateYes (upgrade only)
    Bow3 Sticks + 3 StringsYes
    Arrow1 Flint + 1 Stick + 1 FeatherYes (4 per craft)
    Crossbow3 Sticks + 2 Strings + 1 Iron Ingot + 1 Tripwire HookYes
    Axe (Iron)3 Iron Ingots + 2 SticksYes
    Mace1 Heavy Core + 1 Breeze RodYes (Trial Chamber materials)
    SpearTrial Chamber materialsYes (1.21.11 onwards)
    TridentCannot be craftedNo, Drowned drop only

    The weapon that matters most changes depending on where you are in the game. Stone Sword gets you through the first week. Iron Sword carries you into the Nether. Diamond Sword enchanted with Sharpness V and Mending is the weapon you carry into the End Portal.

    Start crafting in that order, enchant everything you intend to keep, and never let Mending go unequipped on a weapon you love. The right weapon at the right stage of the game makes every fight significantly easier than fighting with underpowered gear twice as long.

  • Minecraft Stronghold: The Complete Guide

    Minecraft Stronghold: The Complete Guide

    The Stronghold is the most important structure in all of Minecraft. It is not the most dangerous, not the most impressive looking, and not the most rewarding to loot but it is the one structure that every player who wants to complete the game must find. Without it, the Ender Dragon fight never happens. The credits never roll. The game is never technically finished.

    Here is everything you need to know about it.

    What Is a Stronghold?

    A Stronghold is a hidden underground structure that holds the End Portal, making it essential if you want to reach the End and fight the Ender Dragon. You will not find it sitting on the surface like a village or a desert temple. It spawns deep underground with multiple libraries, corridors, prison cells, and secret rooms to navigate.

    The stronghold is the only place where an End Portal can be found. That single fact makes it mandatory. Every other structure in Minecraft is optional. This one is not.

    How Many Strongholds Exist Per World

    Java Edition and Bedrock Edition handle this completely differently and the difference matters.

    In Java Edition, strongholds are distributed across 8 concentric rings centered on the world origin. Ring 1 is closest and easiest to find with Eyes of Ender the first stronghold you encounter is almost always in Ring 1, within roughly 3,000 blocks of spawn. Java Edition generates a total of 128 strongholds per world.

    In Bedrock Edition, there are only 3 Strongholds per world in total, and each has an End Portal room. That means on Bedrock, every trip needs to count. You have three shots at finding the portal Java players have 128.

    In Bedrock Edition, there are 3 extra strongholds at least 453 blocks away from the world origin, which tend to be close to the 453-block boundary and are guaranteed to generate below meeting points of a village. If you find a village in Bedrock Edition, there is a good chance a Stronghold sits directly underneath it.

    Where Exactly Do They Generate

    There is no fixed depth and that is what makes them hard to find. Strongholds generate at any Y level, mostly underground, and prefer to generate in biomes above sea level but generate underwater if necessary. They can even spawn at bedrock level, cutting through the bedrock itself.

    Most strongholds concentrate around Y0 to Y-16 in typical terrain. Strongholds adapt to terrain they can be partially exposed in ravines or completely buried under mountains. Check your Y-coordinate while searching. Press F3 on Java Edition or enable coordinates in Bedrock Edition settings.

    Ravines do not overwrite strongholds rather, a stronghold can occasionally be found exposed by a ravine. If you ever spot mossy stone bricks inside a ravine wall, start digging immediately.

    Step 1: Craft the Eyes of Ender

    You cannot find a Stronghold without Eyes of Ender they are the only navigation tool for this structure.

    Each Eye of Ender requires one Ender Pearl and one Blaze Powder. The only way to get Ender Pearls is to defeat Endermen the tall, dark mobs that teleport around and pick up blocks. When you hit them or look into their eyes, they will teleport away and charge you repeatedly.

    Blaze Powder comes from Blaze Rods, which you get by killing Blazes inside Nether Fortresses. This means finding the Stronghold requires completing the Nether first there is no shortcut around it.

    Eyes of Ender have a 20% chance of breaking when thrown. Bring at least 15 to be safe you need 12 for the portal and a few extras for navigation. Never go looking for a Stronghold with less than 15 Eyes in your inventory.

    Step 2: Follow the Eyes of Ender

    This is the intended survival method for finding a Stronghold and the one every player uses on their first run.

    Throw an Eye of Ender into the air and follow the direction it travels. It leads you to the nearest stronghold, which spawns between Y-levels -32 and 48 underground.

    Here is the exact process that works:

    Throw your first Eye of Ender and note the direction it flies. Walk roughly 200 to 300 blocks in that direction. Throw another Eye and check if the direction has changed. Keep walking and throwing every few hundred blocks until the Eye starts floating downward instead of forward.

    When the Eye floats downward instead of forward, you are standing directly above the stronghold. Dig down carefully the stronghold is typically between Y 0 and Y 40. Find the portal room by exploring the stronghold corridors to locate the End Portal room.

    The speedrunner triangulation method uses just 2 Eyes. Throw an Eye at your starting position and note the direction. Walk perpendicular to the Eye’s direction, then throw another Eye. The intersection point of both directions is where the stronghold sits. This saves Eyes of Ender for filling the portal frames later.

    Step 3: Navigating the Maze Inside

    Finding the Stronghold is only half the battle. Getting to the End Portal room inside it is the other half.

    Once inside a Minecraft Stronghold, you will find the place is essentially a maze. There are winding hallways, spiral staircases to follow, and a couple of different rooms you can come across that make it hard to keep track of where you have been. Place torches on the right-hand side wall as you travel with this method, you can know where you have been already as you get lost in the area.

    The torch method is the simplest navigation system in the game. Torches always go on your right wall going forward. When you are backtracking, torches are on your left wall. You can never get permanently lost using this technique.

    While walking around the stronghold, you can find libraries full of bookshelves and spiderwebs, various chests hidden throughout the area, and the End Portal room. Along the way, mobs like zombies and skeletons are likely to spawn in the dark corridors, so be sure to light them up as you travel. Some of the stone bricks around the structure will be infested with silverfish, so be careful what blocks you break or you can have a horde of silverfish attacking you.

    What Is Inside a Stronghold

    The Stronghold is one of the most complex structures in Minecraft most players only find the portal room and leave without exploring properly. Here is every room type and what it contains:

    Room TypeWhat Is InsideWorth Visiting?
    End Portal RoomEnd Portal, Silverfish Spawner, lava poolEssential
    Library (Small)Bookshelves, cobwebs, 1 chestYes, books and loot
    Library (Large, 2 floors)More bookshelves, cobwebs, 2 chestsDefinitely yes
    Prison CellIron bars, sometimes a chestCheck for loot
    Storage RoomSingle chest, stone bricksQuick loot stop
    Spiral StaircaseNavigation between floorsLandmark for orientation
    Fountain RoomStone brick fountain, decorativeNavigation landmark
    CorridorsConnecting rooms, random mob spawnsLight them as you go

    The two-floor library is the best non-portal room in the entire Stronghold. It contains the most chests and the highest concentration of bookshelves which you can break for the books to build your own enchanting setup back at base.

    The End Portal Room

    This is what every Minecraft player is searching for the gateway to the final boss fight.

    When you find the portal room in a Stronghold, it is highly likely that it will be incomplete. If you look at the top of it, there will be slots in the portal frame where you can insert an Eye of Ender into each block. Once all 12 slots have an Eye of Ender, the middle portion of the portal will activate and become very dark and starry.

    Each portal frame has a 10% chance to generate containing an Eye of Ender already placed. On average, 0 to 3 slots are pre-filled, but some seeds generate frames with 4 to 5 Eyes already in place. Count the pre-filled slots immediately when you enter the room each one means one fewer Eye you need to supply.

    The Silverfish Spawner in the portal room is your first priority. Destroy it before doing anything else. Silverfish are small, fast, and attack in swarms fighting them while also trying to fill portal frames in a cramped room above lava is exactly as bad as it sounds.

    The Scouting Run Strategy

    Every experienced Minecraft player does two trips to the Stronghold not one. Once you have located the Stronghold and confirmed the End Portal room, resist the urge to immediately activate the portal and fight the Dragon. Instead, use this first visit as a scouting and looting run. The Stronghold’s chests contain Golden Apples, enchanted books, Ender Pearls, and iron and gold ingots. Collect everything before you commit to the End battle.

    Leave without activating the portal on your first visit. Go back to base, craft enough Eyes of Ender to fill all empty portal frame slots, stock up on food, enchant your armour and weapons, and bring Beds for the Dragon fight. Return fully prepared on your second visit and activate the portal then.

    This two-trip approach has a dramatically higher success rate than rushing straight into the End the moment you find the portal room.

    What to Bring Into the Stronghold

    Come prepared the corridors are dark, full of mobs, and deeper underground than most players expect.

    ItemAmountWhy
    Eyes of Ender15 to 20Navigation and portal activation
    Diamond or Iron Sword1 enchantedMobs and Silverfish
    Full ArmourIron minimum, diamond preferredMultiple mob encounters
    PickaxeIron or diamond with EfficiencyDigging in and navigating stone
    FoodFull stackLong exploration session
    Torches64 minimumNavigation and mob prevention
    Water Bucket1Emergency lava protection
    Bow with Arrows1 with 64 arrowsRanged mob control in corridors

    Do not forget a water bucket. Lava exists in the End Portal room and occasionally elsewhere in the Stronghold. One accidental step means losing everything you are carrying if you have no water nearby.

    Common Mistakes Every First-Timer Makes

    Throwing Eyes of Ender too frequently. Walk 200 to 300 blocks between throws. Throwing every 10 blocks burns your supply before you get close to the Stronghold.

    Activating the portal without preparation. The Ender Dragon fight on a first visit with unprepared gear ends in a respawn and a long walk back through the Stronghold. Scout first, fight second.

    Ignoring the Silverfish Spawner. Destroy it the moment you enter the portal room. Every second it remains active is another Silverfish that can knock you into the lava pool below the portal.

    Breaking infested stone blocks accidentally. Break stone bricks carefully some contain Silverfish that attack when the block breaks. If you hear a high-pitched chittering sound while mining in a Stronghold, stop immediately and switch to a sword.

    Not looting the libraries. The two-floor library contains some of the best early-game enchanted book loot available before the Nether. Skipping it to rush to the portal room wastes genuinely valuable resources.

    Quick Reference: Stronghold by Edition

    FeatureJava EditionBedrock Edition
    Total per world128 strongholds3 main, unlimited total
    Nearest to spawn1,408 to 2,688 blocksAt least 160 blocks away
    Under villagesNo guaranteed linkYes, 3 extra strongholds under villages
    Generation depthY -32 to Y 48Y -32 to Y 48
    Portal frames pre-filled0 to 12 (10% chance each)0 to 12 (10% chance each)
    Missing portal room possibleVery rareRare but documented

    The Stronghold is the turning point of every Minecraft survival world. Everything before it is preparation. Everything after it is endgame. Finding it, navigating it properly, and leaving without activating the portal until you are genuinely ready is the difference between completing Minecraft and dying to the Ender Dragon with three hearts left.

    The Eyes of Ender will take you there. The torch on the right wall will guide you through it. Everything else is just making sure you come back twice.

  • How to Build Your First House in Minecraft

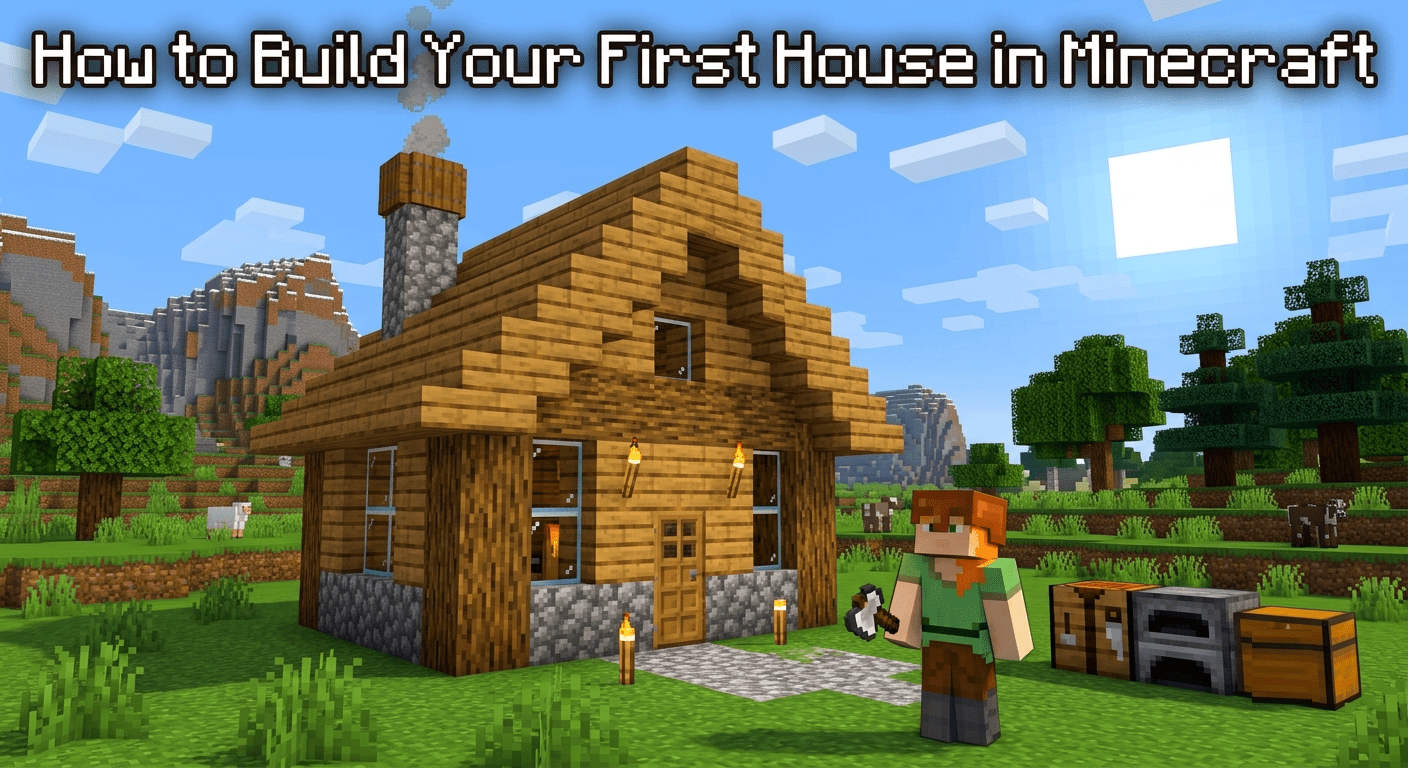
    How to Build Your First House in Minecraft

    Every Minecraft player builds the same first house. Four dirt walls, a hole to crawl through, absolutely no windows, and the quiet dignity of having survived Night 1. That dirt box is the right call survival beats aesthetics every time. But here’s where most players go wrong: they never upgrade it.

    A proper Minecraft house is not a cosmetic project. It is your crafting hub, storage system, spawn anchor, and first line of defence. This guide takes you from that dirt box to a real home step by step.

    Before You Place a Single Block

    Pick your location carefully this decision affects everything that comes after. Your first permanent base needs trees nearby for wood, exposed stone or a hillside for mining, water within reasonable distance, and flat ground to build on comfortably.

    Building into a hillside is the smartest move for a first home. The terrain becomes three of your walls automatically, cutting your material cost in half. You only need to build the front face and the roof everything else already exists.

    If you want to practice before committing, build in Creative Mode first. You can also experiment with different building styles and materials, and since flying is available in Creative, you can check your build from every angle before transferring the design to your survival world.

    What Materials to Collect Before You Start

    Core materials for a starter house include spruce logs, cobblestone, stone bricks, and oak planks all obtainable within the first day. Essentials comprise one bed, double chests, furnaces, and 6 to 8 torches to furnish any beginner house design.

    Here’s the realistic shopping list for an 8×8 starter house:

    MaterialAmountPurpose
    Oak or Spruce Logs1 stack (64)Walls, pillars, floor
    Oak Planks2 stacksInterior floor, walls
    Cobblestone1 stackFoundation, blast resistance
    Glass Panes16 to 32Windows
    Oak or Spruce Stairs32Roof
    Oak Slabs16Roof top layer
    Torches16 minimumLighting everywhere
    Oak Fence16Perimeter and decoration
    Door1 to 2Entry point

    Always collect 3x more than you think you need. Running out of cobblestone halfway through a roof is the most frustrating beginner experience in the game.

    Step 1: Lay the Foundation

    A common beginner size is a 7×7 or 9×9 base start here and scale later. The foundation is the most important structural element of your house. Mark the outline first, then fill it in completely. This ensures your structure remains stable and visually consistent.

    Create an 8×8 frame on the ground. Use Oak Logs for the four corners and fill the lines between them with Cobblestone. Fill the entire floor inside the frame with Oak Planks.

    You can optionally dig one block into the earth so the walls appear to rise from the ground rather than sit on top of it. It is a small detail that makes the build feel grounded and intentional rather than dropped onto the surface.

    Step 2: Build the Walls

    Build your perimeter walls up to 4 blocks high. This gives you enough headroom to move around comfortably inside and prevents spiders from climbing over the top.

    Use different blocks at the corners this is the single technique that eliminates the flat box problem. At each corner, use a different block from your wall material a cobblestone pillar against a wood-plank wall, or a stone brick column against a cobblestone wall. This single technique eliminates the “flat box” problem that plagues most beginner builds without adding any real complexity.

    Leave openings for your door and windows as you build. A door opening is 2 blocks tall and 1 block wide. Window openings look best at 2 blocks wide and 1 to 2 blocks tall, positioned at eye level on the wall.

    Step 3: Add Windows Properly

    Use glass panes, not full glass blocks. Glass panes connect to adjacent blocks and fill only the centre of the space, giving a proper framed window look.

    Never leave windows open without glass. Some players skip glass entirely in early game. It is an open invitation to mobs like skeletons that can attack you from a distance through open gaps in your walls.

    Windows serve two purposes light during the day and visibility at night. Being able to see approaching mobs before they reach your door gives you time to prepare. Position windows on multiple sides of the house so you have sightlines in every direction.

    Step 4: Build the Roof

    The roof is where most first-time builders give up and just slap a flat layer of planks on top. That works functionally but looks terrible. Use slabs for minimalistic builds or stairs for depth and detail.

    The staircase roof method is the easiest way to get a proper pitched roof on a first build:

    Start by placing a row of stairs along the top edge of your longest wall, angled outward. Move one block inward and one block upward and repeat. Continue until both sides meet in the middle. Seal the top with slabs. Cap the two triangular end faces of the roof with the same blocks as your walls.

    The outside portion of the roof can use stone stairs, while the inside uses spruce the spruce compliments the stone well. The roof can be tricky, but if you stagger the stairs on the outside, the inside is easy. Finish off the top with spruce slabs.

    Add a chimney for instant character. Use bricks stacked 2 to 3 blocks above the roofline, place a trapdoor on the side for detail, and put a campfire inside the chimney opening. It produces smoke that rises from the roof and makes your house look genuinely lived in.

    Step 5: Material Upgrades Over Time

    Your house should evolve as you progress never stay on the material you started with. Here is the upgrade path that the building community consistently recommends:

    Day 1 Wood. It is fast to collect and immediately available. Use it for your emergency shelter. Day 2 to 3 Cobblestone. Once you are surviving and have a mine started, switch to cobblestone for any permanent structure. Cobblestone has a blast resistance of 6, making it resilient against creeper explosions and unlike wood, it will not burn. Week 1 and beyond Stone Bricks. Stone bricks require an extra step smelt cobblestone into stone, then craft four stone into four stone bricks but the visual upgrade is significant.

    Replace wall sections gradually rather than demolishing everything at once. Swap out one wall per session as your cobblestone stockpile grows. Your house improves continuously without requiring a full rebuild.

    Step 6: Interior Layout – Function First

    A starter house has one job: keep you alive through the first few nights while you gather resources. That means it needs a door, full lighting inside and on the perimeter, a bed, a crafting table, a furnace, and a chest. Everything else is optional.

    Here is the interior layout that makes your house actually work:

    The storage wall should occupy one full wall. Dedicate one full wall to double chests two chests placed side by side open as a single large storage unit. Aim for at least four double chests in a starter house, organised by category: one for wood and building materials, one for stone and ores, one for food and farming items, one for tools and gear.

    Place item frames on each chest and put a representative item inside the frame. It is the fastest inventory system in vanilla Minecraft and takes two minutes to set up.

    The crafting station should sit adjacent to your storage wall crafting table, furnace, and later a smoker and blast furnace side by side. Keep it compact so you can access everything from one spot.

    Place your bed away from the walls with space on all sides so you can get in and out quickly without getting stuck on furniture during a night emergency.

    Step 7: Lighting – More Important Than You Think

    Lighting in Minecraft is not decoration. It is defence. Hostile mobs spawn in areas where the light level drops below 8. Every dark corner inside your house, every unlit wall outside, every shadow under your porch roof is a potential mob spawn point.

    One detail beginners often miss: furnaces emit light, but that light does not prevent mob spawning. A bed placed in a dark corner away from furnace light can still be a mob spawn point if the surrounding light level drops below 8. Light your entire interior every corner, every ceiling not just the centre of the room.

    Place torches every 7 blocks outside your house in every direction to create a mob-free perimeter. Extend this lighting to cover any farm areas, pathways, or outbuildings nearby. The larger your lit perimeter, the safer your base becomes.

    Step 8: The Details That Transform a Box Into a Home

    The first 80% of a build takes 20% of the time. The last 20% of detail work takes 80% of the time but it is what separates a functional box from something you are genuinely proud of.

    Add a porch. Extend the roof two blocks outward from your front wall and support it with fence posts. Add a fence railing along the edge. It takes five minutes and completely changes how the front of your house reads.

    Add landscaping. Bushes, flowers, and even a small farm can liven up a simple house. Place flower pots on windowsills, add oak leaf bushes at the corners of the building, and put a stone path leading from your door to your farm. These details are free and immediate.

    Use trapdoors as decorative elements. Use stairs as shelves for storage, trapdoors as window shutters, or campfires (extinguished) for chimney effects. Trapdoors on windows look like shutters. Placed on the floor next to walls they look like floor vents. Creativity with non-obvious block uses is what separates good builds from great ones.

    The Mistakes Every First-Time Builder Makes

    Building too small. A 5×5 interior feels fine until you add storage, a bed, a crafting station, and a furnace then there is no room to move. Make your first house at least 7×7 interior minimum.

    Using only one block type. A single-material wall looks flat and unfinished. Mixing spruce logs with stone bricks, or cobblestone with oak planks, creates visual depth that makes even a simple house look intentional.

    Skipping the roof detail. A flat roof is the fastest sign of a beginner build. Spending an extra ten minutes on a staircase roof changes how the entire structure reads from a distance.

    Not lighting the perimeter. Lighting the inside of your house is not enough. Mobs spawn outside and walk through your door the moment you open it. Light everything within 20 blocks of your walls.

    Quick Build Reference

    PhaseWhat to DoTime Needed
    Pick locationFlat ground near trees, stone, water5 min
    Gather materials1 stack logs, 1 stack cobblestone, glass, torches15-20 min
    Foundation8×8 frame with log corners and cobblestone fill5 min
    Walls4 blocks high, different corner blocks, door and window gaps10 min
    Windows and doorGlass panes, door placed in gap5 min
    RoofStaircase method with slab top10-15 min
    InteriorBed, crafting table, furnace, chest wall10 min
    LightingTorches every 7 blocks inside and outside5 min
    DetailsPorch, chimney, landscaping, item frames on chests20-30 min

    The honest truth about building in Minecraft: your first house will not be your best house. A project in Minecraft is rarely finished you will keep discovering new blocks and materials you want to incorporate. Do not hesitate to tear things down and rebuild them. Start functional, upgrade continuously, and let the house grow with your skills. That is how every great Minecraft base actually gets built.

  • Minecraft Survival Guide: How to Survive Your First 100 Days

    Minecraft Survival Guide: How to Survive Your First 100 Days

    Everyone starts the same way in Minecraft. You spawn into a world with nothing, the sun is already moving, and you have absolutely no idea what you are doing. The first night is coming whether you are ready or not. This guide makes sure you are ready from Day 1 all the way through Day 100.

    One quick thing to know before we start. A single Minecraft day is 20 real-world minutes which means completing 100 days takes roughly 33 hours of actual playtime. It is a real commitment, and this guide covers every phase of it.

    Before You Start: Pick Your World Right

    The world you spawn in matters more than most beginners realise. A good spawn gives you trees nearby, passive animals for food, and ideally a village within reasonable distance. A bad spawn drops you in an ocean or a desert with nothing around.

    If your spawn looks terrible, restart. There is no shame in it. Finding a seed with a village nearby changes your entire early game villages give you immediate food, beds, iron tools from trading, and shelter without spending a single resource.

    Days 1 to 10: Pure Survival Mode

    Day 1: The Clock Is Already Running

    The moment you spawn, start moving every second before nightfall counts. Your very first action in any new Minecraft world is to collect wood. Punch any tree trunk repeatedly until the wood blocks fall out. Collect at least 16 wood logs before doing anything else.

    Convert those logs into a Crafting Table immediately. Take 4 of your wood logs and convert them to 16 wooden planks in your inventory crafting grid. Then, arrange 4 planks in a 2×2 square to craft a Crafting Table. Place the Crafting Table on the ground near you this unlocks all the crafting recipes you need to survive.

    Make stone tools, not wood tools. Always craft stone tools before wood tools, as stone is much more effective. Mine a few cobblestone blocks immediately and upgrade every tool from wood to stone before night hits.

    Get a bed before your first night – it is the single most important object in early Minecraft. You need wool to craft a bed. Look around for sheep on open grass fields. Kill 3 sheep to collect at least 3 wool blocks. Combine them with 3 wooden planks to make a bed, place it inside shelter, and sleep through the night entirely.

    If you cannot find sheep, dig into a hillside immediately. Dig into a hill or build a quick dirt hut. Place a torch from charcoal or coal to avoid mob spawns. Do not try to be a hero on Night 1 – zombies, skeletons, and the Breeze mob will end you fast.

    Days 2 to 5: Get Iron, Get Armour

    Iron is the single most important resource in early Minecraft – prioritise it above everything else. Get stone tools, then aim for iron quickly. Use caves, especially with the 1.18+ generation, for deep mining. Bring torches and food. Armour is your life insurance – start with leather if you must, but iron is where the real defence begins.

    Your Day 2 to 5 priority list in order:

    First, mine enough iron for a full set of armour – helmet, chest plate, leggings, and boots. Second, craft an iron sword immediately. Third, build a furnace and cook all raw meat – raw food does not go far thanks to the hunger tweaks in recent updates. Fourth, set up a basic wheat farm next to your shelter for a permanent food supply.

    Light everything around your base – every dark corner is a mob spawn point. Torches prevent hostile mob spawns. Place them every 7 blocks and light caves thoroughly. A base surrounded by darkness will send creepers and zombies to your door every single night.

    Always carry a water bucket. Falling, lava, or fire – a water bucket saves you in caves, mountains, and hardcore situations. It is the most versatile emergency tool in the game and costs almost nothing to make.

    Days 5 to 10: Build a Real Base

    Stop living in a dirt hut. Reinforce shelter walls with stone, obsidian, or other durable blocks to resist creeper explosions, skeleton attacks, and other environmental hazards. A stone base with a proper door, windows, and full lighting is your home for the next 90 days – build it properly now.

    Set up your three essential rooms inside the base. A storage room with organised chests so you always know where everything is. A crafting area with your crafting table, furnace, and eventually an enchanting table. A farm room or outdoor farm with wheat, carrots, and potatoes growing at all times.

    Days 10 to 30: Go Underground

    The Mining Phase

    Days 10 to 30 are about diamonds – everything else is preparation for that goal. Explore the surrounding areas to find resources like coal, iron, and diamonds. Consider branch mining or strip mining to efficiently gather ores like iron, gold, diamonds, and coal.

    Diamonds spawn below Y-level 16 in the current generation – the deeper you go, the better your chances. Branch mining at Y-level -58 (deepslate level) is the most efficient method. Dig a main tunnel, then branch off every two blocks on each side, creating a grid that exposes maximum ore without wasting time on stone.

    Never mine straight down – ever. The classic Minecraft lesson that every new player learns the hard way. Digging straight down drops you into lava, a cave system, or a ravine without warning. Always mine at a diagonal or use a staircase pattern downward.

    When you find diamonds, your immediate priority is a Diamond Pickaxe. Everything else – armour, sword, other tools – comes after you secure the ability to mine faster and access obsidian for the Nether portal. Do not waste early diamonds on armour when iron armour already handles Overworld threats comfortably.

    Villages and Trading: The Early Game Shortcut

    Finding a village in your first 30 days changes everything. Villages provide trading opportunities, resources, and safer shelter for rapid progression. Villager trading gives you access to enchanted books, emeralds, and rare items you would otherwise spend weeks mining for.

    The most valuable early villager trades: Librarians sell enchanted books including Efficiency, Protection, and Unbreaking all of which extend your tools significantly. Farmers trade crops for emeralds, giving you a permanent income stream from your farm. Weaponsmiths sell iron and diamond gear directly.

    Protect the village. Incorporate defensive structures like iron golem farms to provide extra protection against threats. Iron golems spawn naturally in villages and protect villagers from mobs a living village is a resource that keeps giving, so keep it lit and defended.

    Days 30 to 60: The Nether

    Preparing for the Portal

    Before you enter the Nether, make sure you are genuinely ready it is not forgiving. You need at minimum a full set of iron armour (diamond preferred), a diamond sword, a bow with at least 64 arrows, plenty of food, fire resistance potions if possible, and enough obsidian to rebuild a portal if yours gets destroyed.

    Build your Nether portal away from your base. A Ghast fireball can destroy your portal if that portal is connected directly to your base’s front door, a destroyed portal means being stranded in the Nether with no way home. Build it at a safe distance.

    What to Do in the Nether

    The Nether has four things you absolutely need for endgame progression:

    Blaze Rods from Blaze spawners in Nether Fortresses these are required for brewing stands and Eyes of Ender. This is your primary Nether objective. Find a Nether Fortress and farm Blazes until you have at least 12 rods.

    Nether Wart also found in Nether Fortresses the base ingredient for almost every useful potion in the game. Collect and bring back as much as you can carry.

    Ender Pearls through Piglin trading. It is best to get Ender Pearls by trading with Piglins in exchange for Gold. Hunting Endermen is not advisable since they can kill you if you are not prepared. Farm gold, trade with Piglins, and stockpile Ender Pearls safely without fighting Endermen at all.

    Ancient Debris in the lower Nether for Netherite the upgrade that makes diamond gear genuinely powerful. Mine at Y-level 14 to 15 in the Nether for the highest Ancient Debris concentration.

    Days 60 to 100: Automation and The End

    Build Farms That Work While You Sleep

    Days 60 to 100 are about removing manual work. Set up farms for essential resources like food, wood, and other materials. Instead of a manual animal farm, use Dispensers, Hoppers, and Redstone to automate the breeding process, ensuring a constant supply of food.

    The three farms every serious survival world needs:

    An Iron Farm using village mechanics that generates iron automatically without mining. A mob farm using a dark room with a water funnel and drop shaft that farms XP and mob drops overnight. An automatic crop farm using water streams and hoppers that harvests and collects wheat, carrots, and potatoes without manual input.

    Automate first, explore second. Every hour spent building automation saves ten hours of manual resource gathering later in the world.

    The Enchanting Setup

    By Day 60 you should have a functioning enchanting room. You need a level 30 enchanting table surrounded by 15 bookshelves this unlocks the highest-level enchantments. An XP farm feeding levels into your enchanting table is what turns good gear into great gear.

    Priority enchantments for your first round:

    Sword Sharpness V, Looting III, Unbreaking III, Fire Aspect II. Armour Protection IV on every piece, Unbreaking III, Mending. Pickaxe Efficiency V, Fortune III (for diamonds and crops), Unbreaking III, Mending.

    Mending is the enchantment that changes everything. It repairs your tools using XP orbs from mob kills and mining meaning a Mending tool essentially lasts forever if you keep earning XP. Prioritise getting Mending books from librarian villagers above almost everything else.

    Days 80 to 100: The Final Boss

    The Ender Dragon is the final goal of every 100 Days challenge – and by Day 80 you should be ready to attempt it.

    To find the End Portal, use your Ender Pearls combined with Blaze Powder to craft Eyes of Ender. Throw them into the air and follow the direction they travel they always point toward the nearest Stronghold. Follow them until they stop moving upward, then dig straight down to find the Stronghold beneath you.

    Before entering the End, prepare at minimum a full set of diamond or Netherite armour with Protection IV, a sword with Sharpness V, a bow with Power V and Infinity, a pickaxe for breaking End Crystals on the obsidian pillars, plenty of golden apples and potions of healing, and ender pearls for emergency teleportation.

    The fight itself has two phases. First, destroy all End Crystals on top of the obsidian pillars they heal the Dragon continuously while active. Use your bow to shoot them from the ground. Second, attack the Dragon only when it hovers over the central fountain it is immune to arrows during its circuit flight. Hit it with your sword during the landing phase until it falls.

    The 100 Days Checklist

    By Day 100, a complete survival run should have:

    MilestoneTarget Day
    First bed made and placedDay 1
    Full iron armourDay 3 to 5
    Permanent wheat farm runningDay 5
    First diamonds foundDay 10 to 15
    Nether portal builtDay 20 to 25
    Blaze rods collectedDay 25 to 30
    Full diamond armourDay 30 to 40
    Enchanting table at level 30Day 40 to 50
    Automated iron farm runningDay 50 to 60
    Netherite gearDay 60 to 70
    Eyes of Ender craftedDay 70 to 80
    Ender Dragon defeatedDay 80 to 100

    The honest truth about surviving 100 days in Minecraft: the first night is the hardest. Everything after that is just building on what you established in those first 20 minutes. Get wood, get stone, get a bed, get iron in that order and the rest of the challenge opens up naturally.

    The players who fail the 100 Days challenge almost always fail because of Day 1, not Day 99. Nail the beginning, and the rest takes care of itself.