Author: CosmosGamer

  • Best Muscle Cars in GTA V What the Community Actually Agrees On

    Muscle cars in GTA V are not just about raw speed. They are about attitude, sound, and that specific feeling of power sliding through a corner with the rear end stepping out. The car community in GTA Online has been debating the best muscle car for years and in 2026 there is a surprising amount of consensus on which ones genuinely stand above the rest.

    Here is what experienced players and the wider community consistently agree on.

    1. BF Weevil Custom The Fastest Muscle Car Period

    The Weevil Custom is the undisputed fastest muscle car in GTA Online in 2026 and most pro players have accepted this whether they like it or not. It does not look like a traditional muscle car it is based on a modified VW Beetle hot rod but the numbers do not lie. Testing confirms the Weevil Custom reaches a maximum speed of 221.28 km/h (137.50 mph) and completes an average lap in 1:05.365, making it the fastest car in GTA Online within the muscle category.

    Why pro players rate it so highly: In competitive racing the Weevil Custom beats every other muscle car in a straight fight on top speed. Players who prioritise winning races over aesthetics consistently put this at the top of their list. The only path to owning one involves converting a standard Weevil at Benny’s Original Motor Works for $980,000 but the racing community considers it money well spent.

    Best for: Competitive racing, speed-focused players, anyone who wants the objectively fastest muscle car in the class.

    2. Declasse Vigero ZX – The One That Impressed Everyone

    The Vigero ZX is the muscle car that shifted the conversation when it launched and the community has not stopped talking about it since. The Vigero ZX tops the list as an exceptional muscle car that balances high speed with precise handling. Pro players consistently describe it as the muscle car that actually handles something the category is not known for.

    Why pro players rate it so highly: Most muscle cars in GTA Online are fast in a straight line and terrifying in corners. The Vigero ZX breaks that pattern with handling that rewards skilled drivers rather than punishing them. Experienced racers who want to actually compete rather than just slide around consistently choose this over cars with a slightly higher top speed but worse cornering behaviour. The combination of competitive straight-line speed and manageable handling makes it the most complete muscle car for skilled racing.

    Best for: Skilled drivers, competitive races with corners, players who want speed and control together.

    3. Bravado Buffalo EVX The Smart Grinder’s Choice

    The Buffalo EVX is what most serious GTA Online players actually daily drive in 2026 and the reasons go beyond raw speed. The Buffalo EVX is inspired by the Dodge Charger Daytona SRT and features a base top speed of 119.00 mph or 191.51 km/h. But the base speed number tells only half the story.

    Why pro players rate it so highly: The Buffalo EVX becomes a monster with HSW performance upgrades, pushing top speed into supercar territory. It also supports a missile lock-on jammer upgrade, so RPGs and homing missiles struggle to track you. It can take up to 12 RPGs as well as homing missiles, which makes it a brilliant daily driver for public lobbies. This combination of speed, explosive resistance, and anti-missile tech is exactly why grinders love it. In a public lobby where someone with an Oppressor Mk2 is hunting you, the Buffalo EVX is one of the few muscle cars that can genuinely survive and fight back.

    Best for: Public lobby survival, grinders running businesses, players who want one car that does everything.

    4. Imponte Duke O’Death – The Free Car That Earns Its Place

    The Duke O’Death has a reputation that punches above its price point especially because returning players get it completely free. This rear-wheel drive muscle car can be slippery at turns if you don’t let the throttle settle, and it can only fit two players, but its resistance is massive. It takes 3 RPG shots, can be upgraded with missile lock-on jammer, and is almost 100% bulletproof. For returning players it is completely free.

    Why pro players rate it so highly: The Duke O’Death sits in an interesting position it is not the fastest muscle car and not the best handler, but it is one of the most survivable vehicles in the entire game at its price point. The armour, the bulletproofing, and the RPG resistance make it a practical choice for missions and free roam. The car is modelled after the real Dodge Charger and looks every bit the part. Experienced players who already own the fast options often keep a Duke O’Death specifically for situations where survivability matters more than speed.

    Best for: Free roam survivability, budget-conscious players, mission runners who need a tough car.

    5. Bravado Gauntlet Hellfire – The Drift King

    The Hellfire has a specific fanbase that will not hear a word against it the drifting community. The Hellfire is considered a great car for new drifters. It takes its styling cues from the 2018 Dodge Charger SRT Demon. Performance-wise, the car does justice to its counterpart. It is extremely torquey and the acceleration and top speed are very solid reaching up to 201.5 km/h (125.3 mph). It can be purchased from Southern San Andreas Super Autos for $745,000.

    Why pro players rate it so highly: The Hellfire is not the fastest muscle car and not the most competitive in lap times but it is the one that feels the most like a real American muscle car should feel. Rear-wheel drive, massive torque, predictable oversteer that rewards throttle control. The drifting community specifically chose it as their go-to car for a reason. For players who prioritise the driving experience and car culture over lap times, the Hellfire consistently comes out on top.

    Best for: Drifting, car meets, players who want the authentic muscle car driving feel.

    6. Vapid Dominator GTX – The Customisation King

    The Dominator GTX is the muscle car the building and customisation community keeps coming back to and the reasons are visual as much as mechanical. The Dominator GTX comes with a whole host of unique parts including the ability to change the hood to feature a glass window that lets you see the engine even when the hood is down. Players can personalise fenders, grills, add mudguards, and apply a vanity hood.

    Why pro players rate it so highly: The Dominator GTX is not the fastest car in the muscle class and experienced racers know it. But among players who care about how their cars look as much as how they perform, no other muscle car in GTA Online offers this level of visual customisation. The community that organises car meets, car shows, and Mirror Park cruises consistently names the Dominator GTX as one of the most satisfying cars to build and show off. 75+ customisation options at a price point that does not break the bank makes it the enthusiast’s choice.

    Best for: Car meets, customisation enthusiasts, players who want a unique looking build.

    7. Vapid Peyote Gasser – The Sleeper Pick

    The Peyote Gasser is the car that experienced players consistently recommend to people who ask for an underrated muscle car and it deserves more attention than it gets. The Vapid Peyote Gasser sports a top speed of 118 MPH, good acceleration, and decent braking. It is a solid muscle car to use in races with few turns. Southern San Andreas Super Autos sells this vehicle for only $805,000.

    Why pro players rate it so highly: The Peyote Gasser is genuinely old-school in the best way. It looks like a proper period-correct hot rod, handles predictably, and does not cost a fortune. The community that values GTA V’s car culture aesthetic over pure performance consistently names this as one of the most satisfying muscle cars to own and drive. It is not going to win a race against a Vigero ZX but it will look spectacular doing it and cost you less money in the process.

    Best for: Aesthetic enthusiasts, budget buyers, players who want a classic hot rod look.

    Quick Comparison Table

    CarTop SpeedBest ForPriceCommunity Rating
    BF Weevil Custom137.50 mphCompetitive racing$980,000⭐⭐⭐⭐⭐
    Declasse Vigero ZX132+ mphRacing with handlingVaries⭐⭐⭐⭐⭐
    Bravado Buffalo EVX119 mph base, 144 mph HSWPublic lobbies, grinding$2,140,000⭐⭐⭐⭐⭐
    Imponte Duke O’Death116 mphFree roam survivabilityFree (returning players)⭐⭐⭐⭐
    Bravado Gauntlet Hellfire125.3 mphDrifting, car meets$745,000⭐⭐⭐⭐
    Vapid Dominator GTX120 mphCustomisation, shows$125,000⭐⭐⭐⭐
    Vapid Peyote Gasser118 mphAesthetic, budget$805,000⭐⭐⭐⭐

    What the Community Actually Agrees On

    The muscle car debate in GTA V never really ends but experienced players have reached a fairly consistent position in 2026.

    For pure racing, the Weevil Custom wins on numbers and the Vigero ZX wins on the complete package of speed plus handling. For daily driving in public lobbies where survivability matters, the Buffalo EVX is the default recommendation from players who have been around long enough to know what actually keeps you alive. For players who care about the culture, the car meets, the Mirror Park cruises, and the look of their garage the Hellfire, the Dominator GTX, and the Peyote Gasser each have passionate communities behind them.

    The honest answer to which is the best muscle car in GTA V? It depends entirely on what you want from it. Pick your use case from the table above and start there. Every car on this list has been validated by thousands of hours of community testing you cannot go wrong with any of them.

  • High Ping in Valorant: Every Fix That Actually Works (2026)

    High Ping in Valorant: Every Fix That Actually Works (2026)

    High ping in Valorant is not just annoying it is genuinely game-breaking. You peek a corner cleanly, click the head perfectly, and still die because your packets arrived late. The enemy is already gone. Your shot registered on an empty wall. High ping turns a skill game into a lottery, and it does not discriminate between ranked and unranked.

    The good news is that most high ping problems in Valorant are fixable. Here is every solution that works, why it works, and exactly how to do it.

    What High Ping Actually Means

    Ping is the round-trip time for data to travel from your PC to Riot’s servers and back measured in milliseconds. When a VPN helps: your ISP routes your traffic through congested intermediate nodes, your ISP throttles gaming traffic during peak hours, or your ping spikes in the evening but is fine during the day. When it does not: your base ping is already under 20ms with no jitter.

    Here is the honest ping benchmark for Valorant:

    Ping RangeExperienceCompetitive Impact
    0 to 20msIdealZero noticeable delay
    20 to 50msGoodBarely noticeable
    50 to 100msPlayableSlight delay on fast peeks
    100 to 150msPoorNoticeable rubberbanding
    150ms and aboveUnplayableShots feel delayed, abilities lag

    Before trying any fix, identify your current ping. Open Valorant, go to Settings, Video, Stats, and enable Network Round Trip Time. That number stays on screen during matches so you know exactly when spikes happen and whether your fixes are working.

    The Fixes, Every Solution Rated and Explained

    Fix 1: Check Riot Server Status

    Always do this first before changing a single setting on your end. If Riot’s servers are having an outage, no local fix will help. Check the official Riot Games server status page directly if there is a red or yellow status for your region, the problem is on their end and your only option is to wait.

    If Riot Service Status shows an incident or many players report the same region issue, wait before changing local settings. If only your connection is affected, test Ethernet, router, background traffic and tracert logs.

    This takes 30 seconds and saves you from wasting an hour fixing a problem that is not yours.

    Fix 2: Select the Nearest Game Server

    Valorant lets you manually pick your server and the default is not always the best one. In the client, click the flag icon near your name at the top of the main screen. A server selection menu appears with ping readings for each available data centre. Pick the one with the lowest number.

    The distance your data physically travels determines a floor on your ping that no software fix can beat. Select the wrong region by accident or have it set to auto on a bad day and you could be routing to a server twice as far away as necessary. Check this every time your ping feels unusually high.

    Fix 3: Switch from Wi-Fi to Ethernet

    This is the single highest-impact fix for most players and it costs nothing if you already have a cable. Wi-Fi connections can suffer from interference, leading to delays and packet loss. By connecting your device directly to the router with a LAN cable, you can establish a more stable connection and lower your ping.

    Using Ethernet instead of Wi-Fi reduces ping by 5 to 15ms and produces a major jitter reduction. Jitter the variance in ping rather than the average is what causes the sudden spikes that feel worse than consistently high ping. An Ethernet cable eliminates almost all jitter caused by wireless interference.

    If you physically cannot run a cable, a Powerline adapter uses your home’s electrical wiring to create a wired connection without drilling holes or running cables across rooms. It is not as clean as direct Ethernet but dramatically outperforms Wi-Fi for gaming stability.

    Fix 4: Restart Your Router and Modem

    Routers accumulate routing table corruption over time a restart clears it completely. Restarting both Valorant and the Riot Client is a simple and quick solution to clear temporary glitches and errors. The same applies to your router. Turn it off for 10 to 15 seconds, then turn it back on.

    This is especially effective if your ping is normally fine but has been elevated for several days without an obvious cause. Your router’s internal routing tables get stale, its DNS cache gets bloated, and a full restart resets everything to a clean state. Takes two minutes and fixes a surprising number of persistent ping problems.

    Fix 5: Close Background Downloads and Apps

    A downloading game update or streaming upload running in the background will spike your Valorant ping directly and measurably. Pending updates might be downloading in the background and causing ping issues in-game. Check the Windows update menu. Check Steam, Epic, and any other game launcher for active downloads.

    Close or pause these before every ranked session:

    Windows Update downloading silently in the background. Steam or Epic Games updating any installed game. OneDrive, Google Drive, or Dropbox syncing files. Any browser tabs playing video even paused YouTube holds a connection open. Discord video calls or screen shares consuming upload bandwidth.

    The rule is simple: if it uses the internet, close it before you queue into ranked.

    Fix 6: Stop Streaming Apps

    Streaming services consume significant upload bandwidth even when you are watching, not streaming. Other recommended practices include pausing downloads, stopping streaming services, and keeping the router in an open area. Netflix, YouTube, Spotify, and Twitch all maintain active network connections that compete with Valorant for bandwidth and can cause ping spikes on shared or slower connections.

    This matters most on connections below 50Mbps or when multiple household members are online simultaneously. Close streaming apps completely rather than pausing them a paused stream often maintains its connection in the background.

    Fix 7: Try a Gaming VPN for ISP Routing Issues

    Here is the scenario where a VPN actually helps rather than hurts and it is more common than most players know. Some internet service providers throttle gaming traffic during peak hours or route data inefficiently, causing high ping even on fast connections. A gaming-optimised VPN can bypass these routing problems by creating a direct, optimised path to Riot’s servers.

    When a VPN specifically fixes high ping:

    Your ping is fine in the morning but spikes every evening between 7 and 10PM. Your internet speed test is fast but Valorant ping is high. A traceroute shows multiple congested hops between your ISP and Riot’s AWS servers.

    In testing during 2026, the best gaming VPNs added only 3 to 8ms of overhead on nearby servers while reducing jitter by 15 to 30 percent during peak evening hours a net improvement for players whose ISP routing degrades at night.

    NordVPN is the VPN the gaming community keeps coming back to for this specific use case. NordVPN operates over 7,000 servers globally, uses the NordLynx protocol built on WireGuard the fastest protocol available for real-time gaming and consistently delivers lower added latency than competing services. For Valorant specifically, connect to a NordVPN server geographically close to the nearest Riot data centre for your region. The routing optimisation it provides around ISP congestion is real and measurable on affected connections.

    Try NordVPN for better gaming experience with fast and secure connection without compromising your identity.

    Fix 8: Enable QoS on Your Router

    Quality of Service (QoS) is a router setting that prioritises gaming traffic above everything else on your network. Enabling QoS on your router prevents ping spikes when the network is shared. When multiple devices are online simultaneously, QoS ensures Valorant packets move first ahead of your flatmate’s YouTube stream or your phone’s background app updates.

    How to enable it: Log into your router admin panel (usually at 192.168.1.1 or 192.168.0.1 in your browser). Look for QoS, Traffic Priority, or Gaming Mode settings. Add Valorant or your gaming PC’s IP address to the high-priority list. Save and restart the router.

    The exact menu varies by router brand Netgear calls it QoS, ASUS calls it Adaptive QoS, TP-Link calls it QoS or Bandwidth Control. Your router’s manual will confirm the exact location.

    Fix 9: Update Network Drivers

    Outdated network adapter drivers are a hidden cause of latency spikes that most players never check. Outdated, damaged, or incompatible network adapter drivers can cause high latency and high ping issues in the game. Make sure your drivers are up to date by visiting your motherboard or network adapter manufacturer’s website.

    How to update them:

    Open Device Manager in Windows. Expand Network Adapters. Right-click your Ethernet or Wi-Fi adapter. Click Update Driver. Select Search Automatically.

    If the automatic search finds nothing, visit your motherboard manufacturer’s website directly Intel, Realtek, and Killer Networking all release driver updates more frequently than Windows Update delivers them. Download the latest version from the source and install manually.

    Fix 10: Restart Valorant and Your PC

    Restarting the game and PC clears memory leaks, refreshes network connections, and resolves temporary glitches that cause ping spikes. Restarting both Valorant and the Riot Client is a simple and quick solution to clear temporary glitches and errors that may prevent the game from running correctly. This is especially useful if you are facing high ping after an update.

    Close both Valorant and the Riot Client completely. Wait 30 seconds. Relaunch the Riot Client. Let it update if needed. Launch Valorant fresh.

    A full PC restart is more effective than just closing the game. Windows accumulates background processes, memory allocation gets fragmented, and driver states can drift over long uptimes. A restart resets all of it.

    Fix 11: Contact Your ISP

    If every other fix has failed, the problem is almost certainly at your ISP level and contacting them is the right call. Some internet service providers throttle bandwidth during peak times or for specific activities like gaming. If you suspect throttling, contact your ISP to discuss your options.

    What to tell them: Explain that you are experiencing consistently high ping specifically to gaming servers during evening hours. Mention that your speed test results are normal but latency to specific destinations is elevated. Ask whether your connection type is subject to traffic prioritisation policies.

    Run a traceroute first to give them specific evidence. Open Command Prompt, type tracert valorant.gg, and record the results. This shows exactly where the latency spike occurs on the path to Riot’s servers whether it is in your home network, your ISP’s internal network, or on the path to Riot’s data centres. Your ISP support team can use this information to identify the specific hop causing problems.

    All Solutions by Rating for Effective Measures

    Solution⭐ RatingDifficultyTime to FixBest For
    Check Riot Server Status⭐⭐⭐⭐⭐Very Easy1 minServer-side outages
    Select Nearest Server⭐⭐⭐⭐⭐Very Easy2 minWrong region selected
    Switch to Ethernet⭐⭐⭐⭐⭐Easy10 minWi-Fi users with jitter
    Restart Router and Modem⭐⭐⭐⭐Very Easy5 minPersistent high ping
    Close Background Downloads⭐⭐⭐⭐Very Easy2 minEvening peak hour spikes
    Stop Streaming Apps⭐⭐⭐Very Easy1 minShared household networks
    Gaming VPN (NordVPN)⭐⭐⭐⭐Easy10 minISP throttling issues
    Enable QoS on Router⭐⭐⭐Medium15 minMulti-device households
    Update Network Drivers⭐⭐⭐Easy10 minUnexplained driver issues
    Restart Game and PC⭐⭐⭐Very Easy5 minPost-update ping spikes
    Contact Your ISP⭐⭐⭐⭐MediumVariesISP-level throttling

    The Right Order to Try Everything

    Do not randomly jump between fixes work through them in order of impact and effort.

    Start with the zero-effort checks first. Verify Riot server status. Check your selected server region. Close background downloads. Restart the game. These five steps alone resolve the majority of Valorant high ping complaints and take under ten minutes combined.

    If ping is still high, move to the hardware fixes. Switch from Wi-Fi to Ethernet this is the highest single-fix impact available. Restart your router. Enable QoS if multiple devices are on the network.

    If ping spikes only happen in the evenings or at specific times, ISP throttling is almost certainly the cause. This is where a gaming VPN becomes worth testing NordVPN’s 30-day money-back guarantee means you can test it for a full month with zero financial risk. If it fixes your evening ping spikes, keep it. If it makes no difference, request a refund and contact your ISP directly.

    The fix that works for you depends on where your problem actually lives in your home network, your ISP’s routing, or Riot’s servers. Work through the list in order, identify the cause, and apply the right solution.

    I’m about to reveal a secret!
    Just so you know, this page includes affiliate links. If you buy something through our links we get a small cut, which helps us keep creating content like this. Your price stays exactly the same either way. Our affiliate partnerships never influence our recommendations every tip, rating, and solution on this page is based on what actually works, not what pays us more. Thanks for reading, dont forget to check out Nordvpn for your gaming experience

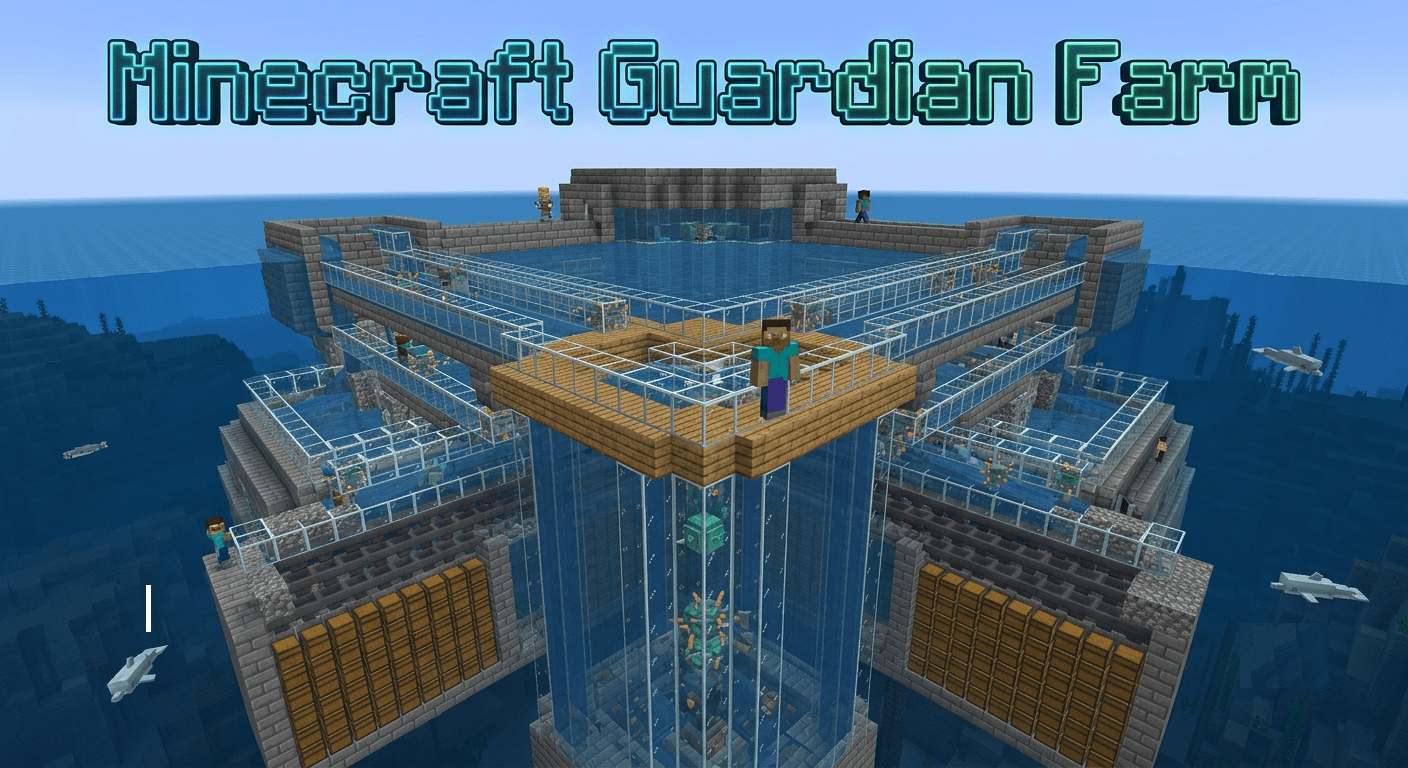
  • Minecraft Guardian Farm: The Complete Build Guide (2026)

    Minecraft Guardian Farm: The Complete Build Guide (2026)

    Guardian farms are among the most rewarding automated farms in Minecraft, producing Prismarine, Sea Lanterns, XP, and fish passively. The catch is the setup cost. This is the most labour-intensive farm you will ever build in Minecraft but the output makes every hour of preparation worth it. A properly built guardian farm produces 10,000+ Prismarine Shards per hour and is one of the best XP farms in the game.

    Here is everything you need to know.

    What Guardians Actually Are

    Guardians are pufferfish-like hostile mobs that spawn in and around ocean monuments. By farming them, players can obtain valuable ingredients such as prismarine shards, crystals, and fish. The Elder variant also drops sponges.

    The Elder Guardian is the boss version three of them inhabit every Ocean Monument and must be defeated before your farm runs efficiently. Before creating a farm, the player may need to conquer an ocean monument, depending on the farm design.

    Why Build a Guardian Farm

    No other farm produces Prismarine it is only obtainable here. Prismarine Shards, Prismarine Crystals, Sea Lanterns, and Dark Prismarine are all exclusive to Ocean Monument loot and Guardian drops. If you want to build anything using these materials at scale, the guardian farm is the only realistic option.

    The XP output is extraordinary. Each piglin drops 5-10 XP best XP source in vanilla outside of grinder farms. Guardian farms produce similar XP density at very high throughput, making them one of the most efficient enchanting fuel sources in the game.

    Step 1: Find the Ocean Monument

    You cannot build a guardian farm without finding an Ocean Monument first. Guardians only spawn in Ocean Monuments, which can only be found in deep ocean biomes. Players can either explore randomly to stumble upon one, or use the command /locate monument to get the coordinate of the nearest Monument.

    The fastest methods for finding one:

    The Trident with Impaling V is the best underwater weapon. It deals 17.5 damage per hit to aquatic mobs. Second best is a Sharpness V Netherite Sword at 11 damage. Bows and crossbows don’t work underwater. Have these ready before approaching the monument.

    Trade with a Cartographer Villager for an Ocean Explorer Map. It marks the nearest Ocean Monument on your map directly the fastest legitimate method that does not involve commands.

    I would recommend finding a monument that has the most flat area surrounding it, as it will minimize the need for land removal later on.

    Step 2: Understand the Spawn Volume

    Before building anything, understand exactly where Guardians can and cannot spawn. Guardians spawn in water blocks within a 58×24×58 volume defined horizontally by the base of the monument and vertically from the floor level of the monument (usually, if not always Y=39) up to just above the decorative structure at the top (usually, if not always Y=61).

    Every water block inside that volume is a potential spawn point. This is why the farm works you redirect natural spawns into your collection system. Putting a roof over the water spawning area will increase the spawning rate, as they usually don’t spawn in water blocks that have a view of the sky.

    Step 3: Defeat the Elder Guardians

    Kill all three Elder Guardians before building anything. Elder Guardians inflict Mining Fatigue III a debuff that makes breaking blocks almost impossibly slow. As long as any Elder Guardian is alive, every attempt to drain or build the farm will be severely hampered.

    Entering without Night Vision potions is the most common mistake on a first monument run. Bring Night Vision potions, a strong sword or Trident with Impaling, full armour, and plenty of food. The Ocean Monument is dark, disorienting, and full of Guardians shooting laser beams at you while you navigate underwater corridors.

    Collect every Sponge you find. Invisibility potions work against the guardians if the user isn’t wearing any armor, but guardians will notice them if they get very close. Use Invisibility potions while navigating to the Elder Guardian rooms if your armour is not strong enough to tank the Guardian laser damage comfortably.

    Step 4: Drain the Monument (The Big Job)

    This is the most time-consuming part of the entire project and it cannot be skipped for a proper farm.

    Build a wall around the monument (around 87 full stacks will be needed; sand or gravel may be preferred as they can be placed from above to fall to the sea floor), and then use sand or gravel to fill in the inside.

    Here are the four main draining methods the community uses:

    Sand or Gravel Fill Method: Drop sand or gravel from the surface gravity carries it to the seafloor automatically, displacing water as it falls. Stack your walls first, then fill from above. It uses a lot of sand but requires the least precision.

    Sponge Method: Build a wall as above, then use sponges to progressively remove the water. Partitioning may be used to allow for manageable areas to be cleared, or pistons may be used to push sponges into the water simultaneously across the width of the monument. Dry sponges absorb up to 65 water blocks each dry them in a furnace and repeat.

    Lava Method: Build a ring, flood the inside with lava to turn a layer of water to stone, extend the ring down, mine out the stone, and repeat. This has the advantage of a much lower initial resource cost, although the mining will take a long time and will use a large number of pickaxes to mine all of the stone out.

    Flammable Fill Method: Build a wall around the monument, fill the water with flammable materials like leaves or wooden planks, and light it up. Fastest fill method but requires enormous amounts of flammable material.

    The honest recommendation: Use the sand fill method for the outer walls and sponges for clearing the interior rooms. It balances speed and resource cost better than any single method alone.

    Step 5: Spawn Proof Nearby Areas

    Before your farm can work at maximum efficiency, nearby mob spawning must be eliminated.

    If the design is to kill guardians with fall damage or to have the player AFK near the bottom of the farm, all undersea caves (and any nearby islands) within a 128-block radius will need to be lit, slabbed, or flooded to prevent other hostile mobs from filling the mob cap. Alternatively, an AFK spot high above the monument (Y=160 to Y=170) may be used so only the monument is within the 128-block-radius sphere.

    The AFK spot above the monument is the easier solution. An essential aspect of the build is the AFK (Away From Keyboard) spot, which should ideally be at a Y-level of 163, right about the middle of the ocean monument. Building your AFK platform at that height ensures only the monument’s bounding box is within your 128-block simulation sphere nothing else competes with the guardian spawn cap.

    Step 6: Choose Your Farm Design

    There are three realistic farm designs for most survival players. Choose based on your resource availability and how much complexity you want to manage.

    Design 1: No-Drain Soul Sand Farm (Easiest)

    These No Drain Guardian farms are time efficient as they use the new 1.13 mechanics of soul sand to launch guardians upwards into a chamber that then directs them in various ways to a kill chamber, often using both lava and gravity. The size of the soul sand section can vary from just a small square to the full 56×56 area of the monument, with the bigger area giving greater drops and yields. The area from the monument floor to the surface must be completely clear to avoid any blocking of the guardians’ ascent to the chamber which is often situated at the ocean surface.

    Who it is for: Players who do not want to drain the monument at all. You place Soul Sand on the monument floor the bubble columns it creates push Guardians upward into a surface-level kill chamber. Output is lower than a drained design but setup time is dramatically shorter.

    The critical note: Note that large blocks of bubble columns can massively lower your FPS unless particles are set to minimal. Set particles to Minimal in your video settings before running this design.

    Design 2: Drained Monument Standard Farm (Best Balance)

    Drain the monument area Use sponges to remove all water within and around the monument’s bounding box. Build a spawning platform Replace the monument with water channels at Y=62 where Guardians can spawn. Funnel with water Use water streams to push spawned Guardians to a central point. Kill chamber Magma blocks, campfires, or lava for automated killing. Collection Hoppers + chests below the kill chamber collect all drops.

    Who it is for: Most survival players who want good output without the complexity of portal-based designs. After draining, replace the monument space with a grid of water channels that funnel Guardians toward a central drop shaft. At the bottom of the drop shaft, magma blocks or a lava layer handles the kill automatically.

    Design 3: Portal-Based Farm (Maximum Output)

    The design comprises 20 portals with a two-block gap between each, where the Guardians will spawn. Waterlogged stairs allow the water to flow towards the portals, and the Guardians are almost instantly teleported to the nether.

    The zombified piglins are attracted to the turtle egg in front of the portal and will fall to the killing chamber. Guardians teleported through the portal end up in a Nether-side killing chamber where the player finishes them manually.

    Who it is for: Late-game players who want maximum throughput. This now produces 600,000 Items Per Hour in Survival Minecraft. The Project Took a total of 49 HOURS and the end result is CRAZY! That output number is for the most optimised version realistic community builds produce 200,000 to 400,000 items per hour, still extraordinary.

    The Kill Chamber: Most Important Detail

    This is where most first-time builds go wrong. A drop shaft pull piglins to a central hole. Falling more than 24 blocks kills zombified piglins outright; tune the height so survivors land at very low health for a one-hit kill, rather than dying mid-fall (a fall death skips the player-only loot).

    The same rule applies to Guardians. A drop of more than 24 blocks kills them from fall damage alone but fall kills give you fewer drops than player kills. Tune your drop shaft to exactly 23 blocks so Guardians arrive with 1 to 2 hearts remaining. One swing of a Looting III sword finishes them and collects maximum loot.

    Use Looting III on every kill run. A zombified piglin has a 2.5% chance to drop a gold ingot. With Looting III, that chance increases to 5.5%. That’s more than double. Guardian drop rates improve similarly with Looting III Prismarine Shard drops increase significantly and the rare Prismarine Crystal drop becomes meaningfully more common.

    What You Need Before Starting

    Gather these materials before approaching the monument:

    ItemAmountPurpose
    Night Vision Potions20 minimumUnderwater visibility throughout the build
    Water Breathing Potions20 minimumExtended underwater work sessions
    Sponges100 to 200Monument draining
    Sand or Gravel87 full stacksPerimeter walls and fill
    Netherite or Diamond Sword1 with Looting IIIKill chamber weapon
    Trident with Impaling V1Underwater combat
    Full Diamond ArmourAqua Affinity + Depth StriderUnderwater movement and survival
    Doors or Trapdoors32Air pocket creation during build
    Hoppers16 to 32Item collection system
    Chests8 to 16Item storage
    Magma Blocks64Kill chamber floor
    Soul Sand64 (no-drain design)Bubble column push

    Aqua Affinity on your helmet is non-negotiable. Without it, breaking blocks underwater takes 5 times longer. The entire build requires breaking hundreds of blocks underwater Aqua Affinity is the single most important enchantment for the construction phase.

    Output by Design Type

    Farm DesignPrismarine Shards Per HourXP OutputComplexity
    No Drain Soul Sand3,000 to 5,000MediumBeginner
    Drained Standard Farm10,000 to 15,000HighIntermediate
    Portal Based Farm50,000 to 200,000+ExtremeAdvanced
    Optimised Full Build600,000 items/hr totalExtremeExpert

    Java vs Bedrock: Key Differences

    Java Edition players should break through the ceiling and build directly on top of the Nether bedrock roof (around Y=128) to completely bypass cave spawns and unwanted mobs. Bedrock Edition players cannot, since the roof is the build height limit there.

    For Bedrock Edition players: Bedrock players usually rely on a dug-out cavern near the ceiling or a portal-cycling design instead. The No-Drain Soul Sand design and the standard drained farm both work on Bedrock with the same mechanics. Portal-based designs require adjustments since Bedrock portal mechanics differ from Java.

    Common Mistakes and How to Fix Them

    MistakeWhat HappensFix
    Elder Guardians not killedMining Fatigue III makes building impossibleKill all three before starting any construction
    No Night Vision potionsCannot see anything during underwater buildBrew 20+ potions before approaching
    Drop shaft too long (24+ blocks)Guardians die from fall damage, reduced lootTune to exactly 23 block drop
    No Looting III swordDramatically reduced Prismarine and Crystal dropsEnchant before farming sessions
    AFK spot too lowOther mobs fill the mob cap, farm output dropsAFK at Y=163 to Y=170 above monument
    Particles not set to MinimalSoul Sand bubble columns tank FPS to single digitsSet video particles to Minimal
    Not spawn-proofing nearby cavesHostile mobs fill mob cap instead of GuardiansSlab, light, or flood within 128 block radius

    The honest truth about guardian farms: Guardian farms will take a sizable amount of resources. Still, the payoffs are well worth the investment as players will receive plenty of benefits from the farm and can come back to collect from it at fairly frequent regularity.

    Build the No-Drain Soul Sand version first if you are new to this. Get familiar with the monument, learn how Guardian spawning works, and collect Prismarine for your builds. Then when you are ready for the full commitment, drain it completely and build the standard drained design.

    There is no shortcut through the draining phase but there is nothing more satisfying in Minecraft than standing above a drained Ocean Monument you transformed into a fully automated Prismarine factory. Do the work once and collect the rewards indefinitely.

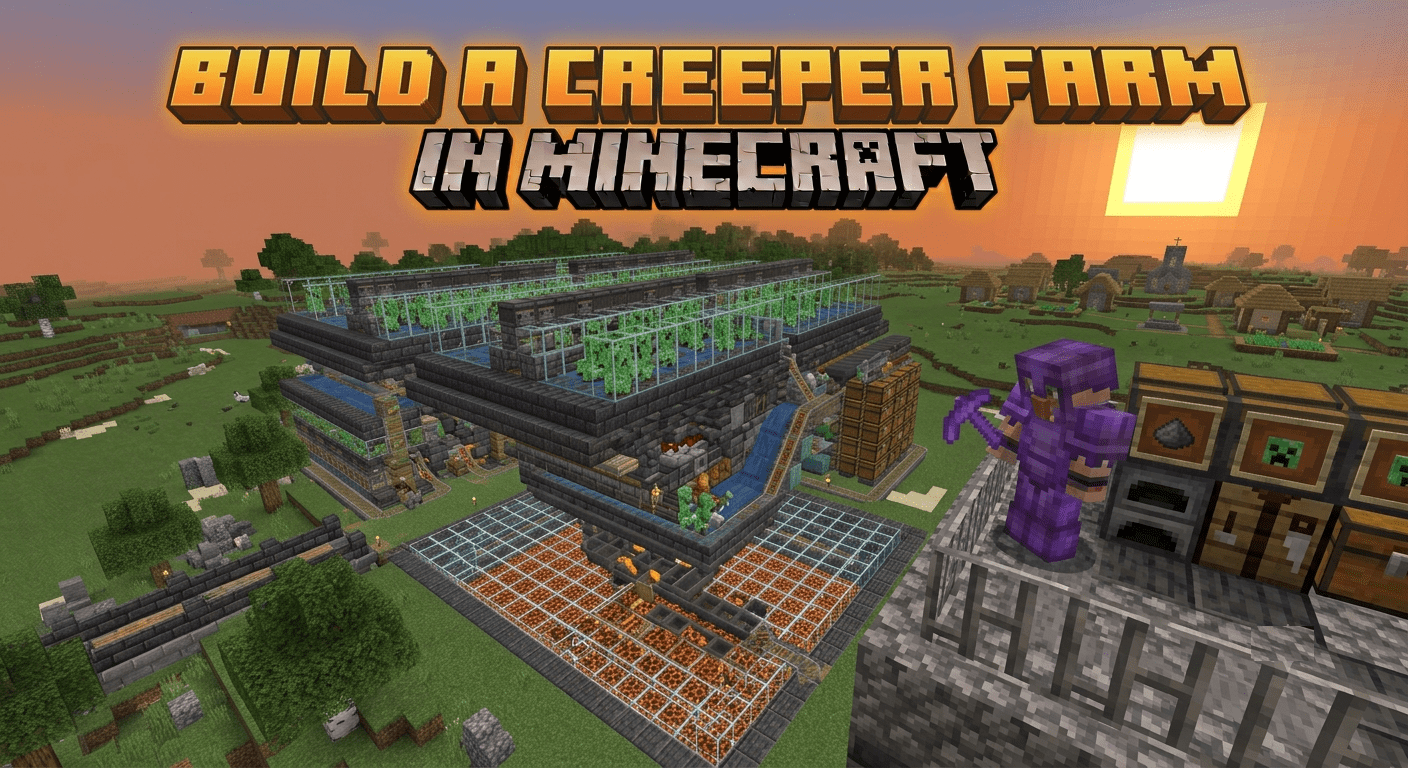
  • How to Build a Creeper Farm in Minecraft: The Complete Guide

    How to Build a Creeper Farm in Minecraft: The Complete Guide

    Gunpowder eats into your TNT, rockets, and splash potions faster than most people expect, and hunting creepers by hand at night is slow and honestly a little dangerous. A dedicated creeper farm fixes that completely no explosions near your base, no risk, just steady gunpowder while you’re off doing something else. Here’s exactly how to build one.

    What You’ll Need

    ItemPurpose
    Solid building blocksPlatform and walls for the spawning area
    TrapdoorsLowers ceiling height so only creepers can spawn
    A cat (tamed)Scares creepers, pushing them toward the drop point
    CampfireOptional passive kill method, no explosion risk
    Looting III swordFor manual kills with much better gunpowder rates
    Hoppers + chestAutomatic loot collection
    SlabsRoof and floor spawn-proofing

    Step 1: Understand How Creeper Spawning Works

    1. Since the 1.18 update, creepers need a light level of 0 to spawn, the same as most other hostiles.
    2. Creepers are slightly smaller than zombies and skeletons, which is the trick the whole farm design is built around.
    3. Placing trapdoors on a 2-block-high ceiling lowers the effective height to about 1 13/16 blocks tall enough for creepers, too short for most other hostiles. This trick does not work on Bedrock Edition.
    4. Creepers are naturally afraid of cats, and will actively flee from them, which farm designs use to herd creepers toward a drop shaft without any redstone at all.

    Step 2: Pick a Farm Type

    Farm TypeDifficultyBest For
    Cat-based hourglass farmEasy-ModerateNo redstone needed, reliable early-to-mid game gunpowder
    Redstone timer + glass pillar farmModerate-HardHigher output, more consistent pushing mechanism

    If you’d rather skip redstone entirely, the cat-based design gets you a fully working farm with just building blocks, trapdoors, and one tamed cat.

    Step 3: Build the Cat-Based Creeper Farm

    1. Pick a location high in the sky, ideally 120+ blocks above the ground, since monsters spawn within a 128-block radius and height reduces spawn competition.
    2. Build a platform in a rough hourglass shape, roughly 13×16 blocks, narrowing toward the center where the drop shaft sits.
    3. Cover the roof with trapdoors on a 2-block ceiling so only creepers (and other small mobs) can spawn.
    4. Place a tamed cat near the center of the hourglass creepers will flee from it toward the narrow drop point.
    5. Build a water channel at the drop point leading to your kill chamber below.
    6. Add slabs around the collection basin to block unwanted spawns from competing for the mob cap.

    Step 4: Set Up the Kill Chamber

    1. For a fully passive option, have creepers fall onto a campfire this kills them safely without any explosion risk and lets gunpowder drop straight into hoppers below.
    2. For better rates, use a drop height of about 22 blocks, which leaves creepers at roughly half a heart, then finish them manually with a Looting III sword.
    3. Place hoppers directly beneath the kill point, feeding into a chest, so drops are collected automatically either way.

    Step 5: Improve Your Rates

    1. Light up caves and dark areas within 128 blocks of the farm, since unlit spaces nearby compete for the same mob cap.
    2. Build your AFK spot high above the farm rather than right next to it, which increases pack-spawning behavior.
    3. If you’re staying up there a while, bring a bed or build a small shelter to avoid phantoms after a few in-game days.

    Troubleshooting: Common Situations and How to Fix Them

    SituationLikely CauseHow to Fix It
    Zombies and skeletons keep spawning instead of creepersCeiling height wasn’t lowered correctly with trapdoorsConfirm the trapdoor ceiling trick is built right this doesn’t work on Bedrock at all
    Creepers aren’t moving toward the drop pointNo cat placed, or it’s too far from the spawn areaAdd a tamed cat near the center so creepers actively flee toward the shaft
    Farm barely produces anythingNearby caves are stealing spawns via the mob capLight up dark caves and open areas within 128 blocks
    Creepers explode near the collection areaKill chamber isn’t fully passive and something aggravated themSwitch to a campfire kill method, which avoids explosions entirely
    Getting drops but low quantity per killNot using Looting IIISwitch to a Looting III sword for manual finishing hits
    Snow golems keep dying near the farmThey were placed too close to live creepersKeep snow golems at least 3 blocks away from any creeper at all times
    Farm works on Java tutorial, fails on BedrockCeiling-height spawn trick doesn’t apply to BedrockLook for a Bedrock-specific creeper farm design instead
    Output is fine but you also wanted charged creepersCharged creepers require a lightning strike, not a farm mechanicUse a Channeling trident during a thunderstorm on an exposed creeper instead

    Java vs Bedrock: Know Before You Build

    EditionNotes
    JavaTrapdoor ceiling-height trick works reliably to filter out other hostiles
    BedrockThe same trapdoor trick does not function the same way Bedrock-specific designs are needed

    What the Community Keeps Debating

    There’s a recurring split between cat-based designs and redstone timer designs. The cat method is simpler and needs no redstone at all, while timer-based builds using glass pillars and a push mechanism tend to produce more consistent output for players willing to put in the extra wiring.

    Charged creepers come up constantly too, mostly because people assume you need a dedicated charged-creeper farm to get mob heads. In practice, most players now agree it’s far easier to just throw a Channeling trident during a thunderstorm at a creeper from a regular farm than to build one of the old, expensive charged-creeper-specific setups.

    Final Thoughts

    A creeper farm is one of the safest, most satisfying builds in the game once it’s running no risk to your base, no exploding surprises, just gunpowder piling up in a chest. Start with the cat-based hourglass design if you want something simple, and don’t forget to check nearby caves if your output ever feels lower than it should.

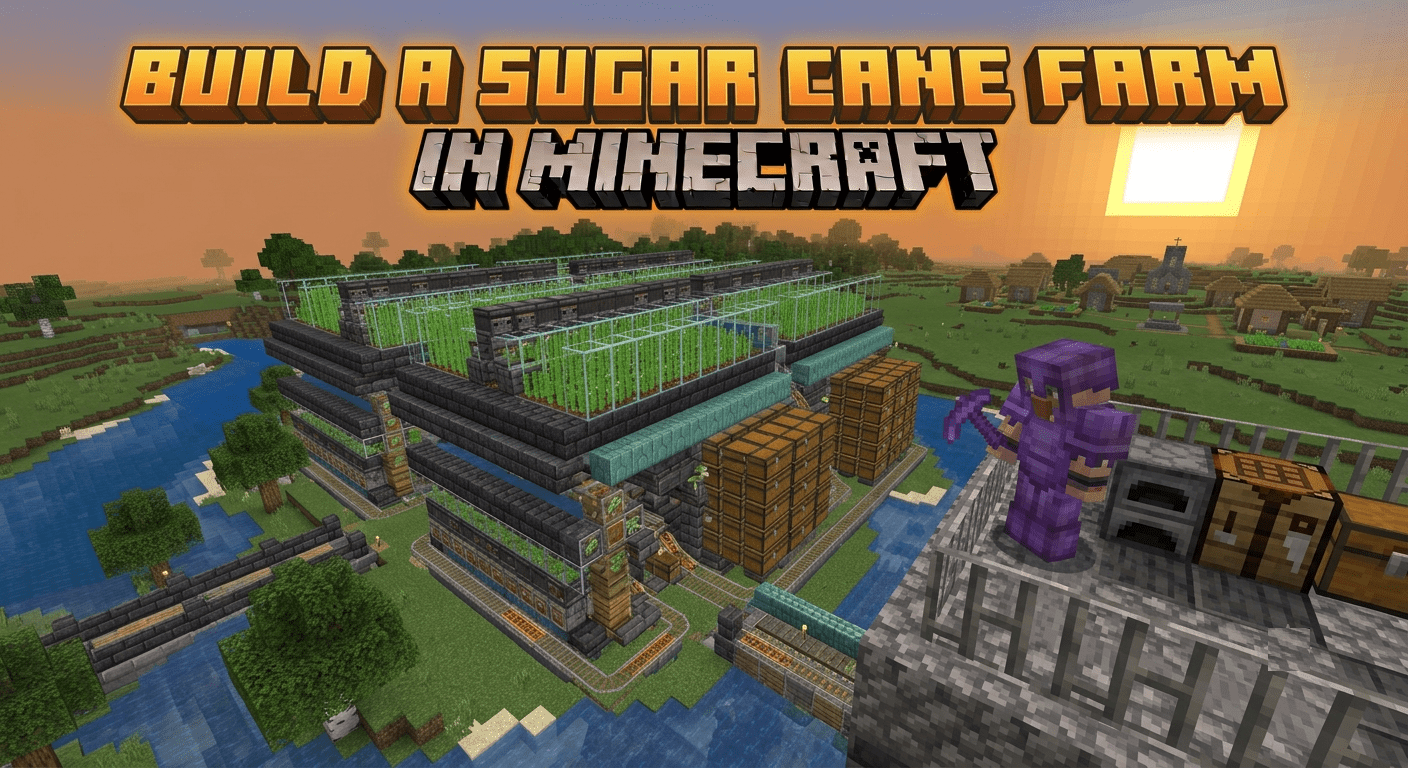
  • How to Build a Sugar Cane Farm in Minecraft: The Complete Guide

    How to Build a Sugar Cane Farm in Minecraft: The Complete Guide

    Once you start enchanting seriously or trading paper with librarians, you’ll burn through sugar cane faster than you’d expect. Punching individual stalks gets old fast, which is why a proper sugar cane farm is one of the earliest automation builds most players tackle. Here’s how to set one up, from the simple version to a fully automatic wall farm.

    What You’ll Need

    ItemPurpose
    Sand, dirt, or grass blocksWhere sugar cane is actually planted
    Water sourceMust sit directly next to the planting block
    Regular pistons (not sticky)Breaks the top of the stalk once it’s grown
    ObserversDetects growth and triggers the piston
    Hoppers + chestAutomatic collection
    Redstone dustRelays the observer’s signal down to the piston
    Glass or solid wallsStops drops from flying out of the farm

    Step 1: Understand How Sugar Cane Growth Works

    1. Sugar cane can only grow on a block that sits directly next to water, horizontally on at least one side.
    2. It grows to a maximum of three blocks tall the bottom block is permanent, and two more grow above it over time.
    3. Growth happens through random ticks, the same system that drives crop growth and leaf decay, so there’s no fixed timer to work around.
    4. On Java Edition, bonemeal does not work on sugar cane. On Bedrock Edition, it does, and can instantly grow a stalk to full height.

    Step 2: Pick a Farm Type

    Farm TypeDifficultyBest For
    Manual platformEasyEarly game, occasional harvesting
    Semi-automatic (piston + switch/clock)ModerateSteady output without constant observer firing
    Fully automatic (observer + piston)Moderate-HardHands-free, harvests the instant cane is ready

    If you’re early game, a simple manual platform is more than enough. Once you’re trading heavily with librarians or crafting rockets and books in bulk, it’s worth building the fully automatic version.

    Step 3: Build a Simple Manual Platform

    1. Place a row of sand or dirt blocks next to a water channel.
    2. Plant sugar cane on each block.
    3. Let the stalks grow to full height, then punch them and replant as needed.
    4. Add a hopper line underneath if you want basic drop collection without full automation.

    Step 4: Build a Fully Automatic Observer-Piston Unit

    1. Plant sugar cane on a block next to water, as usual.
    2. Place a regular piston facing the stalk at the second-block height.
    3. Place an observer directly on top of that piston, also facing the stalk, watching the third-block position.
    4. When the stalk grows to full height, the observer detects the change and fires a one-tick pulse.
    5. That pulse triggers the piston below it, which breaks the top two blocks and lets the stalk regrow automatically.
    6. Route the drops into a water stream or hopper, and repeat the unit for each stalk you want automated.

    Step 5: Scale It Into a Wall Farm

    1. Dig a shallow trench along the base of your farm and line it with connected hoppers feeding into one chest.
    2. Repeat the observer-piston unit horizontally for as many stalks as you want, keeping at least a 2-block gap between rows so drops don’t land in the wrong row.
    3. Add glass walls around the whole structure to stop items from flying outside the collection area.
    4. For very large farms, consider a slower redstone clock instead of instant observer triggers, since dozens of observers firing at once can strain performance.

    Troubleshooting: Common Situations and How to Fix Them

    SituationLikely CauseHow to Fix It
    Sugar cane won’t grow at allIt’s not directly adjacent to waterConfirm water touches the planting block on at least one horizontal side
    Bonemeal doesn’t work on the caneYou’re on Java EditionThis is expected bonemeal only works on Bedrock Edition
    Drops keep landing outside the farmPiston-break direction is randomAdd glass or solid walls around each unit to contain the drops
    Hopper can’t keep up with outputToo many stalks harvesting at once through a single hopperAdd more hoppers, or switch to a slower clock instead of instant observer triggers
    Game lags near a large farmToo many observers firing simultaneouslyUse a slower redstone clock (like a repeater-based or daylight sensor clock) instead of pure observer triggers
    Piston doesn’t retract properlyA sticky piston was used instead of a regular oneSwap in a regular piston sticky pistons try to pull the block back, which breaks the cycle
    Some stalks grow but never get harvestedObserver isn’t facing the correct blockReposition the observer so its face points directly at the stalk’s top growth position
    Farm works but output feels low for its sizeRows are spaced too tightly, causing drop overlap and lossKeep at least a 2-block gap between cane rows

    Java vs Bedrock: Know Before You Build

    EditionNotes
    JavaNo bonemeal boost growth relies entirely on random ticks; observer-piston designs are standard
    BedrockBonemeal instantly grows sugar cane, making dispenser-fed bonemeal farms a popular alternative

    What the Community Keeps Debating

    There’s a long-running disagreement about observer-based instant designs versus slower clock-based designs. Some players prefer observers because they harvest the second a stalk is ready, while others stick with a basic piston row on a multi-minute clock, arguing it’s easier to build, cheaper on resources, and considerably lighter on performance at scale.

    The other frequent topic is drop direction randomness when a piston breaks sugar cane, the item doesn’t always fall the way you’d expect, occasionally landing in the wrong row entirely. Spacing rows out and boxing the farm in with glass comes up constantly as the fix, since relying purely on water streams to catch every drop tends to lose product over time.

    Final Thoughts

    A sugar cane farm is one of the best value-for-effort builds in the game cheap materials, simple mechanics, and it quietly solves your paper and rocket problems for good. Start with a manual row, and once you’re tired of replanting by hand, upgrade to the observer-piston version and scale it out as wide as you need.

  • How to Build a Villager Breeder in Minecraft: The Complete Guide

    How to Build a Villager Breeder in Minecraft: The Complete Guide

    If you want a real trading hall or a working iron farm, you need a steady supply of villagers, and hoping to stumble across enough of them in the wild just doesn’t cut it. A villager breeder solves that by turning two villagers into an endless population source. Here’s how to actually build one that works.

    What You’ll Need

    ItemPurpose
    At least 3 bedsRequired for breeding to trigger (2 villagers + 1 spare)
    2+ adult villagersThe actual breeding pair
    Food (bread, carrots, potatoes, or beetroot)Makes villagers “willing” to breed
    Fences or solid wallsKeeps villagers contained and safe
    Composter (optional)Lets a farmer villager auto-collect crops
    Water stream or 1-block gapMoves babies out without letting adults escape

    Step 1: Understand How Villager Breeding Actually Works

    1. Breeding needs more valid beds than villagers in the space the classic setup is 3 beds for 2 adults.
    2. Each bed needs clear headroom above it, since a baby villager needs room to physically claim it.
    3. Villagers only breed once they’re “willing,” a hidden status flag triggered by having enough food in their inventory or by trading with you.
    4. A farmer villager working near a composter and crop plot will automatically share food with nearby villagers, which is why farmer-based setups are the standard for hands-off breeders.

    Step 2: Pick a Breeder Type

    Breeder TypeDifficultyBest For
    Manual feed breederEasyGetting your first few villagers fast
    Farmer-fed automatic breederModerateLong-term, self-sustaining population growth

    Start manual if you just need a handful of villagers right now. Move to the farmer-fed version once you want the breeder running without you tossing food every few minutes.

    Step 3: Build a Manual Breeder

    1. Build an enclosed room roughly 3×3 or 3×4, big enough for adults to move without wandering off.
    2. Place 3 beds along one wall, making sure each has proper open space above it.
    3. Move two adult villagers into the room using boats or minecarts.
    4. Throw food directly at the villagers bread, carrots, potatoes, or beetroot all work.
    5. Watch for green sparkles, which signal willingness, followed by heart particles when breeding starts.
    6. A baby spawns and claims the spare bed automatically.

    Step 4: Build a Farmer-Fed Automatic Breeder

    1. Set up a 3×3 farm plot of carrots or potatoes that a farmer villager can reach.
    2. Place a composter just outside the breeder room and put an unemployed villager next to it to lock in the farmer profession.
    3. Add your 3 beds inside the breeder room as usual, then move two additional unemployed villagers in as the breeding pair.
    4. Let the farmer harvest and automatically toss excess crops to the breeders willingness will trigger on its own from there.
    5. Cut a 1-block gap at floor level leading to a water stream, sized so babies fit through but adults can’t follow.
    6. Let the water carry babies into a separate holding area or nursery chamber.

    Step 5: Handle the Babies

    Babies don’t inherit professions at birth, so you’ll need to assign work later. Place a job site block within 48 blocks of a grown villager to give it a profession, or break and replace the block to reset its trades entirely.

    Troubleshooting: Common Situations and How to Fix Them

    SituationLikely CauseHow to Fix It
    Villagers won’t touch thrown foodThe mobGriefing gamerule is turned offTurn mobGriefing back on, or accept that automated feeding won’t work with it disabled
    Breeder worked, then suddenly stoppedThe new baby is now counted against your spare bed capacityAdd more beds, or move babies out faster so a spare bed stays open
    One villager keeps wandering offIt claimed a different bed or workstation somewhere nearbyEnclose the breeder fully so no outside beds or job sites are reachable
    No willingness sparkles despite feedingFood isn’t reaching the required thresholdCheck you’re using an accepted food type and enough of it a few pieces isn’t always enough
    Babies keep getting stuck with the adultsNo proper baby-sized exit gap was builtAdd a 1-block gap or water stream sized for babies only
    Breeding is painfully slowThe farmer isn’t producing food fast enoughAdd more farm plots, or feed the breeders manually as a supplement
    Villagers seem trapped near a wild villageAnother village exists within roughly 80 blocksMove the breeder farther away, or isolate it from any nearby villages entirely
    Breeder works on Java tutorial, fails on BedrockBed/workstation detection and linking behave differently between editionsFollow a build made specifically for your edition, not a generic cross-platform one

    Java vs Bedrock: Know Before You Build

    EditionNotes
    JavaBed and village-linking mechanics are well documented and consistent
    BedrockSame core rules, but bed/workstation detection is more failure-prone and a frequent source of stuck villagers

    What the Community Keeps Getting Wrong

    The single most common complaint traces back to the mobGriefing gamerule. Plenty of server owners disable it to stop creepers and endermen from causing damage, not realizing villagers are bundled into that same setting so their farmer stops harvesting and the whole breeder quietly dies without any obvious redstone problem.

    There’s also an ongoing debate about manual feeding versus farmer automation. Some players prefer just tossing carrots at two villagers to get a breeder online fast, while others insist a proper farmer-and-composter setup is worth the extra build time since it keeps running without any babysitting.

    Final Thoughts

    A villager breeder isn’t flashy, but it’s the foundation everything else trading halls, iron farms, curing zombie villagers for discounts ends up depending on. Start manual to get your first few villagers moving, then upgrade to a farmer-fed setup once you’re ready to let it run itself.

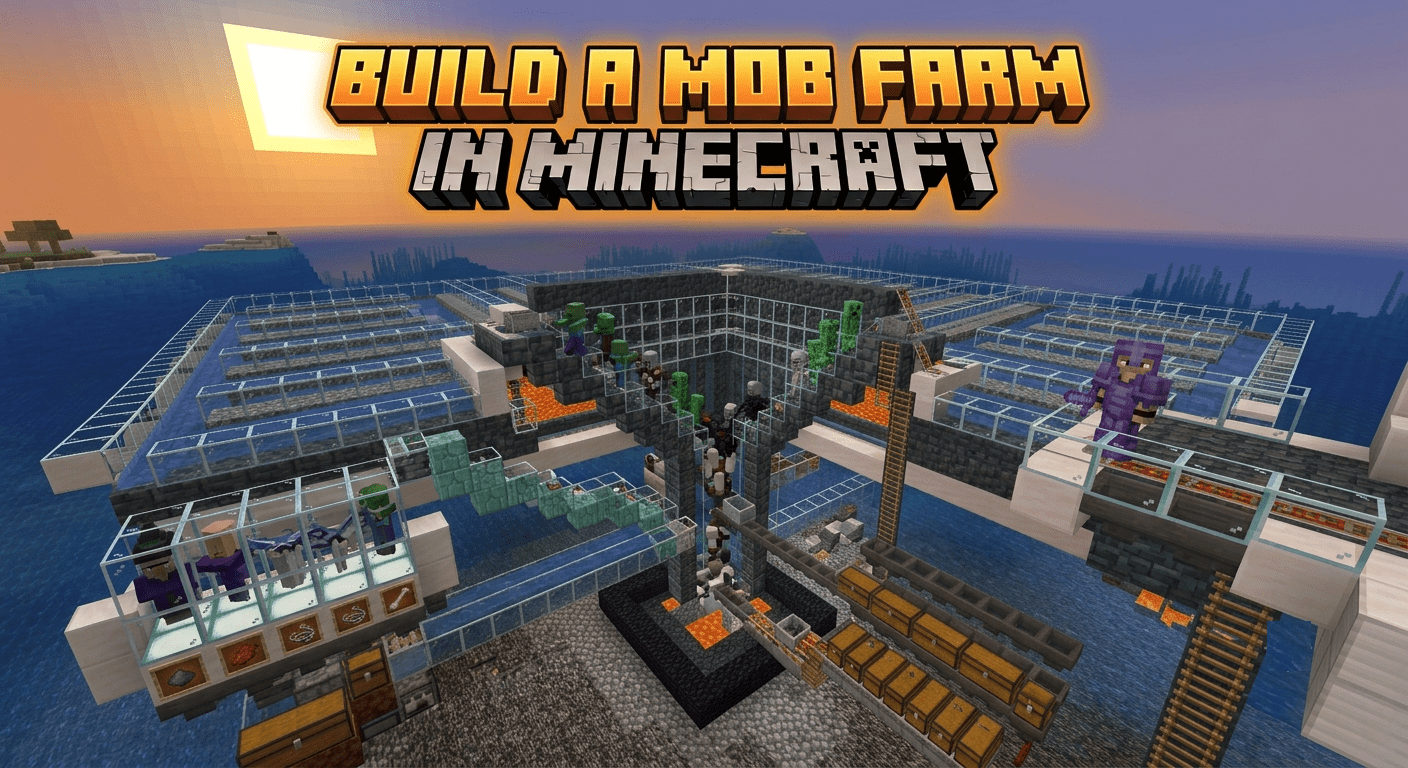
  • How to Build a Mob Farm in Minecraft: The Complete Guide

    How to Build a Mob Farm in Minecraft: The Complete Guide

    Every serious Minecraft world eventually needs a steady source of XP and general drops bones, string, gunpowder, arrows, rotten flesh, all the stuff you burn through constantly. A mob farm solves that in one build, and it’s usually the first automation project most players tackle before moving on to anything fancier. Here’s exactly how to build one, step by step.

    What You’ll Need

    ItemPurpose
    Water bucketsCreates channels that push mobs toward the kill point
    Trapdoors or slabsBlocks spawns on the roof and directs mob movement
    Hoppers + chestsAutomatic loot collection
    Torches (temporary)Used while building, then removed before the farm goes live
    A sword (any enchant helps)Needed for the finishing hit that grants XP
    Building blocksFor the spawning platform and surrounding structure

    Step 1: Understand How Mob Spawning Actually Works

    1. Hostile mobs need a block light level of 0 to spawn, and on the surface, a sky light level of 7 or lower too.
    2. Mobs won’t spawn within a roughly 24-block radius of you, but they can spawn out to about 128 blocks away.
    3. There’s a hard limit on how many hostile mobs can exist at once this is the mob cap around 70 per player on Java and roughly 200 globally on Bedrock.
    4. Critically, XP only drops if you (or a tamed wolf) land the final hit. Fall damage or traps alone will still give item drops, but no experience.

    Step 2: Pick a Farm Type

    Farm TypeDifficultyBest For
    Spawner farmEasyEarly game, if you’ve found a dungeon
    Dark room towerModerateNo spawner needed, scales much higher

    If you’ve stumbled on a dungeon with a spawner already, build around that first it’s cheap and requires zero redstone. If not, the dark room tower works anywhere and scales far better long term.

    Step 3: Build a Spawner Farm (If You Have One)

    1. Find a dungeon spawner, usually a small cobblestone room between Y=0 and Y=50, spawning zombies, skeletons, or spiders.
    2. Light the room temporarily with torches so mobs stop spawning while you build.
    3. Dig a water channel that funnels mobs from the spawner room toward a central drop point.
    4. Build a roughly 22-block drop, which brings mobs down to about half a heart without killing them.
    5. Add a small finishing chamber at the bottom where a single hit kills them and grants XP.
    6. Remove the temporary torches once construction is done so spawning resumes.

    Step 4: Build a Dark Room Tower (No Spawner Needed)

    1. Pick a location high in the sky or over an ocean, away from caves and other dark spaces.
    2. Stack multiple 3-block-high dark chambers, since taller towers with more spawning floors produce more mobs.
    3. Seal every gap completely no torches, glowstone, or light leaks anywhere inside.
    4. Place slabs on top of each level’s roof so mobs can’t waste spawns up there instead of the intended floor.
    5. Run water channels across each platform to sweep mobs toward a central drop shaft.
    6. Let the shaft funnel everything down into one finishing chamber, positioned close enough for repeated manual hits.

    Step 5: Position Your AFK Spot Correctly

    Stand roughly 24 to 32 blocks from the spawning platforms. Too close and mobs can’t spawn at all; too far and they may despawn before reaching your kill chamber.

    Troubleshooting: Common Situations and How to Fix Them

    SituationLikely CauseHow to Fix It
    Farm barely produces any mobsUnlit caves nearby are eating the mob capLight up every dark space within 128 blocks of the farm
    Getting drops but no XPMobs are dying from fall damage or traps aloneRebuild the chamber so you land the actual finishing hit yourself
    Spawns stopped completely after buildingA stray torch or light leak got left inside the chamberWalk every level and check for forgotten light sources
    Mobs spawning on the roof instead of the floorNo slab or barrier on top of the platformCap every platform with slabs to block roof spawns
    Farm worked before, now feels slowerNew caves or structures got explored/lit nearby, shifting mob cap competitionRe-check your 128-block radius for new dark areas
    Trident killer design copied from Java doesn’t workBedrock handles trident mechanics differentlyUse a Bedrock-specific kill method, like a campfire or magma block chamber
    Mobs pile up and despawn before reaching the kill zoneAFK spot is too far from the drop shaftMove closer, ideally within the 24–32 block sweet spot
    Only getting one mob type (e.g., all zombies)Farm is built off a single-type spawner instead of a general dark roomBuild a separate dark room tower if you want variety alongside the spawner farm

    Java vs Bedrock: Know Before You Build

    EditionNotes
    JavaMob cap of ~70 per player; semi-automatic manual-hit designs are the standard
    BedrockGlobal mob cap of ~200; trident-pushing mechanisms can simulate automatic player kills for XP

    Copying a farm design straight from one edition to the other is one of the most common mistakes people run into. Trident killers in particular behave completely differently on Bedrock, so it’s worth confirming a tutorial was actually built for your edition before investing hours into it.

    What the Community Keeps Debating

    There’s an ongoing back-and-forth about whether it’s worth building a spawner farm first or skipping straight to a dark room tower. The spawner camp argues it’s faster to get running and needs zero redstone, while the dark-room camp points out it scales much higher once you’re ready to commit the extra materials.

    The other recurring theme is how often people discover the mob cap issue the hard way. A farm that looks perfectly built can still trickle out almost nothing, and the fix lighting up unrelated caves dozens of blocks away isn’t something most players think to check first.

    Final Thoughts

    A mob farm is the build that quietly changes how the rest of your world plays out. Start with a spawner farm if you’ve got one, graduate to a dark room tower once you want more scale, and always double-check your surroundings for light leaks before assuming the design itself is broken.

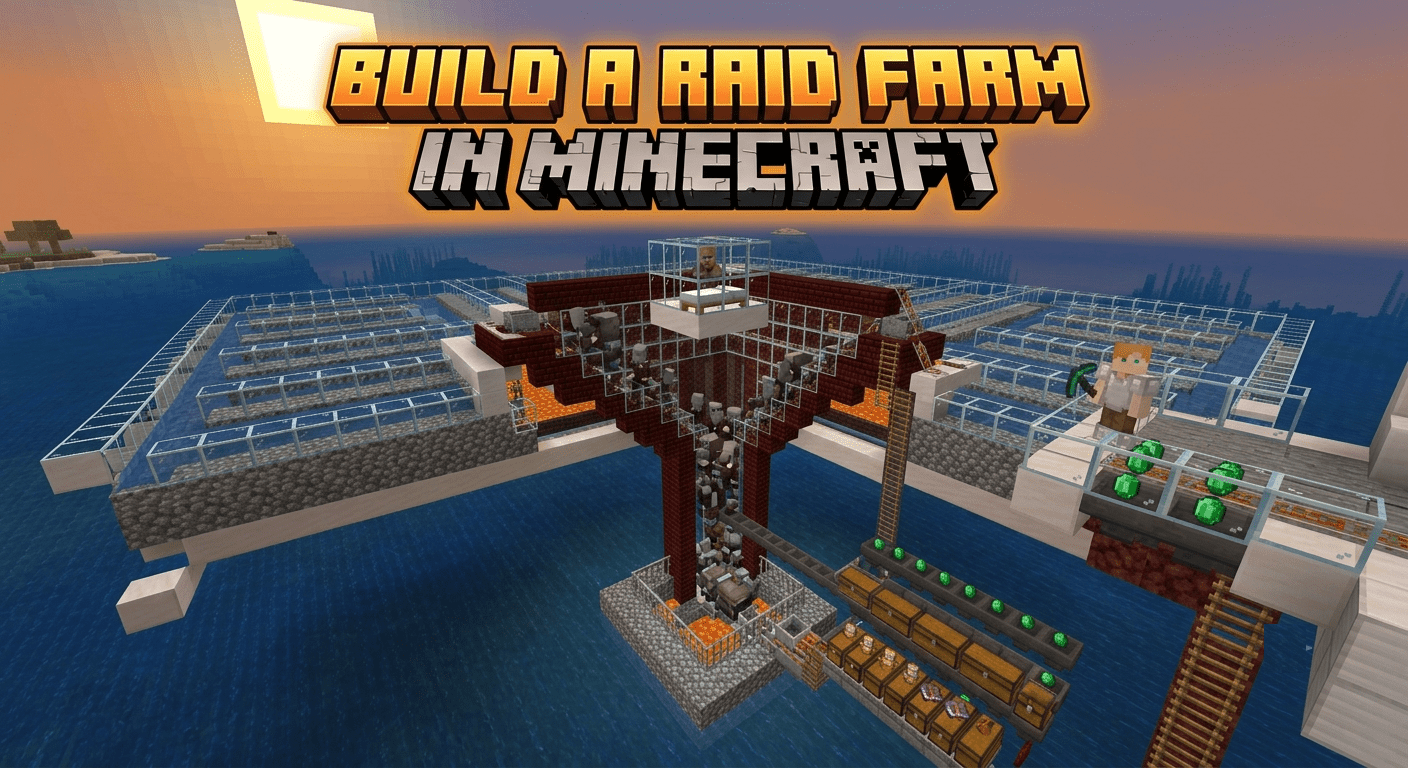
  • How to Build a Raid Farm in Minecraft: The Complete Guide

    How to Build a Raid Farm in Minecraft: The Complete Guide

    If totems of undying and unlimited emeralds sound appealing, a raid farm is where you’re headed next. It’s one of the most rewarding builds in the game, but also one of the most misunderstood, especially after recent mechanic changes shook up how raids actually trigger. This guide breaks down everything you need, step by step.

    What You’ll Need

    ItemPurpose
    Ominous Bottle(s)Required to trigger Raid Omen and start a raid
    A village (1 bed + 1 villager minimum)Raids can only be triggered inside a village
    Sweeping Edge swordPrevents evokers from summoning vexes and reduces witch potion chaos
    Iron golem or armor stand baitAttracts raiders into your kill zone
    Hoppers + chestsAutomatic loot collection
    Bell (optional)Lets you visually track incoming raid waves
    Redstone for a raid engineNeeded for advanced, sustained farms

    Step 1: Understand How Raids Actually Work

    1. A raid only starts when you have the Raid Omen effect and step into a village.
    2. Raid Omen currently comes exclusively from drinking an Ominous Bottle, which you get by defeating raid captains or opening vaults in Trial Chambers.
    3. Once triggered, the raid spawns 5 waves of increasingly dangerous mobs pillagers and vindicators first, then witches, ranged units, and finally mixed waves with ravagers and evokers.
    4. Each wave takes roughly 20–40 seconds to fully spawn, and totems of undying mostly show up in waves 3 through 5.
    5. If you wander too far from the Raid Omen player, the raid pauses, so your farm needs to keep you within range while staying safe.

    Step 2: Secure a Steady Supply of Ominous Bottles

    Since Ominous Bottles are now the only way to trigger a raid, most serious raid farms start with a pillager outpost trap.

    1. Find a pillager outpost and set up a golem-bait or tripwire trap to lure pillagers and captains into a kill zone.
    2. Kill raid captains specifically they’re the ones with a banner, and they drop the Ominous Bottles you need.
    3. Store your bottles somewhere accessible, since you’ll be drinking one every time you want to restart a raid.

    Step 3: Pick a Farm Type

    Farm TypeDifficultyBest For
    Basic hole trapEasyCasual raid loot, early-to-mid game
    Raid engine (stacking) farmHardLong AFK sessions, mid-to-late game
    Multi-player coordinated farmVery HardEndgame servers with friends, maximum totems/hour

    If you’re new to raid farming, start with the basic hole trap. Save the redstone-heavy raid engine for once you understand wave timing and want to automate the whole cycle.

    Step 4: Build the Basic Raid Farm

    1. Choose or create a village with at least one bed and one villager.
    2. Build a spawning platform on solid ground where raiders are forced to spawn remember, they can’t spawn on leaves, scaffolding, or liquid.
    3. Add a funnel system, like a hole with trapdoors, that channels spawned raiders down into a kill chamber.
    4. Drink your Ominous Bottle while standing in the village to trigger Raid Omen and start the raid.
    5. Use a bell near your chamber to visually track each wave as it approaches.
    6. Finish off raiders with your Sweeping Edge sword as they funnel through, and let hoppers collect the drops.

    Step 5: Set Up a Raid Engine for Sustained Farming

    Once the basic version feels too manual, a raid engine automates the repeat cycle for you.

    1. Set up a group of villagers on job site blocks, usually composters, spaced roughly one chunk apart.
    2. Use pistons to interact with the job sites and observers to detect the changes, cycling them to reset the raid state.
    3. Add a redstone clock that matches the 30-second Raid Omen duration, timing when the next bottle gets used and when your funneling system opens.
    4. Keep a small Ominous Bottle farm running alongside this, since 1.21+ raid engines burn through bottles faster than older designs did.

    Troubleshooting: Common Situations and How to Fix Them

    SituationLikely CauseHow to Fix It
    Raid won’t trigger at allYou don’t actually have Raid Omen, or you’re not in a real villageConfirm you drank an Ominous Bottle and that the location counts as a proper village
    Raid pauses mid-waveYou’ve moved too far from the Raid Omen playerBuild your AFK spot closer to the village center, within raid range
    Evokers summon vexes or witches spam potionsYou’re not using Sweeping EdgeSwitch to a sword enchanted with Sweeping Edge before engaging raiders
    Loot keeps disappearingDrops are despawning before collectionSpeed up your hopper/collection system Java drops despawn after 5 minutes
    Raid ends in defeat unexpectedlyToo many raiders escaped or died outside the raid contextTighten your funnel so raiders can’t wander off before reaching the kill zone
    Old stacking farm stopped working after an updateMechanic changes broke the previous trigger methodRebuild the raid engine around Ominous Bottles instead of the old instant Bad Omen trigger
    Server lags badly during raidsToo many entities dying at once, particles and sounds piling upBuild the farm 500+ blocks from spawn, or in another dimension if playing on a busy server
    Getting decent loot but no totemsYou’re ending raids before wave 3Let the raid run its full course totems mainly drop in waves 3–5

    Java vs Bedrock: Know Before You Build

    EditionNotes
    JavaFull raid engine support, faster AFK-able designs, Ominous Bottles obtainable the same way
    BedrockSpecial mob drops during raids (emeralds, enchanted books, iron gear) but some efficiency tricks, like holding a looting sword in the offhand while drinking a bottle, aren’t possible

    This gap has actually become a recurring point of discussion in the community. Plenty of players have pushed back on the idea that raid farms are “overpowered,” arguing that Bedrock players already can’t reach the same efficiency Java players get from optimized engines, so further nerfs would hit the two editions unevenly.

    The Bigger Debate: Was the Ominous Bottle Change a Good Idea?

    Since Bad Omen became something you have to choose to drink instead of getting it automatically from a captain kill, opinions in the community have been pretty split. Some players appreciate the extra control it gives over when a raid starts, since accidentally triggering one used to catch people off guard.

    Others feel it took away some of the tension the mechanic used to have, comparing it to needing “consent” from the player before illagers retaliate. Either way, most agree on one thing: any raid farm tutorial that doesn’t build around Ominous Bottles is outdated and needs a redesign to work in current versions.

    Final Thoughts

    A raid farm is one of the best ways to stockpile totems of undying and emeralds, but it’s also one of the builds most affected by recent mechanic changes. Get comfortable with the Ominous Bottle cycle first, start with a simple hole trap, and only move to a full raid engine once you’re ready to commit to the redstone.

  • How to Build a Gold Farm in Minecraft: The Complete Guide

    How to Build a Gold Farm in Minecraft: The Complete Guide

    Gold is one of those resources you never have enough of once you hit the Nether. You need it for powered rails, golden apples, and bartering with piglins, and mining it by hand just isn’t worth your time. This guide walks you through everything you need to build a working gold farm, from the basics to the endgame builds the community keeps buzzing about.

    What You’ll Need

    Gather these before you head into the Nether, so you’re not making trips back and forth mid-build.

    ItemPurpose
    Glass or slabsSpawn-proofing so only piglins spawn on your platform
    Hoppers + chests/minecartAutomatic loot collection
    TrapdoorsFunneling piglins toward the drop point
    Sword with Looting IIIRoughly doubles nugget/flesh output per kill
    Ender pearlsNeeded if you’re going up to the Nether roof
    ObsidianRequired for portal-wall style farms

    Step 1: Understand How the Farm Actually Works

    1. Every gold farm is built around the zombified piglin, which spawns naturally in dark areas of the Nether.
    2. When killed, it drops gold nuggets, rotten flesh, and occasionally a gold ingot or golden sword.
    3. The goal is to concentrate spawns in one place and funnel the mobs into a kill zone.
    4. The Nether Wastes biome has the highest spawn weight of any Nether location, making it the best base for almost every design.

    Step 2: Pick a Farm Type for Your Stage

    Not every player needs the same farm. Match the build to where you are in the game.

    Farm TypeDifficultyRough OutputBest For
    Simple platformEasyLow–moderateEarly game, first stack of gold
    Nether roof farmHardHighMid–late game, steady large supply
    Portal-wall farmVery hardUp to ~1,600 gold blocks/hourEndgame, dedicated builders

    If you just built your first Nether portal, start with the simple platform farm. Save the roof and portal-wall builds for once you’re geared up and patient enough for the redstone work.

    Step 3: Build the Simple Platform Farm

    1. Clear a large, flat area in the Nether Wastes, at least 20×20 blocks.
    2. Keep the ceiling low and dark so piglins are the mobs most likely to spawn there.
    3. Seal off any nearby caves or open spaces that could let other mobs spawn instead.
    4. Place a trapdoor or water-stream system at the edges to funnel piglins toward one drop point.
    5. Use fall damage or a narrow one-block gap to move piglins down into a holding area without killing them.

    Step 4: Set Up the Kill Chamber

    This step matters more than it used to. Gold ingots, golden swords, and XP now only drop when you or your tamed wolf land the final hit, so a passive kill method alone won’t give you the good loot anymore.

    1. Build a small chamber where piglins land at low health after the fall.
    2. Position yourself (or your wolf) so every piglin can be finished off manually.
    3. Use your Looting III sword for every kill to maximize nugget and flesh drops.
    4. Add a hopper minecart or hopper line underneath to auto-collect everything.

    Step 5: Upgrade to a Nether Roof or Portal-Wall Farm

    Once the basic farm feels too slow, it’s time to move up.

    Nether roof farm:

    1. Head to Y-200 or higher and use an ender pearl trick to slip through the bedrock ceiling.
    2. Build your spawning platform on the roof, where spawn rates noticeably improve.
    3. Add a slab or glass roof above your platform to block ghast spawns.
    4. Route piglins into the same style of manual kill chamber from Step 4.

    Portal-wall farm:

    1. Stack dozens of Nether portals together in a wall formation.
    2. Set up a piston or flying-machine system to force-tick the portals rapidly.
    3. Funnel spawned piglins toward a central kill point using turtle eggs or a similar attractant.
    4. Finish each kill manually to keep the good drops flowing at scale.

    Common Mistakes the Community Keeps Bringing Up

    The biggest one is relying on old tutorials that assume passive kills still drop full loot. That mechanic was patched out, so any guide that doesn’t mention a manual kill chamber is outdated.

    The second common issue is poor spawn-proofing. Light leaking into unintended areas or leftover spawnable surfaces nearby will quietly tank your farm’s output, even if the redstone itself is built perfectly.

    Java vs Bedrock: Know Before You Build

    EditionRecommended Approach
    JavaMore flexibility – portal-ticking mega-farms work reliably
    BedrockStick to large natural-spawn platforms; portal-ticking designs are unreliable

    Spawning mechanics genuinely differ between the two editions, so a design that works on one can fail completely on the other. Always build from a tutorial made for your specific edition.

    Troubleshooting: Common Situations and How to Fix Them

    Even a well-planned farm runs into problems once it’s actually running. Here’s what usually goes wrong and how to sort it out.

    SituationLikely CauseHow to Fix It
    Almost no piglins are spawningNearby caves or open spaces are stealing the mob capSeal off surrounding areas so your platform is the only valid spawn surface
    Piglins die from the fall before you can hit themDrop height is too tallShorten the fall so they land alive at low health, ready for a finishing hit
    You’re only getting nuggets and flesh, no ingots or XPThe killing blow isn’t landing from you or your wolfRebuild the chamber so every piglin is close enough for a manual hit, not passive damage
    Ghasts keep spawning on your roof farmNo ceiling above the platformAdd a full slab or glass roof to block ghast spawn checks
    A whole horde turns hostile and rushes you at onceOne angered piglin alerts every other piglin nearbyFight from a narrow, defensible kill chamber, and keep good armor on even for “AFK” farms
    Output feels way lower than tutorials promiseYou’re outside simulation distance or the farm isn’t fully loadedAFK closer to the farm, or check your simulation/render distance settings
    Portal-wall farm barely spawns anythingNot enough portals are ticking fast enoughAdd more portals to the wall or speed up your piston/flying-machine ticking mechanism
    Game lags or crashes near the farmToo many entities stacked in one spotKeep kill chamber cycles fast so piglins don’t pile up, and avoid oversized single-chamber designs
    Farm worked on one edition but not the otherFollowing a tutorial built for the wrong editionMatch your build to a guide made specifically for Java or Bedrock, not a generic one

    Final Thoughts

    A well-built gold farm turns one of Minecraft’s most annoying resources into something you barely think about again. Start simple, upgrade once you outgrow it, and always double-check that your kill chamber is set up for manual finishing hits that one detail trips up more people than anything else.

  • Minecraft Iron Farm: The Complete Build Guide (2026)

    Minecraft Iron Farm: The Complete Build Guide (2026)

    Iron is the component that makes everything else in Minecraft possible. The deeper you get into a survival world, the more iron bleeds into everything else. Hoppers are 5 ingots each. A minecart rail system is hundreds. Pistons, dispensers, observers, anvils, buckets, shears, cauldrons, armor stands it all chips away at your supply faster than you’d expect, and suddenly you’re 80 hours into a world running dangerously low.

    An iron farm solves that problem permanently. Build it once and iron flows automatically while you focus on everything else.

    Why Build an Iron Farm

    An iron farm is often the most useful fully automatic farm because it feeds hoppers, rails, buckets, minecart rails, and armor upgrades. Iron is a hard bottleneck in survival progression, and its uses multiply.

    A well-built single farm produces 240 to 400 iron ingots per hour enough to cover every project you’ll ever build in a survival world without mining a single ore block after setup.

    How It Actually Works

    Iron farms exploit the fact that villagers spawn iron golems to defend themselves. Understanding the mechanic before building means you can diagnose problems instead of just following steps blindly.

    Java Edition mechanics:

    In Java Edition, villagers summon golems when they are gossiping or panicking. A group of five or more villagers with at least one gossiping can qualify, but the far more efficient route is panicking: only three or more panicking villagers are needed, and they make a spawn attempt every 5 seconds. For a golem to actually spawn, each villager must have slept in the last 20 minutes, there must be no other iron golem detected within 16 blocks in the last 30 seconds, and there must be a valid spawn spot.

    Bedrock Edition mechanics:

    Bedrock Edition demands more completed sleep cycles often around 75% of the night so trapdoor-eject tricks that work on Java won’t trigger as many spawns on Bedrock. Bedrock players should plan for designs that let villagers actually finish most of the night and complete more workstation interactions. That often means larger pods, longer bed access times, and different panic mechanics than the Java layout described here.

    The panic trigger:

    Zombies and pillagers nearby increase the spawn rate of iron golems. If a zombie or pillager is seen by villagers, they panic and increase the rate of spawn attempts. Zombies are easier to use as scaring mobs than pillagers, as you’d need a disarmed pillager for the farm to work, although pillagers have a much larger range to scare villagers than zombies. Pillagers also don’t burn in sunlight unlike zombies and won’t hurt you if their crossbow breaks.

    What Each Iron Golem Drops

    Every iron golem you kill drops a guaranteed 3 to 5 iron ingots averaging 4 and 0 to 2 poppies about a 67% chance averaging 1. That is the entire economy of the farm: more golems per hour means more iron.

    What You Need Before Building

    Gather these materials before starting construction:

    ItemAmountPurpose
    Villagers3 minimum (Java), 5+ recommended (Bedrock)Core spawn trigger
    Beds3 minimum per cellVillager sleep requirement
    Workstations3 minimum per cell (any job site block)Villager work requirement
    Zombie1 named with Name TagPanic trigger named so it never despawns
    Lava Bucket1 to 2Kill chamber
    Hoppers4 to 8Item collection
    Chest2 to 4Storage
    Water Buckets4Pushing golems into kill area
    Glass or Solid Blocks2 stacksZombie cage enclosure
    Solid Platform Blocks1 to 2 stacksSpawn platform

    Get the Name Tag before trapping the zombie. Get a name tag before you trap the zombie. You’ll thank yourself later. A zombie without a name tag despawns during the day and your farm stops working completely.

    Location: The Most Important Decision

    Build location determines whether your farm works or fails before you place a single block.

    Build at least 150 blocks away from any natural village in all directions. If you build too close, your farm’s villagers may merge with the existing village’s golem cap and the whole thing underperforms badly.

    Choose a location with minimal external valid spawn surfaces and keep strong separation from other villager systems.

    The AFK platform location matters just as much. The farm only runs when its chunks are loaded. On Java, the default sim distance is 10 chunks. If you AFK somewhere else on your base and it’s more than 160 blocks away, the farm goes completely idle. Build a dedicated AFK platform directly above the farm at around Y=250 stand there, load a YouTube video, come back to a full chest.

    Step by Step: Building the Farm

    Step 1: Build the Villager Pod

    This is where your three villagers will live, sleep, and panic.

    The design that produces 300+ iron per hour in survival without complicated redstone or multiple zombies uses three villagers, three beds, three workstations, a single named zombie, and a small, well-positioned spawn platform.

    Build a small enclosed platform approximately 9×9 blocks. Place three beds side by side inside the enclosure leave enough headroom that villagers can path to them. Place three workstation blocks next to or near the beds. Bring three villagers into the platform using a boat or minecart right-click a villager with a boat to trap them inside, then drive the boat to your farm location.

    Make sure villagers can actually sleep on Java and reach their beds and workstations on Bedrock, since both conditions gate spawning.

    Wait until you see the villagers walk to beds at night and interact with workstations during the day before proceeding. If they don’t claim beds and workstations, no golems will ever spawn.

    Step 2: Build the Zombie Cage

    The zombie cage sits adjacent to the villager pod where villagers can see the zombie but the zombie cannot reach them.

    If your zombie cell has any exposure to sunlight through the top, the zombie burns up and your farm stops panicking. Always roof the cage with solid blocks, not glass. The villagers don’t need to see the sky they just need to see the zombie. A fully enclosed cage with a solid roof is actually better because the zombie survives indefinitely without any daylight concern.

    Build a 3x3x3 enclosure of solid blocks with one glass or transparent wall facing the villager pod. Place your named zombie inside before sealing the cage. Villagers need line-of-sight to the zombie to panic the transparent wall provides that without giving the zombie a path to escape.

    Step 3: Build the Spawn Platform

    The spawn platform is where golems physically appear before falling into the kill chamber.

    There must be at least 3 transparent blocks above the spawning surface, and that surface must be solid and flat but not a bottom slab.

    Directly below the pod, construct a 16×16 spawn platform 4 to 5 blocks down. Use a two-block-high roof so golems can’t climb out. Spawned golems will appear anywhere on that platform inside the 16x6x16 volume, so place water source blocks around the edges to push them toward the center. At the center where water converges, dig a one-block-deep hopper pit with four hoppers feeding a single chest and place signs along the pit walls. Put lava on those signs so arriving golems take damage and drop their iron and poppies into the hoppers.

    The water flow setup is critical. Place water sources at all four edges of the spawn platform flowing inward toward the central collection pit. Golems that spawn anywhere on the platform get pushed by water toward the centre automatically.

    Step 4: The Kill Chamber

    Lava is the standard kill method instant, automatic, and requires zero player input.

    Place lava source blocks on signs or trapdoors positioned above the hopper collection pit. Golems pushed by water into the centre fall onto the lava, take fatal damage, and drop iron and poppies directly into the hoppers below. The hoppers funnel everything into the chest.

    The sign or trapdoor placement prevents lava from flowing outward onto the spawn platform while still exposing golems in the kill zone to heat. Signs block lava flow on all editions.

    Step 5: Spawn Proof the Surrounding Area

    Unlit areas near your farm compete for mob spawning and can interfere with golem generation.

    Light every surface within 128 blocks of your farm with torches, slabs, or any light source. Mobs spawning in caves and dark areas within 128 blocks of your farm compete for the local mob cap. In practice, crowded chunk loading in a mob-heavy area causes performance issues.

    Place slabs or blocks on any flat surfaces where golems could accidentally spawn outside your designated platform. An iron golem that spawns outside your collection area is an iron golem you never collect.

    Output Rates by Design

    Design TypeIron Per HourComplexity
    Single cell, 3 villagers (Java)240 to 300 ingotsBeginner friendly
    Single cell, 5 villagers (Bedrock)180 to 250 ingotsBeginner friendly
    Multi-cell, 4 pods spaced 100+ blocks960 to 1,200 ingotsIntermediate
    Large scale village stacking1,000+ ingotsAdvanced

    Scaling is simpler by repeating the three-villager pod rather than building an elaborate single farm. Build multiple identical pods 100+ blocks apart so each pod forms its own village and has its own golem cap. Four pods spaced correctly yield roughly four times the output with fewer troubleshooting headaches.

    Troubleshooting: Why Your Farm Stopped Working

    Most iron farm failures have one of five causes:

    Golems not spawning at all: The most common causes are villagers that have not slept recently, Java requires sleep in the last 20 minutes, too few villagers, 3 or more to panic and 5 or more to gossip in Java, 10 villagers and 20 beds in Bedrock, or an obstructed spawn platform.

    Farm works then stops: Symptom: Works for a short time, then degrades. Fix: verify state synchronization and external interference zones.

    Low output despite correct structure: Check that your zombie cage roof has no daylight exposure a burning zombie means no panicking villagers and no golems.

    Golems spawning outside the collection area: Golems spawn within a 16x6x16 volume centered on the village meeting point, which is calculated from the locations of detected beds and workstations in Java Edition. If your kill chamber falls outside that volume, golems will spawn on the platform or wander off instead of dropping into the pit.

    Farm idle while you play elsewhere: You moved too far from the farm. Build a dedicated AFK platform directly above the farm at around Y=250 stand there, load a YouTube video, come back to a full chest.

    Bedrock Edition Specific Fixes

    On Bedrock, iron farm output can be noticeably lower than Java with an identical design because the panic detection range and tick rate behave differently. The most common fix is bumping villager count from 3 to 5 per cell. More villagers means the panic threshold is hit more consistently per cycle, which increases real-world golem production even though the spawn timer itself doesn’t change.

    Quick Reference: Common Mistakes

    MistakeWhat HappensFix
    Building near a natural villageGolem cap shared, output dropsBuild 150+ blocks away
    Unnamed zombieZombie despawns, farm stopsName tag before trapping
    Glass roof on zombie cageZombie burns in daylightUse solid blocks for roof
    Too few villagers on BedrockLow spawn rateUse 5 villagers minimum
    AFK spot too far awayFarm goes completely idleBuild AFK platform at Y=250 above farm
    No spawn-proofing nearbyGolems spawn outside collection zoneSlab every flat surface nearby
    Villagers not claiming bedsZero golems spawnWait for villagers to path to beds at night

    The honest truth about iron farms: Approach debugging in order: work, sleep, panic, then spawn-area issues. Watching a villager through a full day and night cycle reveals most faults lack of workstation interaction or a missing bed claim are common culprits.

    Build it once, fix it once, and then never think about iron again. That is the entire point of automation in Minecraft turn a constant problem into a solved one and move on to building the things that actually interest you.