Author: CosmosGamer

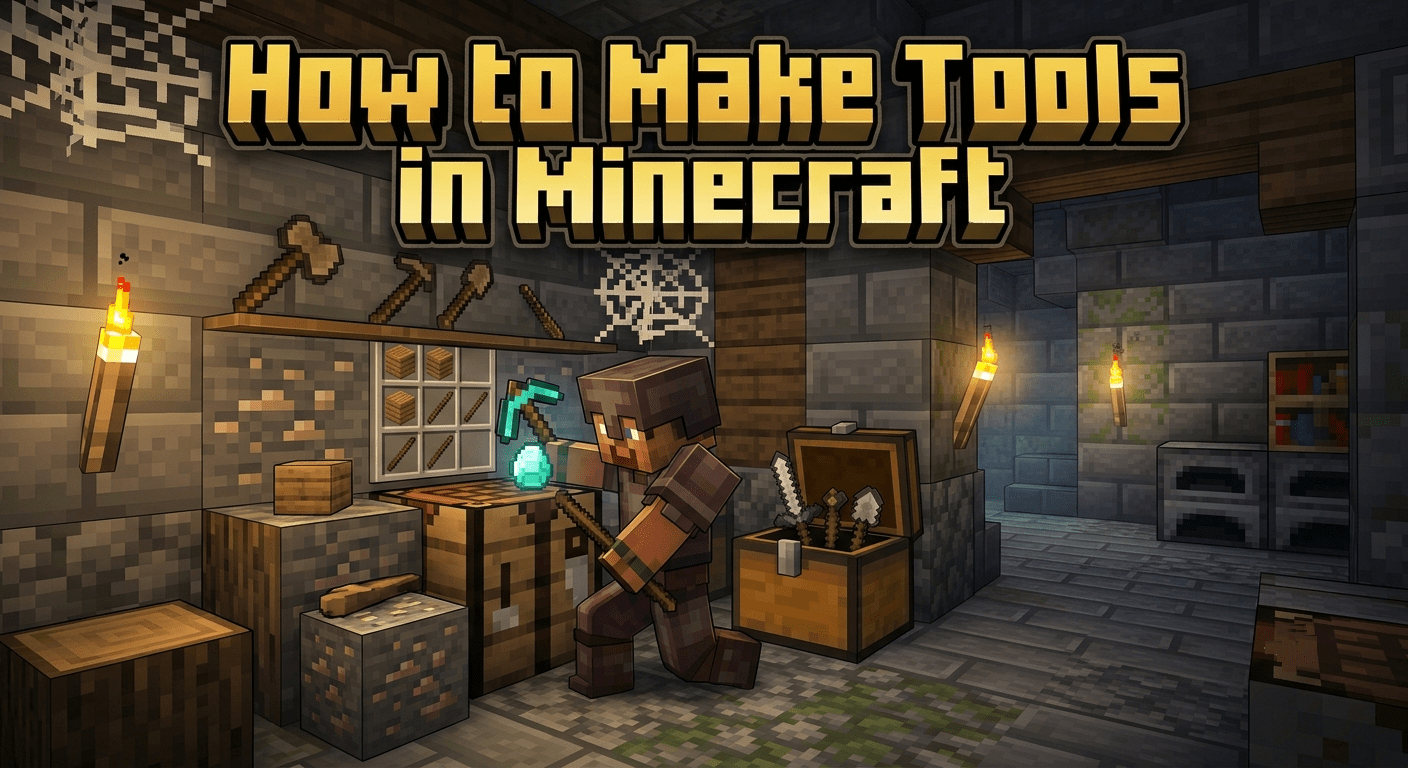
  • How to Make Tools in Minecraft

    How to Make Tools in Minecraft

    Tools are everything in Minecraft. Without them you mine slower, farm nothing, fish nothing, and die faster. The pickaxe alone determines your entire progression path what ores you can reach, what gear you can craft, and how long each mining session lasts. This guide covers every tool, every crafting recipe, every material tier, and what each tool actually does.

    The One Rule Before You Start

    Every tool in Minecraft requires a Crafting Table. Your inventory 2×2 grid is too small for any tool recipe. Place four wood planks in your inventory grid to craft a Crafting Table, put it on the ground, and right-click it to open the full 3×3 grid where all tools are made.

    In Minecraft, you can craft tools such as a bowl, bucket, clock, compass, fishing rod, flint and steel, fire charge, shears, axe, hoe, pickaxe, or shovel. Each one has a specific job and using the wrong tool for a block wastes durability and time.

    The Material Progression: Always Upgrade in Order

    The material you use determines how fast a tool works, how long it lasts, and what blocks it can mine. Materials from worst to best in terms of mining speed are: wooden, stone, copper, iron, diamond, netherite, gold.

    Wait gold is fastest? Yes, but here is the catch:

    MaterialSpeedDurabilityWhen to Use
    WoodSlowest59 usesDay 1 emergency only
    StoneBetter131 usesDays 1 to 3
    IronGood250 usesMost of the game
    GoldFastest32 usesSkip entirely
    DiamondExcellent1,561 usesEndgame standard
    NetheriteBest2,031 usesUltimate tier

    Gold tools may seem beautiful and valuable, but they have relatively low value and wear out quickly. It is not worth mining and processing gold to make tools. Skip gold entirely spend those ingots on Piglin trading in the Nether instead.

    Don’t rush to upgrade everything to Netherite. Prioritize your Pickaxe, Axe, and Sword first, tools you actually use daily. A Netherite shovel might look cool, but the upgrade cost isn’t worth it unless you’re in full endgame farming mode.

    The Pickaxe: Your Most Important Tool

    The pickaxe is the first tool you craft and the one you use most for your entire Minecraft journey. It is the first tool you craft, the one you use most often, and the only tool directly tied to your advancement through materials and ores. The pickaxe is designed to break blocks with stone-level hardness or higher, such as ores, stone, deepslate, and metal-based blocks. It is also the only tool capable of mining key progression materials, like diamonds, obsidian, ancient debris, and ores that unlock every major crafting tier in the game.

    The crafting recipe for a Pickaxe:

    Place three of your chosen material in a horizontal row across the top of the crafting grid. Place two sticks in the middle and bottom centre slots directly below the centre material.

    Crafting GridLeftCentreRight
    Top rowMaterialMaterialMaterial
    Middle rowEmptyStickEmpty
    Bottom rowEmptyStickEmpty

    The material tier determines what you can mine:

    A wooden pickaxe mines stone and coal but cannot mine iron ore the iron drops nothing. An iron pickaxe mines everything a stone pickaxe can plus gold, diamonds, redstone, and emeralds. A diamond pickaxe mines everything including obsidian and ancient debris. Never mine diamonds with a stone pickaxe the ore breaks and drops nothing.

    Best enchantments for your Pickaxe: Best Pickaxe: Netherite Pickaxe with Efficiency V, Unbreaking III, Fortune III, and Mending.

    The Axe: Trees and More

    The axe is your primary woodcutting tool and a legitimate combat weapon as a bonus. Axes are the most efficient tool for harvesting wood, and higher-tier materials like diamond and netherite chop down trees much faster. Beyond wood, axes are also the most efficient for breaking pumpkins and melons.

    The crafting recipe for an Axe:

    Place material in the top-left, top-centre, and middle-left slots. Place sticks in the middle-centre and bottom-centre slots.

    Crafting GridLeftCentreRight
    Top rowMaterialMaterialEmpty
    Middle rowMaterialStickEmpty
    Bottom rowEmptyStickEmpty

    All block-breaking tools excluding pickaxes also have other uses than just breaking blocks axes can be used to strip logs and wood. Right-clicking a log with an axe removes the bark and turns it into a stripped log useful for decorative building.

    Best enchantments for your Axe: Best Axe: Netherite Axe with Efficiency V, Sharpness V, Unbreaking III, Mending.

    The Shovel: Faster Than Your Hands

    The shovel is the most underrated tool in Minecraft. The shovel is one of the most frequently used tools in Minecraft, excelling at digging through softer materials like sand, gravel, dirt, clay, and soul sand. It significantly increases the speed of breaking these blocks compared to using bare hands or other tools. Shovels can also be used to break snow layers instantly, making them essential for collecting snow efficiently.

    The crafting recipe for a Shovel:

    Place one material in the top-centre slot. Place two sticks directly below it in the middle-centre and bottom-centre slots.

    Crafting GridLeftCentreRight
    Top rowEmptyMaterialEmpty
    Middle rowEmptyStickEmpty
    Bottom rowEmptyStickEmpty

    Shovels can create dirt paths right-click grass or dirt with a shovel to create a path block that looks cleaner and prevents mob spawning. Useful for building roads and walkways around your base.

    Apart from breaking the blocks at an immense speed, shovels can also be used to extinguish the campfire by right-clicking on it.

    Best enchantments for your Shovel: Best Shovel: Netherite Shovel with Efficiency V, Silk Touch, Unbreaking III, Mending.

    The Hoe: More Than Just Farming

    Most players think the hoe only tills dirt for farming. It does much more than that. Another underrated tool in the game that does a lot more than simply turning dirt into farmland. You can use this tool to mine several blocks faster than any other tool in the game: leaves, sponges, hay bales, target blocks, nether wart blocks, shroomlight, and vines. If you’re clearing leaves or nether wart blocks manually, nothing, not even shears, can beat a high-efficiency hoe.

    The crafting recipe for a Hoe:

    Place material in the top-left and top-centre slots. Place sticks in the middle-centre and bottom-centre slots.

    Crafting GridLeftCentreRight
    Top rowMaterialMaterialEmpty
    Middle rowEmptyStickEmpty
    Bottom rowEmptyStickEmpty

    Hoes can till soil and create farmland. Right-click dirt or grass with a hoe to convert it into farmland where seeds can be planted. Without tilling soil first, seeds cannot be placed on the ground.

    For large-scale leaf and nether wart clearing, a Diamond or Netherite Hoe with Efficiency V is genuinely the fastest tool for the job faster than axes and pickaxes on those specific blocks.

    Shears: The Specialist Tool

    Shears are a unique tool with no material tier progression they only come in one type. Shears are designed to collect delicate blocks and materials that would otherwise be destroyed when mined. They are also one of the few tools that can be used both manually and automatically via dispensers, making them invaluable for automation setups.

    The crafting recipe for Shears:

    Place one Iron Ingot in the middle-left slot. Place another Iron Ingot in the top-centre slot. No sticks required.

    Crafting GridLeftCentreRight
    Top rowEmptyIron IngotEmpty
    Middle rowIron IngotEmptyEmpty
    Bottom rowEmptyEmptyEmpty

    Here are a few things Shears can be used for: shearing sheep, harvesting leaves, collecting vines, gathering or destroying cobwebs, harvesting bee nests and honeycombs, and carving pumpkins.

    The limitation of Shears: The only disadvantage of this tool is that you can only add a limited number of enchantments: Unbreaking III and Mending. The fact that you cannot use Fortune and Silk Touch on this makes it a bit of a downgrade.

    Flint and Steel: The Fire Starter

    Flint and Steel is the tool that lights fires, activates Nether Portals, and triggers TNT. You cannot enter the Nether without one or without having a Flint and Steel in your inventory to relight your portal if a Ghast destroys it.

    The crafting recipe for Flint and Steel:

    Place one Iron Ingot in the top-left slot. Place one Flint in the middle-centre slot.

    Crafting GridLeftCentreRight
    Top rowIron IngotEmptyEmpty
    Middle rowEmptyFlintEmpty
    Bottom rowEmptyEmptyEmpty

    Where to get Flint: Mine Gravel blocks each one has roughly a 10% chance of dropping Flint instead of Gravel. Carry a shovel and break Gravel near riverbanks or beaches.

    Always carry two Flint and Steel on any Nether trip. Ghast fireballs destroy portals regularly and being stranded in the Nether without a way to relight yours is genuinely dangerous.

    The Fishing Rod: Patience Rewarded

    The Fishing Rod is one of the most surprisingly useful tools in Minecraft. Beyond food, fishing produces enchanted books, saddles, name tags, and rare items that would otherwise take hours to obtain through other means.

    The crafting recipe for a Fishing Rod:

    Place sticks diagonally from top-right to bottom-left one stick in the top-right, one in the middle-centre, one in the bottom-left. Place string in the middle-right and bottom-right slots.

    Crafting GridLeftCentreRight
    Top rowEmptyEmptyStick
    Middle rowEmptyStickString
    Bottom rowStickEmptyString

    Best enchantments for a Fishing Rod: Luck of the Sea III increases the chance of treasure catches including enchanted books and rare items. Lure III reduces waiting time between catches dramatically. Mending and Unbreaking III complete the set.

    A fully enchanted fishing rod is one of the best ways to get Mending books early in the game which is why many experienced players build an AFK fishing farm within their first week.

    Bucket: More Than Water Collection

    The Bucket is technically classified as a tool and it is one of the most versatile items in the game. You use it for carrying water, lava, milk from cows, and even fish.

    The crafting recipe for a Bucket:

    Place one Iron Ingot in the middle-left slot. Place one Iron Ingot in the middle-right slot. Place one Iron Ingot in the bottom-centre slot.

    Crafting GridLeftCentreRight
    Top rowEmptyEmptyEmpty
    Middle rowIron IngotEmptyIron Ingot
    Bottom rowEmptyIron IngotEmpty

    Always carry a Water Bucket underground. It converts lava into obsidian instantly, saves you from fall damage by placing water below you before you land, and extinguishes fire from lava exposure. Always carry a water bucket to turn lava into obsidian, and never dig straight down into an unknown block.

    Complete Crafting Reference: Every Tool at a Glance

    ToolMaterials NeededPrimary Use
    Pickaxe3 material + 2 sticksMining stone, ores, and hard blocks
    Axe3 material + 2 sticksChopping wood, stripping logs
    Shovel1 material + 2 sticksDigging dirt, sand, gravel, snow
    Hoe2 material + 2 sticksTilling farmland, clearing leaves
    Shears2 Iron IngotsShearing sheep, harvesting leaves
    Flint and Steel1 Iron Ingot + 1 FlintLighting fire, activating Nether portals
    Fishing Rod3 Sticks + 2 StringsFishing for food and treasure loot
    Bucket3 Iron IngotsCarrying water, lava, and milk

    The Upgrade Path: What Order to Craft

    Knowing what to make and in what order separates efficient players from players wasting materials.

    Day 1: Crafting Table first, then Wooden Pickaxe immediately to mine Cobblestone, then Stone Pickaxe and Stone Axe before the first night. Wooden tools exist only to reach stone nothing more.

    Days 2 to 5: Mine iron ore and smelt it into Iron Ingots. Craft an Iron Pickaxe first it is the most critical upgrade. Then Iron Axe and Iron Shovel as your stockpile grows.

    Days 10 to 20: Diamond tools starting with the Diamond Pickaxe. This is the only tool that mines obsidian for the Nether Portal. Craft Diamond Axe second for combat and woodcutting. Everything else waits until you have sufficient diamonds.

    Endgame: Netherite tools can be obtained only through upgrading take your Diamond tools to a Smithing Table with Netherite Ingots and a Netherite Upgrade Template found in Bastion Remnants. Prioritise Pickaxe, Axe, and Sword in that order.

    Repairing Tools: Three Methods

    A broken tool is wasted resources always repair before they reach zero durability.

    You can repair tools in different ways: combining two damaged tools in the crafting grid, using an anvil with materials, or a grindstone. With the Mending enchantment, tools even repair themselves when you collect XP.

    The Crafting Grid method combines two damaged tools of the same type into one with pooled durability but removes all enchantments from both. Never do this on an enchanted tool.

    The Anvil method repairs a tool using raw materials of the same type an Iron Pickaxe repaired with Iron Ingots at an Anvil preserves all enchantments. This is the correct method for enchanted tools.

    Mending enchantment is the best long-term solution every XP orb you collect while holding or wearing a Mending item repairs it automatically. The best method is with an anvil, because it preserves enchantments. Grindstones remove all enchantments when combining items.

    The tool progression in Minecraft is the clearest skill path in the entire game. Wooden tools to stone on Day 1. Iron by Day 3. Diamond Pickaxe by Day 10. Enchanted Diamond tools by Day 30. Netherite upgrades at endgame. Follow that order, never skip iron by rushing to diamond, and always put Mending on every tool you intend to keep permanently.

  • How to Get Diamonds in Minecraft: The Complete Guide (2026)

    How to Get Diamonds in Minecraft: The Complete Guide (2026)

    Diamonds are the turning point of every Minecraft survival world. The moment you get your first diamond, the game changes completely better tools, better armour, access to Netherite, and a clear path to the Ender Dragon fight. The problem is most players are still mining in the wrong place using outdated advice.

    Here is everything you need to know, updated for 2026.

    First: Stop Mining at Y=11

    If someone told you to mine at Y=11 for diamonds, that advice is from before 2021. The old Y=11 advice is from before the 1.18 Caves and Cliffs update. In current versions, Y=11 has extremely low diamond rates. You need to go to Y=-59 for optimal results.

    The best Y level for diamonds in Minecraft hasn’t changed since 1.18, and as of June 2026, across all current versions including Java Edition 1.21.x and Bedrock Edition 1.21.x, Y -59 remains the consensus optimal depth.

    Press F3 on Java Edition to see your current Y level. On Bedrock Edition, enable “Show Coordinates” in world settings. Mine down until that number reads -59 and then start working horizontally.

    Where Diamonds Actually Spawn

    Diamonds do not spawn evenly underground they follow a triangular distribution that gets denser the deeper you go. Diamond ore generates from Y=16 all the way down to Y=-63, but it is not spread evenly. The generation follows a triangular distribution it is rare near the top of that range, increases steadily as you go deeper, and peaks at the bottom. Deepslate diamond ore is most commonly found at Y=-58 and Y=-59.

    Here is the honest Y level breakdown:

    Y LevelDiamond DensityLava RiskRecommendation
    Y 16 to Y 0Very lowLowNot worth mining here
    Y -16 to Y -40Low to mediumMediumBetter options available
    Y -53HighLowerSafe sweet spot
    Y -58 to Y -59HighestHigherBest diamond yield
    Y -64 (Bedrock)Theoretically peakVery highBedrock blocks limit movement

    At Y -59, you are deep enough to hit the highest diamond concentration while staying mostly clear of bedrock interference. Bedrock starts generating irregularly at around Y -60, which can actually block some diamond ore veins from spawning. Y -59 lets you stay just above that cutoff while still in prime territory.

    The practical choice between -53 and -59: If you are a pro with Fire Resistance potions, go -59. If you just want efficiency without dying, go -53.

    The Air Exposure Rule Nobody Tells You

    This is the most important diamond mechanic that most players never learn. Diamond ore that would generate next to air blocks such as caves and ravines is removed in many cases. This means diamonds exposed in caves are approximately 50% less common than expected. Branch mining which involves tunneling through solid rock finds more diamonds than cave exploring. Diamonds surrounded by solid blocks on all sides are never reduced.

    What this means in practice: Walking through a cave looking for exposed diamond veins is significantly less efficient than digging through solid deepslate. The diamonds are hiding inside the rock not on the walls of open caves.

    Method 1: Branch Mining (Most Reliable)

    Branch mining is the most efficient long-term strategy for consistent diamonds. Branch mining involves digging a long straight tunnel at Y=-59, then carving side branches two or three blocks apart. Because diamond veins are about four blocks wide, spacing tunnels means you tunnel through unexposed deepslate where ore is most likely to have survived generation. It is safer and more reliable, but uses more pickaxe durability and torches.

    Here is the exact setup:

    Dig your main hallway at Y=-59 going in one direction as far as you want. Every 2 to 3 blocks along the main hallway, dig a side tunnel branching off in both directions make each side tunnel 2 blocks tall and 1 block wide. Walk each branch until it is 20 to 30 blocks deep. Return to the main hallway and repeat.

    The 2-block branch spacing is critical. Since diamond veins spread up to 4 blocks wide, branches every 2 blocks guarantee no vein is missed between tunnels.

    Set up a chest at your mining entrance. Bringing chests to your strip mining site is a great idea it lets you dump full inventories without making the long climb back to the surface every hour.

    Method 2: Cave Exploration (Fastest to Start)

    If you are early in the game and need diamonds quickly, exploring existing caves gets you there faster without burning durability. Exploring natural caves, ravines, and dripstone caverns down at deepslate depth is faster and burns far less tool durability, since the digging is already done for you. The downside is danger including mobs, lava, and the deep dark, and the air-exposure penalty thinning out exposed ore.

    Find a cave entrance on the surface and follow it down. When your Y coordinate reaches -40 or deeper you are in the right territory. Look for the distinctive blue-black deepslate diamond ore on cave walls and ceilings.

    The best hybrid approach: Explore caves to cover ground quickly, and switch to branch mining whenever you reach quiet, fully enclosed deepslate at the right depth. Use the cave system as free transportation down, then mine systematically once you reach the right level.

    Method 3: Underwater Cave Mining

    This is the advanced method that most players skip entirely and it is genuinely better for diamonds. The caves that you find underwater are better for finding diamond ores. The reason is that water blocks do not count as air blocks, and hence, they will not reduce the generation of diamond ore veins.

    The air exposure mechanic that reduces diamond generation near open caves does not apply underwater. Flooded caves at deepslate level have denser diamond concentrations than equivalent dry caves. Bring a Night Vision potion for visibility and a Door or Conduit for breathing.

    Method 4: Loot Chests (No Mining Required)

    Diamonds can be found without mining a single block if you know where to look. A great way to find diamonds without going underground is to explore various loot structures such as Jungle Pyramids, Shipwrecks, Desert Pyramids, and so on. Within them, you will find loot chests that have a small chance of containing diamonds.

    Buried Treasure has the highest chance of diamonds outside of mining. End Cities are recommended for late-game players who can score huge diamond loot there.

    Here is every loot source with diamonds:

    LocationChance of DiamondsNotes
    Buried TreasureVery HighBest non-mining source, use treasure maps
    End City ChestsHighLate-game only, requires beating the Dragon
    ShipwrecksMediumFind treasure map chests inside
    Desert TempleLow to Medium4 chests underground, watch the pressure plate
    Jungle TempleLowPuzzle chests contain diamonds occasionally
    Mineshaft ChestsLowWorth looting while mining anyway
    Village BlacksmithLowAlways check blacksmith chests early game

    Method 5: TNT Mining (Advanced)

    This is the fastest raw clearing method at endgame when TNT stockpiles are not a concern. If you have reached the endgame stage and created enough Minecraft farms to stack large amounts of gunpowder in your chests, consider using the TNT method. This is one of the fastest ways of finding diamonds in Minecraft. Unlike the traditional breaking methods, lighting up a TNT block can instantly clear large sections of the deepstone layers and expose the ore veins. All you need to do is dig a tunnel and reach the deepest underground layers around Y = -59, then explore the blast regions to look for the diamond ores.

    Important note: TNT does not drop diamonds it destroys them. Use TNT only to clear stone and expose veins, then mine the exposed diamond ore manually with your pickaxe.

    The Most Important Rule: Always Use an Iron Pickaxe or Better

    This is the mistake that devastates new players. The player needs an iron, diamond, or netherite pickaxe to mine diamonds. Diamond ore does not drop diamonds when mined with a wood, stone, or gold pickaxe.

    Mining a diamond ore block with a stone pickaxe produces nothing. The block breaks, the diamonds are gone, and you have nothing to show for it. Always carry a spare iron pickaxe when mining at depth never risk losing diamonds to a broken tool at the wrong moment.

    Fortune III: The Enchantment That Doubles Everything

    Getting a Fortune III pickaxe before any serious diamond mining run is the single biggest efficiency upgrade available. Fortune III on your pickaxe dramatically increases diamond yields. With Fortune III, a single diamond vein of 8 ore produces an average of 17.6 diamonds instead of 8. This more than doubles your yield.

    Each level adds a chance to drop extra diamonds, up to a maximum of 4 per ore block with Fortune III. Fortune III more than doubles your effective diamond rate, so it is worth getting a Fortune III pickaxe before any serious mining trip.

    The Silk Touch strategy if you do not have Fortune III yet: If you do not have Fortune III yet, use Silk Touch to mine diamond ore blocks without breaking them. Store the ore blocks, and when you eventually get Fortune III, mine them for 2.2x yields. This is a common speedrun and survival strategy.

    Fortune III and Silk Touch cannot exist on the same pickaxe. They are mutually exclusive enchantments. Keep one pickaxe for Fortune III mining and a separate one for Silk Touch collection.

    Lava Safety: The Thing That Ends Mining Runs

    Lava at Y=-59 will destroy your diamonds before you can pick them up. A diamond ore block broken near a lava source drops the diamonds directly onto the ground if lava reaches those drops before you do, they are gone forever.

    Always carry a water bucket it is your most important safety tool at this depth. If a player does see diamond ore blobs exposed near a lava pool, use a water bucket to convert the surface of the pool into obsidian or cobblestone, then leave the area flooded while mining. That way, if there is more lava under the diamond ore, the water can quench it before the lava can destroy the newly mined diamonds.

    The lava safety checklist before mining any exposed ore:

    First, look around the ore vein for nearby lava. Second, place water above or beside the vein before breaking any ore. Third, mine the ore with water flowing nearby to catch drops. Fourth, pick up all drops immediately before removing the water.

    What to Bring on Every Diamond Mining Run

    Preparation determines how long your run lasts and how many diamonds you come back with.

    ItemAmountWhy
    Iron or Diamond Pickaxe (Fortune III)2 to 3Primary mining tool, bring backups
    Water Bucket1 mandatoryLava safety, non-negotiable
    Torches64 minimumLighting, mob prevention, navigation
    FoodFull stackMining burns hunger constantly
    Sword1 enchantedMobs spawn at this depth
    Chest2 to 3Underground storage to dump inventory
    Spare Pickaxes2 minimumNever lose diamonds to a broken tool
    Fire Resistance Potions4 to 6Essential at Y=-59
    Night Vision Potions2 to 4See deepslate diamonds clearly
    ArmourFull set minimumMultiple mob encounters guaranteed

    Common Diamond Mining Myths Busted

    Myth: Diamonds spawn more near lava. Lava does not cause diamonds. They just happen to generate in similar depth ranges. Lava is a hazard near diamonds, not a signal of them.

    Myth: Certain biomes have more diamonds. Biome does not affect diamond generation. Mine at the right Y level in any biome the results are identical.

    Myth: Diamonds are more common in unexplored chunks. Diamond generation happens at world creation regardless of whether you have visited the area. Unexplored chunks are not richer in diamonds.

    Myth: Cave exploring finds more diamonds than branch mining. The air exposure mechanic means the opposite is true. Branch mining through solid deepslate consistently outperforms cave exploration for raw diamond yield.

    Diamond Mining Quick Reference

    What You NeedThe Answer
    Best Y levelY=-59 (maximum density), Y=-53 (safer)
    Minimum pickaxeIron stone drops nothing
    Best enchantmentFortune III for yield, Silk Touch to save ores
    Most efficient methodBranch mining at Y=-59 with 2-3 block branch spacing
    Best non-mining sourceBuried Treasure chests
    Fortune III average yield2.2 diamonds per ore (up to 4 maximum)
    Biggest mistakeMining at Y=11 (pre-1.18 advice, outdated)
    Safety essentialWater Bucket, always

    The formula for getting diamonds in 2026 is straightforward. Go deep, mine smart, and use Fortune III. That is really the whole formula.

    Dig to Y=-59. Branch mine through solid deepslate with 2-block branch spacing. Carry a water bucket for every lava encounter. Use Fortune III on every diamond ore block. Come back when your inventory is full. Everything else is just details on top of those five habits.

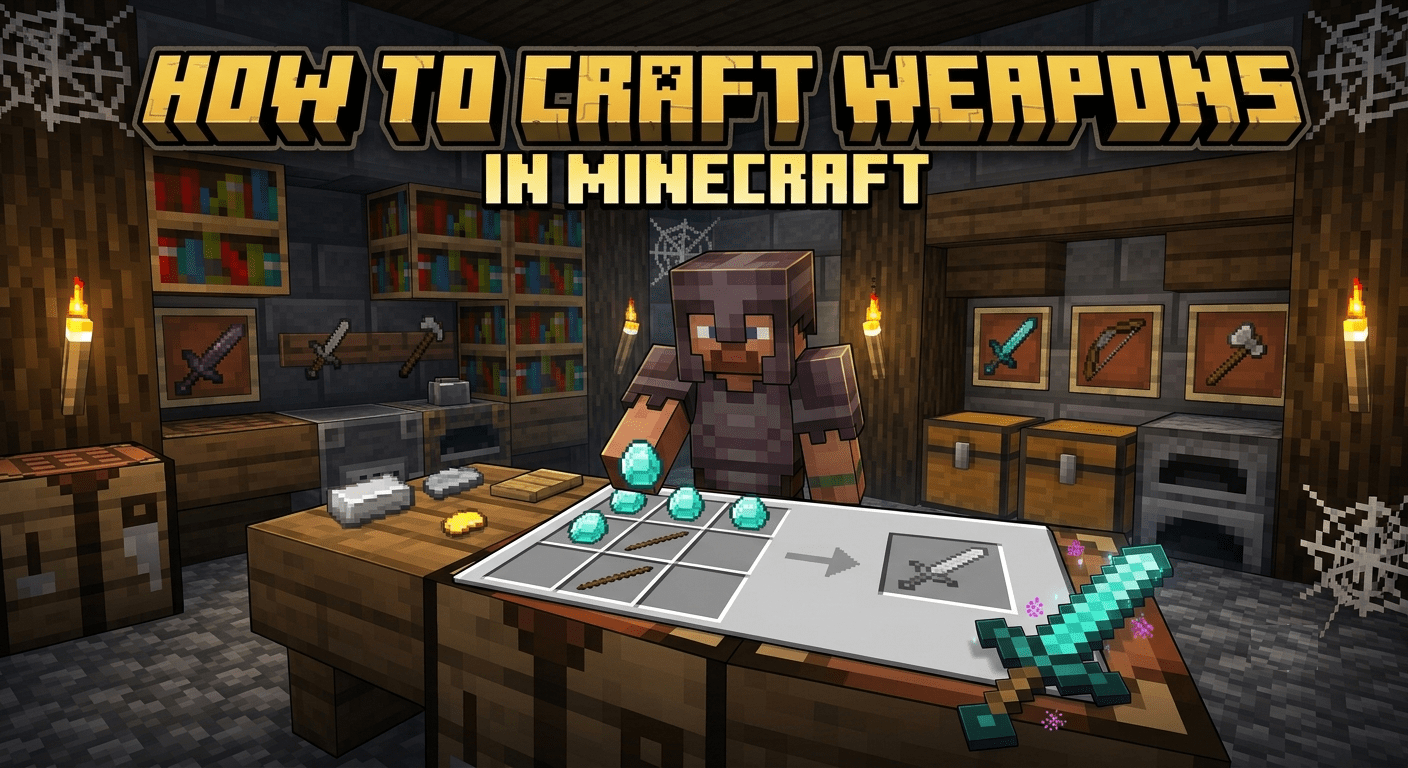
  • How to Craft Weapons in Minecraft

    How to Craft Weapons in Minecraft

    Every Minecraft player starts with the same two weapons their fists and desperation. Fists deal half a heart of damage. A wooden sword deals 4 hearts. The upgrade takes 30 seconds and two sticks. This guide walks you through every craftable weapon in the game, the material progression that makes each one better, and which weapon actually fits how you play.

    Before You Craft Anything: The Crafting Table Rule

    Every weapon in Minecraft requires a Crafting Table your inventory crafting grid is too small. Place a Crafting Table on the ground and right-click it to open a full 3×3 crafting grid. All weapon recipes use this grid.

    The basic pattern for every sword and most weapons is vertical materials stack in a column from top to bottom. Once you understand that pattern, every recipe clicks immediately.

    The Sword: Your Most Important Weapon

    The sword is the backbone of Minecraft combat. Swords offer the highest damage per second in the game with a swift cooldown of 0.6 seconds, outpacing their axe-wielding counterparts by 60%. Their unique sweep attack ability also lets you hit multiple targets, making them a formidable choice.

    The crafting recipe never changes only the material does.

    Place two of your chosen material in a vertical column in the centre of the top two rows. Place one stick directly below them in the bottom centre slot.

    Slot PositionMaterial
    Top centreMaterial (Wood/Stone/Iron/Gold/Diamond)
    Middle centreMaterial (same as above)
    Bottom centreStick

    That is it. Two materials and one stick every single time.

    The Material Progression: Every Sword Tier

    Never stay on wood longer than your first night stone is always within reach. Craftable weapons progress from wood to stone, iron, gold, diamond, and finally netherite. For swords, the progression is Wood Sword, Stone Sword, Iron Sword, Gold Sword, Diamond Sword, and Netherite Sword.

    Here is every sword tier, what it costs, and what it does:

    Sword TierMaterials NeededDamageDurabilityWhen to Use
    Wooden Sword2 Oak Planks + 1 Stick4 HP59 usesDay 1 emergency only
    Stone Sword2 Cobblestone + 1 Stick5 HP131 usesDays 1 to 3
    Iron Sword2 Iron Ingots + 1 Stick6 HP250 usesDays 3 to 15
    Golden Sword2 Gold Ingots + 1 Stick4 HP32 usesSkip entirely
    Diamond Sword2 Diamonds + 1 Stick7 HP1,561 usesEndgame standard
    Netherite SwordDiamond Sword + Netherite Ingot8 HP2,031 usesUltimate weapon

    Skip the Golden Sword entirely. Gold swords are available but deal low damage despite their material cost. Gold durability is only 32 uses your sword breaks before the materials were worth gathering. The only reason to craft gold tools is for Piglin trading in the Nether.

    The Netherite Sword is a special case. Since 1.20, you need a smithing table, your diamond sword, 1x netherite ingot, and a netherite upgrade smithing template found in bastion remnants and other structures. The template requirement is the change most players miss after updating from older versions. You do not craft a Netherite Sword from scratch you upgrade an existing Diamond Sword at a Smithing Table.

    The Axe: The Shield Breaker

    The axe is the sword’s slower, harder-hitting cousin and it has one unique ability no other weapon has. Axes are the only weapon that can disable a player’s shield, which is extremely useful in PvP.

    The crafting recipe for an axe:

    Place two materials in the top-right and middle-right slots. Place one material in the top-centre slot. Place sticks in the middle-centre and bottom-centre slots.

    In Java Edition, axes deal more damage per hit than their sword counterparts but have a slower cooldown. Wooden and stone axes have a cooldown time of 1.2 seconds, 100% slower than swords. Iron axes have a cooldown time of 1.1 seconds. Golden, diamond, and netherite axes have a cooldown time of 1 second, 60% slower than swords.

    Sword vs Axe: Which Should You Use?

    Bedrock Edition players should favour swords for combat, as axes deal less damage in this version. On Java Edition, axes deal more per hit but swords win on sustained damage-per-second. In PvP specifically, the axe wins because it disables shields in PvE against mobs, the sword is faster and more consistent.

    The Bow: Your Ranged Foundation

    Every Minecraft player needs a bow it is the safest way to fight Skeletons, Creepers, and the Ender Dragon.

    The crafting recipe for a Bow:

    Place three sticks in a diagonal line from top-right to middle-left to bottom-right. Place three strings in a vertical line filling the left column gaps.

    Crafting GridLeftCentreRight
    Top rowEmptyEmptyStick
    Middle rowStringEmptyEmpty
    Bottom rowEmptyEmptyStick

    Wait that is not quite right. Here is the correct layout:

    Place sticks in top-centre, middle-right, and bottom-centre positions. Place strings in top-right, middle-right… Actually the clearest way to remember it: three sticks form a vertical curve on the left side, three strings connect them on the right side.

    Bows can be charged by pressing the use control arrows go the farthest and deal the most damage when shot from a fully charged bow. Bows can be crafted using sticks and string, but are also a rare drop from skeletons and strays.

    Always pull the bowstring to full charge before releasing. A partially drawn bow does significantly less damage and travels shorter distance patience wins the ranged fight every time.

    Crafting Arrows: The Bow’s Ammunition

    A bow without arrows is a stick with string. Always craft arrows in bulk.

    The crafting recipe for Arrows (4 at a time):

    Place one Flint in the top-centre slot. Place one Stick directly below it in the middle-centre slot. Place one Feather directly below that in the bottom-centre slot.

    Crafting SlotItem
    Top centreFlint
    Middle centreStick
    Bottom centreFeather

    Where to get the materials: Flint drops from Gravel blocks with a 10% chance per block broken mine Gravel near rivers and beaches. Feathers drop from chickens. Sticks come from wood planks.

    Craft at least 64 arrows before attempting any boss fight. Running out of arrows mid-Ender Dragon fight is one of the most avoidable deaths in the game.

    The Crossbow: Power Over Speed

    The Crossbow trades fire rate for raw power and unique features. Crossbows have a longer range than bows and deal more damage, but take longer to charge when unenchanted. Unlike the bow, crossbows cannot fire a partially charged attack the player must fully charge a crossbow to load it and fire.

    The crafting recipe for a Crossbow:

    You need 3 Sticks, 2 Strings, 1 Iron Ingot, and 1 Tripwire Hook. The recipe is: 3 sticks plus 1 iron ingot plus 2 strings plus 1 tripwire hook equals 1 crossbow.

    Place it like this in the crafting grid:

    Crafting GridLeftCentreRight
    Top rowStickIron IngotStick
    Middle rowStringEmptyString
    Bottom rowEmptyStickEmpty

    Place the Tripwire Hook in the middle-centre slot completing the recipe.

    The Crossbow’s unique feature: A fun feature is that you can shoot fireworks with a crossbow. Load a Firework Rocket instead of arrows for explosive area damage one of the most devastating ranged attacks in the game against grouped mobs.

    The Mace: The Newest Weapon (1.21)

    The Mace was added in the 1.21 Tricky Trials update and it is unlike anything else in the game. The mace was added in 1.21 Tricky Trials and is the first new melee Minecraft weapon in years. It has the slowest attack speed of all weapons with a 1.67 second cooldown but makes up for it with its signature mechanic: the smash attack. If you hit a target while falling more than 2 blocks, the mace deals bonus damage equal to 0.5 HP per fallen block, scaling infinitely with height.

    How to craft the Mace:

    You need a Breeze Rod and a Heavy Core both obtained from Trial Chambers. The Breeze Rod drops from the Breeze mob. The Heavy Core comes from Ominous Vaults inside Trial Chambers with approximately a 7.5% chance.

    Place the Heavy Core in the top-centre slot and the Breeze Rod directly below it in the middle-centre slot.

    The smash attack mechanic changes how you think about height. Jump off a cliff, fall 20 blocks, and hit an enemy at the bottom the damage is catastrophic. Players have been using this to one-shot bosses from height, and it works in every difficulty.

    The Spear: Brand New in 1.21.11 (December 2025)

    The Spear arrived in the Mounts of Mayhem update in December 2025 and fills a completely new combat niche. The spear arrived in 1.21.11 Mounts of Mayhem in December 2025 and fills a niche no other weapon covers: a melee weapon built around movement and reach.

    Crafted using a Breeze Rod and materials from Trial Chambers, the Spear is designed for players who want a weapon that works with movement rather than stationary combat. It is the newest addition to the weapon roster and the community is still discovering optimal uses for it.

    The Trident: Cannot Be Crafted Only Obtained

    This is the most important thing to know about the Trident: The only downside to a trident is its rarity. You cannot craft it you can only obtain it from drowned or in the trial chambers.

    How to get one: Find Drowned enemies in ocean and river biomes. Only Drowned that are already holding a Trident have a chance of dropping it on death roughly 8.5% chance on Java Edition. It takes patience but the Trident is worth hunting for.

    Tridents can be swung to deal 9HP damage, the same as an unenchanted stone, iron, or diamond axe in Java Edition. Tridents can also be thrown to deal 8HP damage. Unlike most other projectiles, they are not slowed down in water.

    The enchantments are what make it extraordinary:

    Loyalty makes the thrown Trident return to your hand like a boomerang. Channeling summons lightning during thunderstorms when the Trident hits an enemy. Riptide propels you through water or rain when you throw it effectively turning it into a movement tool. Impaling increases damage against aquatic mobs significantly.

    Best Enchantments for Every Weapon

    Crafting the weapon is step one. Enchanting it is what makes it genuinely powerful.

    WeaponPriority EnchantmentsWhat They Do
    SwordSharpness V, Looting III, Mending, Unbreaking IIIMore damage, better drops, self-repair, longer life
    AxeSharpness V, Efficiency V, MendingDamage boost, faster chopping, self-repair
    BowPower V, Infinity, Flame, Unbreaking IIIMassive damage boost, unlimited arrows, fire arrows
    CrossbowQuick Charge III, Multishot, Piercing IVFaster reload, three arrows at once, arrow passes through enemies
    TridentLoyalty III, Channeling, MendingReturns when thrown, summons lightning, self-repair
    MaceSmite V, Density V, Breach IVExtra undead damage, more smash damage, armour penetration

    Mending is the enchantment that every weapon needs above everything else. Different swords are good for different situations, but Looting, Mending, Sharpness, and Sweeping Edge should be on every sword. A weapon with Mending repairs itself using XP orbs meaning it essentially lasts forever as long as you keep earning experience.

    Which Weapon Should You Use?

    The answer depends entirely on what you are fighting and how you play. Here is the honest breakdown:

    SituationBest WeaponWhy
    General mob fightingDiamond Sword with Sharpness VFastest DPS, sweep attack hits multiple mobs
    PvP against playersAxeDisables shields, higher damage per hit
    Fighting from distanceBow with Power VSafest combat, essential against Skeletons and Ghasts
    Boss fightsMace from heightSmash attack scales infinitely, one-shots with enough fall distance
    Water combatTrident with LoyaltyNot slowed by water, returns when thrown
    Grouped enemiesCrossbow with MultishotThree arrows per shot, devastating against crowds
    Undead mobs (Zombies, Skeletons)Sword or Axe with Smite VSmite deals extra damage specifically to undead

    Quick Crafting Reference: Every Weapon at a Glance

    WeaponMaterials RequiredObtainable By Crafting?
    Wooden Sword2 Oak Planks + 1 StickYes
    Stone Sword2 Cobblestone + 1 StickYes
    Iron Sword2 Iron Ingots + 1 StickYes
    Diamond Sword2 Diamonds + 1 StickYes
    Netherite SwordDiamond Sword + Netherite Ingot + Smithing TemplateYes (upgrade only)
    Bow3 Sticks + 3 StringsYes
    Arrow1 Flint + 1 Stick + 1 FeatherYes (4 per craft)
    Crossbow3 Sticks + 2 Strings + 1 Iron Ingot + 1 Tripwire HookYes
    Axe (Iron)3 Iron Ingots + 2 SticksYes
    Mace1 Heavy Core + 1 Breeze RodYes (Trial Chamber materials)
    SpearTrial Chamber materialsYes (1.21.11 onwards)
    TridentCannot be craftedNo, Drowned drop only

    The weapon that matters most changes depending on where you are in the game. Stone Sword gets you through the first week. Iron Sword carries you into the Nether. Diamond Sword enchanted with Sharpness V and Mending is the weapon you carry into the End Portal.

    Start crafting in that order, enchant everything you intend to keep, and never let Mending go unequipped on a weapon you love. The right weapon at the right stage of the game makes every fight significantly easier than fighting with underpowered gear twice as long.

  • Minecraft Stronghold: The Complete Guide

    Minecraft Stronghold: The Complete Guide

    The Stronghold is the most important structure in all of Minecraft. It is not the most dangerous, not the most impressive looking, and not the most rewarding to loot but it is the one structure that every player who wants to complete the game must find. Without it, the Ender Dragon fight never happens. The credits never roll. The game is never technically finished.

    Here is everything you need to know about it.

    What Is a Stronghold?

    A Stronghold is a hidden underground structure that holds the End Portal, making it essential if you want to reach the End and fight the Ender Dragon. You will not find it sitting on the surface like a village or a desert temple. It spawns deep underground with multiple libraries, corridors, prison cells, and secret rooms to navigate.

    The stronghold is the only place where an End Portal can be found. That single fact makes it mandatory. Every other structure in Minecraft is optional. This one is not.

    How Many Strongholds Exist Per World

    Java Edition and Bedrock Edition handle this completely differently and the difference matters.

    In Java Edition, strongholds are distributed across 8 concentric rings centered on the world origin. Ring 1 is closest and easiest to find with Eyes of Ender the first stronghold you encounter is almost always in Ring 1, within roughly 3,000 blocks of spawn. Java Edition generates a total of 128 strongholds per world.

    In Bedrock Edition, there are only 3 Strongholds per world in total, and each has an End Portal room. That means on Bedrock, every trip needs to count. You have three shots at finding the portal Java players have 128.

    In Bedrock Edition, there are 3 extra strongholds at least 453 blocks away from the world origin, which tend to be close to the 453-block boundary and are guaranteed to generate below meeting points of a village. If you find a village in Bedrock Edition, there is a good chance a Stronghold sits directly underneath it.

    Where Exactly Do They Generate

    There is no fixed depth and that is what makes them hard to find. Strongholds generate at any Y level, mostly underground, and prefer to generate in biomes above sea level but generate underwater if necessary. They can even spawn at bedrock level, cutting through the bedrock itself.

    Most strongholds concentrate around Y0 to Y-16 in typical terrain. Strongholds adapt to terrain they can be partially exposed in ravines or completely buried under mountains. Check your Y-coordinate while searching. Press F3 on Java Edition or enable coordinates in Bedrock Edition settings.

    Ravines do not overwrite strongholds rather, a stronghold can occasionally be found exposed by a ravine. If you ever spot mossy stone bricks inside a ravine wall, start digging immediately.

    Step 1: Craft the Eyes of Ender

    You cannot find a Stronghold without Eyes of Ender they are the only navigation tool for this structure.

    Each Eye of Ender requires one Ender Pearl and one Blaze Powder. The only way to get Ender Pearls is to defeat Endermen the tall, dark mobs that teleport around and pick up blocks. When you hit them or look into their eyes, they will teleport away and charge you repeatedly.

    Blaze Powder comes from Blaze Rods, which you get by killing Blazes inside Nether Fortresses. This means finding the Stronghold requires completing the Nether first there is no shortcut around it.

    Eyes of Ender have a 20% chance of breaking when thrown. Bring at least 15 to be safe you need 12 for the portal and a few extras for navigation. Never go looking for a Stronghold with less than 15 Eyes in your inventory.

    Step 2: Follow the Eyes of Ender

    This is the intended survival method for finding a Stronghold and the one every player uses on their first run.

    Throw an Eye of Ender into the air and follow the direction it travels. It leads you to the nearest stronghold, which spawns between Y-levels -32 and 48 underground.

    Here is the exact process that works:

    Throw your first Eye of Ender and note the direction it flies. Walk roughly 200 to 300 blocks in that direction. Throw another Eye and check if the direction has changed. Keep walking and throwing every few hundred blocks until the Eye starts floating downward instead of forward.

    When the Eye floats downward instead of forward, you are standing directly above the stronghold. Dig down carefully the stronghold is typically between Y 0 and Y 40. Find the portal room by exploring the stronghold corridors to locate the End Portal room.

    The speedrunner triangulation method uses just 2 Eyes. Throw an Eye at your starting position and note the direction. Walk perpendicular to the Eye’s direction, then throw another Eye. The intersection point of both directions is where the stronghold sits. This saves Eyes of Ender for filling the portal frames later.

    Step 3: Navigating the Maze Inside

    Finding the Stronghold is only half the battle. Getting to the End Portal room inside it is the other half.

    Once inside a Minecraft Stronghold, you will find the place is essentially a maze. There are winding hallways, spiral staircases to follow, and a couple of different rooms you can come across that make it hard to keep track of where you have been. Place torches on the right-hand side wall as you travel with this method, you can know where you have been already as you get lost in the area.

    The torch method is the simplest navigation system in the game. Torches always go on your right wall going forward. When you are backtracking, torches are on your left wall. You can never get permanently lost using this technique.

    While walking around the stronghold, you can find libraries full of bookshelves and spiderwebs, various chests hidden throughout the area, and the End Portal room. Along the way, mobs like zombies and skeletons are likely to spawn in the dark corridors, so be sure to light them up as you travel. Some of the stone bricks around the structure will be infested with silverfish, so be careful what blocks you break or you can have a horde of silverfish attacking you.

    What Is Inside a Stronghold

    The Stronghold is one of the most complex structures in Minecraft most players only find the portal room and leave without exploring properly. Here is every room type and what it contains:

    Room TypeWhat Is InsideWorth Visiting?
    End Portal RoomEnd Portal, Silverfish Spawner, lava poolEssential
    Library (Small)Bookshelves, cobwebs, 1 chestYes, books and loot
    Library (Large, 2 floors)More bookshelves, cobwebs, 2 chestsDefinitely yes
    Prison CellIron bars, sometimes a chestCheck for loot
    Storage RoomSingle chest, stone bricksQuick loot stop
    Spiral StaircaseNavigation between floorsLandmark for orientation
    Fountain RoomStone brick fountain, decorativeNavigation landmark
    CorridorsConnecting rooms, random mob spawnsLight them as you go

    The two-floor library is the best non-portal room in the entire Stronghold. It contains the most chests and the highest concentration of bookshelves which you can break for the books to build your own enchanting setup back at base.

    The End Portal Room

    This is what every Minecraft player is searching for the gateway to the final boss fight.

    When you find the portal room in a Stronghold, it is highly likely that it will be incomplete. If you look at the top of it, there will be slots in the portal frame where you can insert an Eye of Ender into each block. Once all 12 slots have an Eye of Ender, the middle portion of the portal will activate and become very dark and starry.

    Each portal frame has a 10% chance to generate containing an Eye of Ender already placed. On average, 0 to 3 slots are pre-filled, but some seeds generate frames with 4 to 5 Eyes already in place. Count the pre-filled slots immediately when you enter the room each one means one fewer Eye you need to supply.

    The Silverfish Spawner in the portal room is your first priority. Destroy it before doing anything else. Silverfish are small, fast, and attack in swarms fighting them while also trying to fill portal frames in a cramped room above lava is exactly as bad as it sounds.

    The Scouting Run Strategy

    Every experienced Minecraft player does two trips to the Stronghold not one. Once you have located the Stronghold and confirmed the End Portal room, resist the urge to immediately activate the portal and fight the Dragon. Instead, use this first visit as a scouting and looting run. The Stronghold’s chests contain Golden Apples, enchanted books, Ender Pearls, and iron and gold ingots. Collect everything before you commit to the End battle.

    Leave without activating the portal on your first visit. Go back to base, craft enough Eyes of Ender to fill all empty portal frame slots, stock up on food, enchant your armour and weapons, and bring Beds for the Dragon fight. Return fully prepared on your second visit and activate the portal then.

    This two-trip approach has a dramatically higher success rate than rushing straight into the End the moment you find the portal room.

    What to Bring Into the Stronghold

    Come prepared the corridors are dark, full of mobs, and deeper underground than most players expect.

    ItemAmountWhy
    Eyes of Ender15 to 20Navigation and portal activation
    Diamond or Iron Sword1 enchantedMobs and Silverfish
    Full ArmourIron minimum, diamond preferredMultiple mob encounters
    PickaxeIron or diamond with EfficiencyDigging in and navigating stone
    FoodFull stackLong exploration session
    Torches64 minimumNavigation and mob prevention
    Water Bucket1Emergency lava protection
    Bow with Arrows1 with 64 arrowsRanged mob control in corridors

    Do not forget a water bucket. Lava exists in the End Portal room and occasionally elsewhere in the Stronghold. One accidental step means losing everything you are carrying if you have no water nearby.

    Common Mistakes Every First-Timer Makes

    Throwing Eyes of Ender too frequently. Walk 200 to 300 blocks between throws. Throwing every 10 blocks burns your supply before you get close to the Stronghold.

    Activating the portal without preparation. The Ender Dragon fight on a first visit with unprepared gear ends in a respawn and a long walk back through the Stronghold. Scout first, fight second.

    Ignoring the Silverfish Spawner. Destroy it the moment you enter the portal room. Every second it remains active is another Silverfish that can knock you into the lava pool below the portal.

    Breaking infested stone blocks accidentally. Break stone bricks carefully some contain Silverfish that attack when the block breaks. If you hear a high-pitched chittering sound while mining in a Stronghold, stop immediately and switch to a sword.

    Not looting the libraries. The two-floor library contains some of the best early-game enchanted book loot available before the Nether. Skipping it to rush to the portal room wastes genuinely valuable resources.

    Quick Reference: Stronghold by Edition

    FeatureJava EditionBedrock Edition
    Total per world128 strongholds3 main, unlimited total
    Nearest to spawn1,408 to 2,688 blocksAt least 160 blocks away
    Under villagesNo guaranteed linkYes, 3 extra strongholds under villages
    Generation depthY -32 to Y 48Y -32 to Y 48
    Portal frames pre-filled0 to 12 (10% chance each)0 to 12 (10% chance each)
    Missing portal room possibleVery rareRare but documented

    The Stronghold is the turning point of every Minecraft survival world. Everything before it is preparation. Everything after it is endgame. Finding it, navigating it properly, and leaving without activating the portal until you are genuinely ready is the difference between completing Minecraft and dying to the Ender Dragon with three hearts left.

    The Eyes of Ender will take you there. The torch on the right wall will guide you through it. Everything else is just making sure you come back twice.

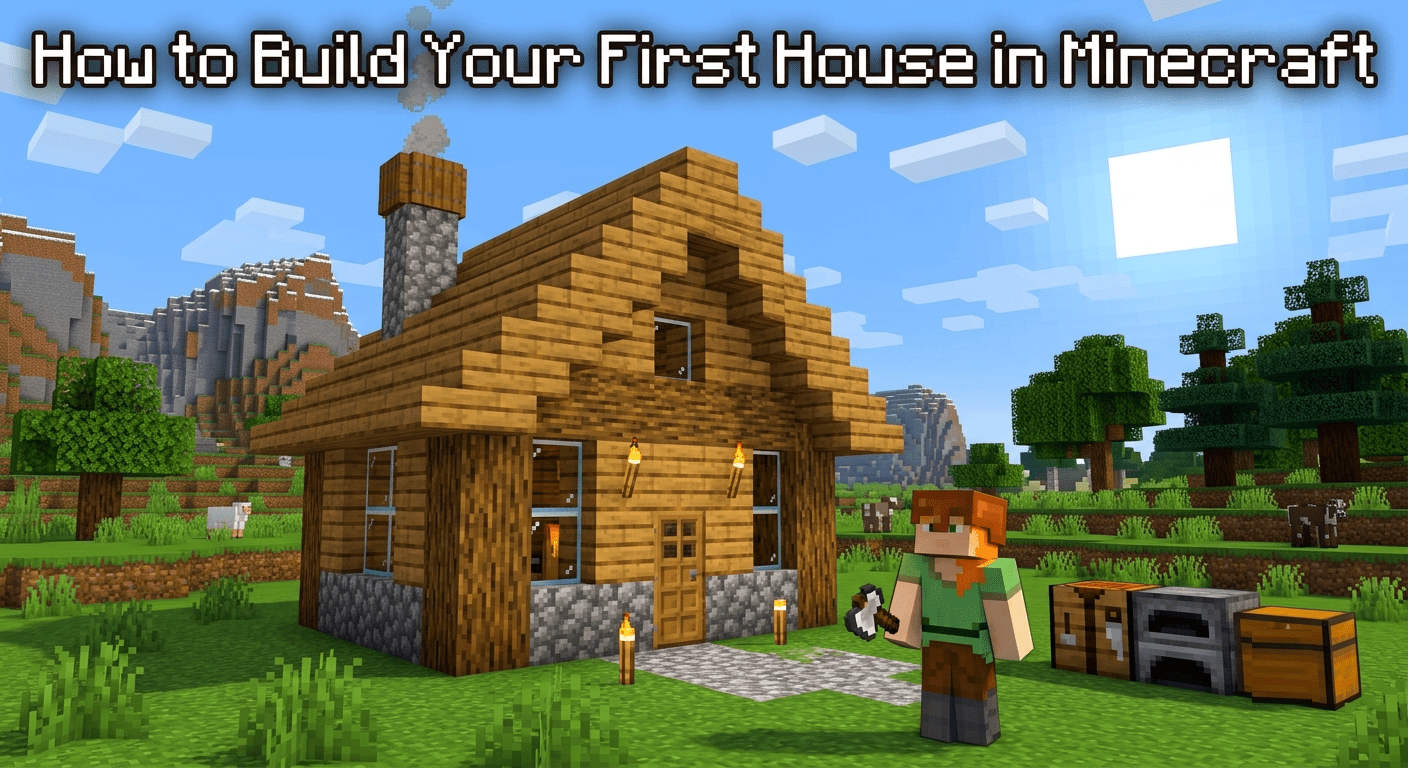
  • How to Build Your First House in Minecraft

    How to Build Your First House in Minecraft

    Every Minecraft player builds the same first house. Four dirt walls, a hole to crawl through, absolutely no windows, and the quiet dignity of having survived Night 1. That dirt box is the right call survival beats aesthetics every time. But here’s where most players go wrong: they never upgrade it.

    A proper Minecraft house is not a cosmetic project. It is your crafting hub, storage system, spawn anchor, and first line of defence. This guide takes you from that dirt box to a real home step by step.

    Before You Place a Single Block

    Pick your location carefully this decision affects everything that comes after. Your first permanent base needs trees nearby for wood, exposed stone or a hillside for mining, water within reasonable distance, and flat ground to build on comfortably.

    Building into a hillside is the smartest move for a first home. The terrain becomes three of your walls automatically, cutting your material cost in half. You only need to build the front face and the roof everything else already exists.

    If you want to practice before committing, build in Creative Mode first. You can also experiment with different building styles and materials, and since flying is available in Creative, you can check your build from every angle before transferring the design to your survival world.

    What Materials to Collect Before You Start

    Core materials for a starter house include spruce logs, cobblestone, stone bricks, and oak planks all obtainable within the first day. Essentials comprise one bed, double chests, furnaces, and 6 to 8 torches to furnish any beginner house design.

    Here’s the realistic shopping list for an 8×8 starter house:

    MaterialAmountPurpose
    Oak or Spruce Logs1 stack (64)Walls, pillars, floor
    Oak Planks2 stacksInterior floor, walls
    Cobblestone1 stackFoundation, blast resistance
    Glass Panes16 to 32Windows
    Oak or Spruce Stairs32Roof
    Oak Slabs16Roof top layer
    Torches16 minimumLighting everywhere
    Oak Fence16Perimeter and decoration
    Door1 to 2Entry point

    Always collect 3x more than you think you need. Running out of cobblestone halfway through a roof is the most frustrating beginner experience in the game.

    Step 1: Lay the Foundation

    A common beginner size is a 7×7 or 9×9 base start here and scale later. The foundation is the most important structural element of your house. Mark the outline first, then fill it in completely. This ensures your structure remains stable and visually consistent.

    Create an 8×8 frame on the ground. Use Oak Logs for the four corners and fill the lines between them with Cobblestone. Fill the entire floor inside the frame with Oak Planks.

    You can optionally dig one block into the earth so the walls appear to rise from the ground rather than sit on top of it. It is a small detail that makes the build feel grounded and intentional rather than dropped onto the surface.

    Step 2: Build the Walls

    Build your perimeter walls up to 4 blocks high. This gives you enough headroom to move around comfortably inside and prevents spiders from climbing over the top.

    Use different blocks at the corners this is the single technique that eliminates the flat box problem. At each corner, use a different block from your wall material a cobblestone pillar against a wood-plank wall, or a stone brick column against a cobblestone wall. This single technique eliminates the “flat box” problem that plagues most beginner builds without adding any real complexity.

    Leave openings for your door and windows as you build. A door opening is 2 blocks tall and 1 block wide. Window openings look best at 2 blocks wide and 1 to 2 blocks tall, positioned at eye level on the wall.

    Step 3: Add Windows Properly

    Use glass panes, not full glass blocks. Glass panes connect to adjacent blocks and fill only the centre of the space, giving a proper framed window look.

    Never leave windows open without glass. Some players skip glass entirely in early game. It is an open invitation to mobs like skeletons that can attack you from a distance through open gaps in your walls.

    Windows serve two purposes light during the day and visibility at night. Being able to see approaching mobs before they reach your door gives you time to prepare. Position windows on multiple sides of the house so you have sightlines in every direction.

    Step 4: Build the Roof

    The roof is where most first-time builders give up and just slap a flat layer of planks on top. That works functionally but looks terrible. Use slabs for minimalistic builds or stairs for depth and detail.

    The staircase roof method is the easiest way to get a proper pitched roof on a first build:

    Start by placing a row of stairs along the top edge of your longest wall, angled outward. Move one block inward and one block upward and repeat. Continue until both sides meet in the middle. Seal the top with slabs. Cap the two triangular end faces of the roof with the same blocks as your walls.

    The outside portion of the roof can use stone stairs, while the inside uses spruce the spruce compliments the stone well. The roof can be tricky, but if you stagger the stairs on the outside, the inside is easy. Finish off the top with spruce slabs.

    Add a chimney for instant character. Use bricks stacked 2 to 3 blocks above the roofline, place a trapdoor on the side for detail, and put a campfire inside the chimney opening. It produces smoke that rises from the roof and makes your house look genuinely lived in.

    Step 5: Material Upgrades Over Time

    Your house should evolve as you progress never stay on the material you started with. Here is the upgrade path that the building community consistently recommends:

    Day 1 Wood. It is fast to collect and immediately available. Use it for your emergency shelter. Day 2 to 3 Cobblestone. Once you are surviving and have a mine started, switch to cobblestone for any permanent structure. Cobblestone has a blast resistance of 6, making it resilient against creeper explosions and unlike wood, it will not burn. Week 1 and beyond Stone Bricks. Stone bricks require an extra step smelt cobblestone into stone, then craft four stone into four stone bricks but the visual upgrade is significant.

    Replace wall sections gradually rather than demolishing everything at once. Swap out one wall per session as your cobblestone stockpile grows. Your house improves continuously without requiring a full rebuild.

    Step 6: Interior Layout – Function First

    A starter house has one job: keep you alive through the first few nights while you gather resources. That means it needs a door, full lighting inside and on the perimeter, a bed, a crafting table, a furnace, and a chest. Everything else is optional.

    Here is the interior layout that makes your house actually work:

    The storage wall should occupy one full wall. Dedicate one full wall to double chests two chests placed side by side open as a single large storage unit. Aim for at least four double chests in a starter house, organised by category: one for wood and building materials, one for stone and ores, one for food and farming items, one for tools and gear.

    Place item frames on each chest and put a representative item inside the frame. It is the fastest inventory system in vanilla Minecraft and takes two minutes to set up.

    The crafting station should sit adjacent to your storage wall crafting table, furnace, and later a smoker and blast furnace side by side. Keep it compact so you can access everything from one spot.

    Place your bed away from the walls with space on all sides so you can get in and out quickly without getting stuck on furniture during a night emergency.

    Step 7: Lighting – More Important Than You Think

    Lighting in Minecraft is not decoration. It is defence. Hostile mobs spawn in areas where the light level drops below 8. Every dark corner inside your house, every unlit wall outside, every shadow under your porch roof is a potential mob spawn point.

    One detail beginners often miss: furnaces emit light, but that light does not prevent mob spawning. A bed placed in a dark corner away from furnace light can still be a mob spawn point if the surrounding light level drops below 8. Light your entire interior every corner, every ceiling not just the centre of the room.

    Place torches every 7 blocks outside your house in every direction to create a mob-free perimeter. Extend this lighting to cover any farm areas, pathways, or outbuildings nearby. The larger your lit perimeter, the safer your base becomes.

    Step 8: The Details That Transform a Box Into a Home

    The first 80% of a build takes 20% of the time. The last 20% of detail work takes 80% of the time but it is what separates a functional box from something you are genuinely proud of.

    Add a porch. Extend the roof two blocks outward from your front wall and support it with fence posts. Add a fence railing along the edge. It takes five minutes and completely changes how the front of your house reads.

    Add landscaping. Bushes, flowers, and even a small farm can liven up a simple house. Place flower pots on windowsills, add oak leaf bushes at the corners of the building, and put a stone path leading from your door to your farm. These details are free and immediate.

    Use trapdoors as decorative elements. Use stairs as shelves for storage, trapdoors as window shutters, or campfires (extinguished) for chimney effects. Trapdoors on windows look like shutters. Placed on the floor next to walls they look like floor vents. Creativity with non-obvious block uses is what separates good builds from great ones.

    The Mistakes Every First-Time Builder Makes

    Building too small. A 5×5 interior feels fine until you add storage, a bed, a crafting station, and a furnace then there is no room to move. Make your first house at least 7×7 interior minimum.

    Using only one block type. A single-material wall looks flat and unfinished. Mixing spruce logs with stone bricks, or cobblestone with oak planks, creates visual depth that makes even a simple house look intentional.

    Skipping the roof detail. A flat roof is the fastest sign of a beginner build. Spending an extra ten minutes on a staircase roof changes how the entire structure reads from a distance.

    Not lighting the perimeter. Lighting the inside of your house is not enough. Mobs spawn outside and walk through your door the moment you open it. Light everything within 20 blocks of your walls.

    Quick Build Reference

    PhaseWhat to DoTime Needed
    Pick locationFlat ground near trees, stone, water5 min
    Gather materials1 stack logs, 1 stack cobblestone, glass, torches15-20 min
    Foundation8×8 frame with log corners and cobblestone fill5 min
    Walls4 blocks high, different corner blocks, door and window gaps10 min
    Windows and doorGlass panes, door placed in gap5 min
    RoofStaircase method with slab top10-15 min
    InteriorBed, crafting table, furnace, chest wall10 min
    LightingTorches every 7 blocks inside and outside5 min
    DetailsPorch, chimney, landscaping, item frames on chests20-30 min

    The honest truth about building in Minecraft: your first house will not be your best house. A project in Minecraft is rarely finished you will keep discovering new blocks and materials you want to incorporate. Do not hesitate to tear things down and rebuild them. Start functional, upgrade continuously, and let the house grow with your skills. That is how every great Minecraft base actually gets built.

  • Minecraft Survival Guide: How to Survive Your First 100 Days

    Minecraft Survival Guide: How to Survive Your First 100 Days

    Everyone starts the same way in Minecraft. You spawn into a world with nothing, the sun is already moving, and you have absolutely no idea what you are doing. The first night is coming whether you are ready or not. This guide makes sure you are ready from Day 1 all the way through Day 100.

    One quick thing to know before we start. A single Minecraft day is 20 real-world minutes which means completing 100 days takes roughly 33 hours of actual playtime. It is a real commitment, and this guide covers every phase of it.

    Before You Start: Pick Your World Right

    The world you spawn in matters more than most beginners realise. A good spawn gives you trees nearby, passive animals for food, and ideally a village within reasonable distance. A bad spawn drops you in an ocean or a desert with nothing around.

    If your spawn looks terrible, restart. There is no shame in it. Finding a seed with a village nearby changes your entire early game villages give you immediate food, beds, iron tools from trading, and shelter without spending a single resource.

    Days 1 to 10: Pure Survival Mode

    Day 1: The Clock Is Already Running

    The moment you spawn, start moving every second before nightfall counts. Your very first action in any new Minecraft world is to collect wood. Punch any tree trunk repeatedly until the wood blocks fall out. Collect at least 16 wood logs before doing anything else.

    Convert those logs into a Crafting Table immediately. Take 4 of your wood logs and convert them to 16 wooden planks in your inventory crafting grid. Then, arrange 4 planks in a 2×2 square to craft a Crafting Table. Place the Crafting Table on the ground near you this unlocks all the crafting recipes you need to survive.

    Make stone tools, not wood tools. Always craft stone tools before wood tools, as stone is much more effective. Mine a few cobblestone blocks immediately and upgrade every tool from wood to stone before night hits.

    Get a bed before your first night – it is the single most important object in early Minecraft. You need wool to craft a bed. Look around for sheep on open grass fields. Kill 3 sheep to collect at least 3 wool blocks. Combine them with 3 wooden planks to make a bed, place it inside shelter, and sleep through the night entirely.

    If you cannot find sheep, dig into a hillside immediately. Dig into a hill or build a quick dirt hut. Place a torch from charcoal or coal to avoid mob spawns. Do not try to be a hero on Night 1 – zombies, skeletons, and the Breeze mob will end you fast.

    Days 2 to 5: Get Iron, Get Armour

    Iron is the single most important resource in early Minecraft – prioritise it above everything else. Get stone tools, then aim for iron quickly. Use caves, especially with the 1.18+ generation, for deep mining. Bring torches and food. Armour is your life insurance – start with leather if you must, but iron is where the real defence begins.

    Your Day 2 to 5 priority list in order:

    First, mine enough iron for a full set of armour – helmet, chest plate, leggings, and boots. Second, craft an iron sword immediately. Third, build a furnace and cook all raw meat – raw food does not go far thanks to the hunger tweaks in recent updates. Fourth, set up a basic wheat farm next to your shelter for a permanent food supply.

    Light everything around your base – every dark corner is a mob spawn point. Torches prevent hostile mob spawns. Place them every 7 blocks and light caves thoroughly. A base surrounded by darkness will send creepers and zombies to your door every single night.

    Always carry a water bucket. Falling, lava, or fire – a water bucket saves you in caves, mountains, and hardcore situations. It is the most versatile emergency tool in the game and costs almost nothing to make.

    Days 5 to 10: Build a Real Base

    Stop living in a dirt hut. Reinforce shelter walls with stone, obsidian, or other durable blocks to resist creeper explosions, skeleton attacks, and other environmental hazards. A stone base with a proper door, windows, and full lighting is your home for the next 90 days – build it properly now.

    Set up your three essential rooms inside the base. A storage room with organised chests so you always know where everything is. A crafting area with your crafting table, furnace, and eventually an enchanting table. A farm room or outdoor farm with wheat, carrots, and potatoes growing at all times.

    Days 10 to 30: Go Underground

    The Mining Phase

    Days 10 to 30 are about diamonds – everything else is preparation for that goal. Explore the surrounding areas to find resources like coal, iron, and diamonds. Consider branch mining or strip mining to efficiently gather ores like iron, gold, diamonds, and coal.

    Diamonds spawn below Y-level 16 in the current generation – the deeper you go, the better your chances. Branch mining at Y-level -58 (deepslate level) is the most efficient method. Dig a main tunnel, then branch off every two blocks on each side, creating a grid that exposes maximum ore without wasting time on stone.

    Never mine straight down – ever. The classic Minecraft lesson that every new player learns the hard way. Digging straight down drops you into lava, a cave system, or a ravine without warning. Always mine at a diagonal or use a staircase pattern downward.

    When you find diamonds, your immediate priority is a Diamond Pickaxe. Everything else – armour, sword, other tools – comes after you secure the ability to mine faster and access obsidian for the Nether portal. Do not waste early diamonds on armour when iron armour already handles Overworld threats comfortably.

    Villages and Trading: The Early Game Shortcut

    Finding a village in your first 30 days changes everything. Villages provide trading opportunities, resources, and safer shelter for rapid progression. Villager trading gives you access to enchanted books, emeralds, and rare items you would otherwise spend weeks mining for.

    The most valuable early villager trades: Librarians sell enchanted books including Efficiency, Protection, and Unbreaking all of which extend your tools significantly. Farmers trade crops for emeralds, giving you a permanent income stream from your farm. Weaponsmiths sell iron and diamond gear directly.

    Protect the village. Incorporate defensive structures like iron golem farms to provide extra protection against threats. Iron golems spawn naturally in villages and protect villagers from mobs a living village is a resource that keeps giving, so keep it lit and defended.

    Days 30 to 60: The Nether

    Preparing for the Portal

    Before you enter the Nether, make sure you are genuinely ready it is not forgiving. You need at minimum a full set of iron armour (diamond preferred), a diamond sword, a bow with at least 64 arrows, plenty of food, fire resistance potions if possible, and enough obsidian to rebuild a portal if yours gets destroyed.

    Build your Nether portal away from your base. A Ghast fireball can destroy your portal if that portal is connected directly to your base’s front door, a destroyed portal means being stranded in the Nether with no way home. Build it at a safe distance.

    What to Do in the Nether

    The Nether has four things you absolutely need for endgame progression:

    Blaze Rods from Blaze spawners in Nether Fortresses these are required for brewing stands and Eyes of Ender. This is your primary Nether objective. Find a Nether Fortress and farm Blazes until you have at least 12 rods.

    Nether Wart also found in Nether Fortresses the base ingredient for almost every useful potion in the game. Collect and bring back as much as you can carry.

    Ender Pearls through Piglin trading. It is best to get Ender Pearls by trading with Piglins in exchange for Gold. Hunting Endermen is not advisable since they can kill you if you are not prepared. Farm gold, trade with Piglins, and stockpile Ender Pearls safely without fighting Endermen at all.

    Ancient Debris in the lower Nether for Netherite the upgrade that makes diamond gear genuinely powerful. Mine at Y-level 14 to 15 in the Nether for the highest Ancient Debris concentration.

    Days 60 to 100: Automation and The End

    Build Farms That Work While You Sleep

    Days 60 to 100 are about removing manual work. Set up farms for essential resources like food, wood, and other materials. Instead of a manual animal farm, use Dispensers, Hoppers, and Redstone to automate the breeding process, ensuring a constant supply of food.

    The three farms every serious survival world needs:

    An Iron Farm using village mechanics that generates iron automatically without mining. A mob farm using a dark room with a water funnel and drop shaft that farms XP and mob drops overnight. An automatic crop farm using water streams and hoppers that harvests and collects wheat, carrots, and potatoes without manual input.

    Automate first, explore second. Every hour spent building automation saves ten hours of manual resource gathering later in the world.

    The Enchanting Setup

    By Day 60 you should have a functioning enchanting room. You need a level 30 enchanting table surrounded by 15 bookshelves this unlocks the highest-level enchantments. An XP farm feeding levels into your enchanting table is what turns good gear into great gear.

    Priority enchantments for your first round:

    Sword Sharpness V, Looting III, Unbreaking III, Fire Aspect II. Armour Protection IV on every piece, Unbreaking III, Mending. Pickaxe Efficiency V, Fortune III (for diamonds and crops), Unbreaking III, Mending.

    Mending is the enchantment that changes everything. It repairs your tools using XP orbs from mob kills and mining meaning a Mending tool essentially lasts forever if you keep earning XP. Prioritise getting Mending books from librarian villagers above almost everything else.

    Days 80 to 100: The Final Boss

    The Ender Dragon is the final goal of every 100 Days challenge – and by Day 80 you should be ready to attempt it.

    To find the End Portal, use your Ender Pearls combined with Blaze Powder to craft Eyes of Ender. Throw them into the air and follow the direction they travel they always point toward the nearest Stronghold. Follow them until they stop moving upward, then dig straight down to find the Stronghold beneath you.

    Before entering the End, prepare at minimum a full set of diamond or Netherite armour with Protection IV, a sword with Sharpness V, a bow with Power V and Infinity, a pickaxe for breaking End Crystals on the obsidian pillars, plenty of golden apples and potions of healing, and ender pearls for emergency teleportation.

    The fight itself has two phases. First, destroy all End Crystals on top of the obsidian pillars they heal the Dragon continuously while active. Use your bow to shoot them from the ground. Second, attack the Dragon only when it hovers over the central fountain it is immune to arrows during its circuit flight. Hit it with your sword during the landing phase until it falls.

    The 100 Days Checklist

    By Day 100, a complete survival run should have:

    MilestoneTarget Day
    First bed made and placedDay 1
    Full iron armourDay 3 to 5
    Permanent wheat farm runningDay 5
    First diamonds foundDay 10 to 15
    Nether portal builtDay 20 to 25
    Blaze rods collectedDay 25 to 30
    Full diamond armourDay 30 to 40
    Enchanting table at level 30Day 40 to 50
    Automated iron farm runningDay 50 to 60
    Netherite gearDay 60 to 70
    Eyes of Ender craftedDay 70 to 80
    Ender Dragon defeatedDay 80 to 100

    The honest truth about surviving 100 days in Minecraft: the first night is the hardest. Everything after that is just building on what you established in those first 20 minutes. Get wood, get stone, get a bed, get iron in that order and the rest of the challenge opens up naturally.

    The players who fail the 100 Days challenge almost always fail because of Day 1, not Day 99. Nail the beginning, and the rest takes care of itself.

  • Do You Really Need a $1,000+ PC for a Great Gaming Experience?

    Do You Really Need a $1,000+ PC for a Great Gaming Experience?

    No. And the sooner the gaming industry stops implying otherwise, the better.

    The real answer to this question starts with one question back at you: what do you actually play? Because the hardware you need for Valorant, PUBG Mobile on emulator, and Minecraft is completely different from what you need for Cyberpunk 2077 at 4K with ray tracing. Treating them the same is where the confusion and the overspending begins.

    The Myth That’s Costing People Real Money

    The idea that great gaming requires expensive hardware is one of the most successfully marketed myths in consumer technology. It feeds on comparison anxiety you see someone’s $2,000 battlestation on YouTube and assume that’s the entry price. It isn’t.

    A well-optimised $500 gaming PC can deliver impressive results, especially in esports titles. Valorant runs at extremely high frame rates, often exceeding 100 FPS even on high settings. Fortnite runs at smooth 60-70 FPS on competitive settings. Apex Legends is fully playable with balanced settings.

    If you play esports titles, a $500 machine is not a compromise. It’s genuinely the right tool for the job.

    The Specification Problem Nobody Explains

    Here is the thing manufacturers never tell you clearly: the minimum and recommended specs printed on a game’s store page apply only to that game running completely alone on a clean system.

    They do not account for:

    Windows itself consuming 3-5GB of RAM before you open a single app. That overhead is not optional it is the operating system doing its job, and it runs whether you want it to or not.

    Background processes you forgot were running including Discord, your browser, Steam client, Xbox Game Bar, OneDrive sync, antivirus scanner, and Windows Update downloading silently while you play.

    This is why a PC that technically meets “recommended” specs still stutters. The developer tested on a clean machine with nothing else running. Your machine is never clean. 16GB of RAM is the floor you may need to close unnecessary applications when playing resource-intensive games because Windows, a game launcher, and the game itself together are already pushing against that ceiling.

    The practical rule: always mentally add 4-6GB to any RAM requirement you read on a game’s store page. A game listed as needing 8GB actually needs 12-14GB in real-world conditions when Windows and your background apps are factored in.

    The Confusion That Sends People Overspending

    Most people approach hardware buying backwards. They look at the most demanding game they might ever want to play, find the recommended spec for that game, and build to that number. Then they pay for hardware they use at 20% capacity for 90% of their gaming sessions.

    The better question is: what is the ceiling of what you actually play today?

    If you are planning on mostly playing 2D indie games or esports games such as League of Legends and Valorant, you likely will not need a super-powerful machine since these titles are usually well-optimised to run on lower-end hardware.

    Here is the honest breakdown of what different types of players actually need:

    What You PlayReal Example GamesBudget NeededGPU Sweet SpotWhat to Skip
    Esports & Light GamesValorant, CS2, Roblox, PUBG Mobile emulator$400 – $500No GPU needed, integrated graphics worksDedicated GPU, RTX anything
    Popular Battle RoyaleFortnite, Apex Legends, Warzone (1080p)$500 – $700RX 6600 or RTX 3060Anything more powerful than these two
    Open World AAA (1080p 60FPS)GTA V, Cyberpunk, Hogwarts Legacy$600 – $800RTX 3060 Ti or RX 6700Expensive CPU, premium motherboard
    AAA at 1440pCyberpunk, Alan Wake 2, Black Myth$900 – $1,100RTX 4070 or RX 7800 XTFlagship GPU, extreme speed DDR5
    4K Max Settings Ray TracingEverything at absolute best visuals$2,000+RTX 4090 or RTX 5080Most people genuinely do not need this tier

    The last row in that table is where $1,000+ becomes relevant. Everything above it does not need it.

    The Hardware Myths That Drive Bad Purchases

    More cores means better gaming.

    It does not. Most modern games still rely heavily on strong single-thread performance and efficient scheduling rather than simply throwing more cores at the problem. That is why CPUs with fewer, faster cores often outperform chips with larger core counts in gaming workloads. Buying a 16-core CPU for gaming means paying for 10 cores that will sit idle during your entire session.

    You need an expensive motherboard for good performance.

    You do not. Budget and midrange CPUs run perfectly fine on mainstream boards. Unless you are chasing extreme overclocks, spending extra purely for a premium motherboard is money that could be better allocated elsewhere. A B650 or B760 board does everything a gaming PC needs.

    Future-proofing justifies spending more today.

    Future-proofing is a myth that hardware companies love. No amount of spending today prevents your build from being mid-range in 3-4 years. Instead of overspending now, build smart at mid-range and use the savings for a GPU upgrade in 2-3 years. The money you save buying appropriately today will buy you a better upgrade in two years than the premium you paid today ever justifies.

    The most expensive version of a component is the safest choice.

    The best build is not the one that spends the most it is the one that aligns with how you actually play. Performance is not just measured in frames.

    The Free Fixes Nobody Tries First

    Before spending a single dollar on hardware, do these things. Most people skip straight to buying parts without ever doing the free version first.

    Close Chrome before launching your game. Chrome holds 500MB-1GB of RAM open even with zero tabs visible. That memory comes directly out of what your game can use.

    Turn Xbox Game Bar off. Go to Settings, Gaming, Xbox Game Bar, and switch it off. It runs constantly, consumes CPU, adds input latency, and the vast majority of players never use it once.

    Set your Power Plan to High Performance. Windows defaults to Balanced mode on most systems, which throttles your CPU clock speed to save power including during gaming. Go to Control Panel, Power Options, and switch to High Performance. This is free and immediate.

    Pause Windows Update before gaming sessions. Windows Update downloads and installs silently in the background and competes directly with your game for CPU, RAM, and storage bandwidth. Pause it for 7 days in Settings, Windows Update, Advanced Options.

    Add your game folders to antivirus exclusions. Your antivirus scans every file write in real time during installation and gameplay. Adding your game library folder to Windows Defender exclusions stops this silent overhead completely.

    These five changes cost nothing and together deliver more real-world performance improvement than upgrading from 8GB to 16GB RAM would on many systems. Try them before you open PCPartPicker.

    The One Component Where Money Actually Matters

    If you are going to spend more anywhere, spend it on the GPU. Not the CPU, not the motherboard, not RGB lighting. The GPU.

    The GPU renders everything you see. For gaming, this is typically the most important component and where most of your budget should go.

    Everything else in a gaming PC exists to support the GPU doing its job. A fast CPU paired with a weak GPU produces a slow gaming machine. A modest CPU paired with a strong GPU produces a fast one. That hierarchy is consistent across almost every gaming workload that exists.

    Second priority is your monitor, not your PC components. A $700 PC driving a quality 1440p 144Hz monitor produces a better daily gaming experience than a $1,200 PC driving a 1080p 60Hz monitor that came free with a desk. Do not build a sports car and park it on a dirt road.

    The Honest Summary

    You do not need a $1,000+ PC for a great gaming experience. You need the right PC for the games you actually play.

    The best gaming PC in 2026 is the one that matches your needs, not just the highest spec sheet. Choose wisely and you will end up with a system that delivers great performance today and stays relevant for years to come.

    Start by answering what you play. Build to that ceiling. Do the free Windows optimisations first. Spend the GPU budget where it belongs. And stop measuring your gaming experience in dollars measure it in whether the game runs well for the way you actually play it.

    That is the only spec that matters.

  • The Maze Bank Tower GTA V’s Most Iconic Skyscraper

    The Maze Bank Tower GTA V’s Most Iconic Skyscraper

    Let’s talk about the building that every GTA V player has looked up at, tried to get on top of, and at some point either base-jumped from or got killed on. The Maze Bank Tower is the tallest building in all of San Andreas 1,050 feet of pure Los Santos ambition and over a decade later the community is still finding new reasons to go up there.

    Here’s everything worth knowing about it.

    What It Actually Is

    The Maze Bank Tower is the crown jewel of the Pillbox Hill skyline and the headquarters of the fictional Maze Bank financial empire in Los Santos. The Tower stands 1,050 feet tall, which is actually 32 feet taller than its real-life counterpart. It is the tallest building in the State of San Andreas and the second tallest in the entire GTA series, only after the Rotterdam Tower in Liberty City.

    It’s modelled directly on the U.S. Bank Tower in Downtown Los Angeles right down to the distinctive cylindrical crown at the top. The real building has 73 floors. The in-game version has 72 stories. Rockstar didn’t miss.

    Getting Up There: Nobody Takes the Stairs

    Here’s the first thing every new player discovers there are no stairs or elevators accessible from street level. Getting to the top of Maze Bank Tower requires all of a player’s resourcefulness. None of the routes to the top involve getting inside a lift.

    The community has developed three standard methods for reaching the rooftop:

    The helicopter approach is the most common. Grab a Buzzard or any chopper and land directly on the helipad. Simple, reliable, and the default method for players who own the CEO office.

    The jet landing is the community flex. Players land a Lazer jet on the rooftop by approaching the tower, flying toward the mid-point of the structure, taking a slight dip downwards before exposing landing gear, reducing speed, and doing a near-vertical climb up the side of the building. It looks nearly impossible until you see it done perfectly at which point it looks obvious.

    The parachute drop is the most cinematic. Gain altitude above the tower in any aircraft, exit the vehicle, and freefall onto the helipad from above. It’s the entry method that makes you feel like an action movie villain. Nobody is going to argue with that.

    What Players Come Here For

    The base jump off the Maze Bank Tower is the activity the community never gets tired of. In a mission featuring Dom Beasley, Franklin meets him at the roof of the Maze Bank Tower where Dom convinces him to jump off. The two leap from the Tower and navigate through the city before landing on the back of a Flatbed travelling along Power Street.

    That mission introduced the jump to millions of players and they never stopped doing it recreationally. The freefall from 1,050 feet over downtown Los Santos, city grid spreading out in every direction, threading between skyscrapers before pulling the parachute at the last possible second it’s one of the most consistently thrilling player-created experiences in the entire game.

    The Sumo IV adversary mode turns the rooftop into a vehicular battle arena that the community loves for its absurdity. In Sumo IV, players form two teams and use cars to force the opposing team off the edge of the helipad. The falling cars are knocked out of the round. Pushing someone off the top of the tallest building in the city in a compact car while hovering 1,050 feet above Los Santos is exactly the kind of experience GTA Online exists to create.

    Sniper duels between rooftops are a recurring community event that the tower enables naturally. The elevation advantage from the Maze Bank roof creates sightlines across virtually the entire Pillbox Hill district. Organised PVP players use it as the anchor point for long-range duels between nearby skyscrapers it’s one of the few competitive PVP formats in GTA Online where position and map knowledge matter more than reflexes.

    The CEO Office: Worth It or Not?

    This is the conversation the community keeps having and the answer is genuinely divided. In GTA Online, the Maze Bank Tower office can be purchased from Dynasty 8 Executive for $4,000,000, making it the most expensive Executive Office in the game. After purchase, players can register as CEO and access SecuroServ features.

    It is the representation of success in GTA Online. By purchasing this office, you get access to the tallest building in Los Santos, situated in the middle of downtown for easy access to multiple missions. You also get access to the highest helipad in the game, making it a great place to enter and exit with a flying vehicle without worrying about other players shooting you down.

    The honest counter-argument is equally valid though. The Maze Bank Tower is the most expensive Executive Office. Unless you want the prestige of having the most expensive office, it is not worth the price tag. It comes with the most inconvenient helipad — it is high up in the air so it takes longer to fly to and has the most stairs when walking up from your office to the helipad. It also has bad personal vehicle spawns.

    The community consensus in 2026 is pretty consistent: Players who want to buy this office may do so if they have the money for some it really is about the view of Los Santos from the tallest building in the game, and who can blame them? But if efficiency is your priority, the general GTA Online rule applies here never buy the most expensive version of something. The offices all have the same interior options and garages. It is really just the location and the view from the window that is different.

    Buy it if you want the prestige. Skip it if you want the best value. Both are legitimate choices and the community respects both positions.

    The Stunts That Keep Going Viral

    The community’s obsession with the Maze Bank Tower rooftop as a stunt canvas never fully fades. Players have managed to deliver a cargo truck to the top of the Maze Bank Tower using two Deluxos flying inside the rear of the truck and using their cars like a jet propulsion system to push it all the way up. That clip circulated widely and spawned dozens of attempted copies, each trying to one-up the original.

    The jet landing challenge is the one that keeps recurring. New players see it done, assume it’s impossible, then spend an evening at the Tower until they nail it. Some players have mentioned that they like to do this little stunt to keep on top of their game and that it is not as challenging as one might think. That’s the classic GTA loop something looks insane, someone does it cleanly, and suddenly everyone is trying it.

    The Building Nobody Fully Notices

    Here’s a piece of Maze Bank Tower trivia that even long-time players miss. Despite being a relatively prominent building among the Los Santos skyline, the Maze Bank Tower actually makes fewer story appearances compared to the Union Depository to the north and the IAA and FIB Headquarters to the east.

    And the building’s in-game lore is quietly fascinating. In Jock Cranley’s campaign video, it is claimed the tower was built prior to 1985. For a city that runs on financial corruption and shady deals, a bank tower built in the early 1980s fits the aesthetic perfectly.

    Why You Should Actually Visit

    If you’ve never stood on the Maze Bank Tower rooftop and looked at the city below you, you’re missing one of the most purely cinematic moments GTA V offers. The entire Los Santos grid stretches out in every direction the coast to the west, the airport runway to the south, the Vinewood Hills to the north, and the industrial east side all visible simultaneously from one vantage point.

    It’s the view that makes Los Santos feel like a real city rather than a collection of missions and waypoints. Everything Rockstar built is visible from up there and there’s something about seeing it all from 1,050 feet that makes the scale of the world suddenly click in a way it doesn’t from street level.

    Go up there. Base jump off the west face. Pull your parachute late. There’s a reason the community has been doing exactly that for over a decade.

  • SSD vs HDD

    SSD vs HDD

    Your computer stores everything on a drive Windows, your apps, your games, your files. The type of drive you have has a bigger impact on how fast your PC feels than almost anything else. Most people never think about it, but it’s the single most important factor in whether your computer feels fast or frustratingly slow every single day.

    There are two main types: the old HDD (Hard Disk Drive) and the newer SSD (Solid State Drive). Let’s break down exactly what they are, how different they actually are in real numbers, and what’s coming next.

    WHAT THEY ARE

    SSD – Solid State Drive

    An SSD has no moving parts at all. It works like a very large USB stick it stores and reads data using electronic chips. When you ask it for a file, it finds it almost instantly because there’s nothing physical that has to move. It makes no noise, it doesn’t vibrate, and dropping your laptop won’t destroy your data. This is what almost every new laptop and PC ships with today.

    HDD – Hard Disk Drive

    An HDD is a spinning magnetic disk, almost exactly like a vinyl record, with a tiny reading arm that has to physically swing across the disk to find your data. Every time you open a file, that arm has to locate it on the spinning disk. The faster the disk spins, the faster it can find things but it’s still mechanical, which means it has physical limits. It makes a quiet humming sound when running, and dropping it even slightly can damage or destroy all your data permanently.

    REAL PERFORMANCE NUMBERS GAMES AND SOFTWARE

    This is where the difference stops being abstract and starts being something you feel every single day.

    Windows Startup Time
    On an SSD, Windows starts up in about 8 to 12 seconds. On an HDD, the same Windows installation takes 45 to 90 seconds. That’s not a small difference you’re staring at a loading screen for over a minute every time you turn on your PC.

    Adobe Photoshop Launch Time
    Photoshop opens in roughly 4 seconds on an SSD. On an HDD, it takes 22 to 30 seconds to fully load. If you use creative software regularly, this adds up to many minutes of waiting every single work session.

    GTA V Loading Into the Game World
    On an SSD, you’re in the game in about 30 seconds. On an HDD, the same load takes 4 to 6 minutes. That’s not a typo. Players on HDDs were so well known for long load times that Rockstar Games actually released a patch specifically to speed up HDD loading after a modder discovered the game had inefficient code making it worse.

    Microsoft Excel Opening a Large 50MB File
    On an SSD, a large spreadsheet opens in about 2 seconds. On an HDD, the same file takes 12 to 18 seconds. For anyone doing data work or finance work, this kind of delay happens dozens of times a day.

    Call of Duty Warzone Map Loading Screen
    On an SSD, you’re into the match in about 25 seconds. On an HDD, loading takes 2 to 3 minutes and Warzone is known for actually kicking players with HDDs during loading because the game’s servers consider them too slow to keep up with other players. You don’t just wait longer. You get removed from the game entirely.

    Drive Read Speed How Fast Data Reaches Your Software
    This is the raw measurement of how quickly the drive can hand data to your software. An NVMe SSD (the fastest common type) reads at around 3,500 MB per second. A SATA SSD (older type) reads at around 550 MB per second. A standard HDD reads at 80 to 160 MB per second. Think of MB/s like lanes on a highway more lanes means more data delivered to your software at once, which means faster everything, across every app you use.

    QUESTIONS YOU PROBABLY HAVE

    Q: If SSD wins at everything, why do people still buy HDDs?

    Because of storage space per rupee or dollar. A 4TB HDD that’s 4,000 GB, enough for 40 or more big games costs around 60 to 70 percent less per gigabyte than an SSD of the same size. If you have hundreds of movies, years of photos, or archived work files you rarely open, it makes perfect financial sense to store all of that on a cheap HDD. Speed only matters when you actually open a file. Data sitting on a drive doing nothing doesn’t benefit from speed. So most smart setups use an SSD for Windows and active software, and an HDD for bulk storage.

    Q: Does the type of SSD matter? What is NVMe?

    Yes not all SSDs are equal, and this matters more than most people realize. SATA SSDs are the older type and plug in using the same cable as a regular hard drive. They’re faster than HDDs but limited by that older connection. NVMe SSDs plug directly into your motherboard through a dedicated slot and use a much faster connection. An NVMe SSD is about 6 times faster than a SATA SSD, and about 30 to 40 times faster than a standard HDD. If your PC or motherboard supports NVMe, always choose it for your main Windows drive.

    Q: Will an SSD make my old PC faster overall?

    Yes and it’s usually the single most impactful upgrade you can make to an aging computer. If your PC is slow to start, slow to open apps, or freezes up when you have several things open at once, there’s a very high chance the HDD is the main bottleneck, not the processor or RAM. Replacing the HDD with an SSD can make a 7-year-old computer feel 3 to 4 times more responsive for everyday use. Your RAM and processor still matter for heavier tasks like video rendering or gaming graphics, but a slow HDD drags down everything else first.

    Q: Can software actually fail or crash because of a slow HDD?

    Absolutely. This is becoming more common as software gets larger and more complex. Games like Cyberpunk 2077 and Fortnite now list an SSD as a minimum system requirement not a recommendation, but a requirement. On an HDD, textures fail to load in time, so you see blurry walls, invisible objects, or environments that pop into existence right in front of you mid-game. Warzone is the most famous example it actively removes players with HDDs from loading screens because the game treats their loading speed as a connection problem. This issue will only get worse as games and software grow larger.

    Q: Can software actually fail or crash because of a slow HDD?

    Absolutely. Games like Cyberpunk 2077 and Fortnite now list an SSD as a minimum system requirement not a suggestion. On an HDD, textures fail to load fast enough, so you see blurry walls, pop-in objects, or invisible enemies. Warzone is the most famous example it kicks HDD players during loading because the game interprets slow loading as a connection issue. This will only get worse as games grow larger and stream data in real-time during gameplay.

    HOW THEY COMPARE IN PRICE

    These are percentage comparisons, not exact prices, since prices vary by brand, capacity, and region. The key thing to understand is the relative value.

    HDD is the cheapest option and acts as the baseline.

    SATA SSD costs roughly 2 to 3 times more per gigabyte than an HDD of the same size.

    NVMe SSD costs roughly 3 to 4 times more per gigabyte than an HDD.

    NVMe Gen 5 SSD, the newest and fastest type, costs roughly 6 to 8 times more per gigabyte than an HDD.

    The good news is that SSD prices have dropped dramatically over the past 3 years. A solid 1TB NVMe SSD today costs roughly the same as a 1TB HDD cost back in 2018. The gap is closing fast, and for most people the price difference for a 1TB drive is no longer a huge barrier.

    NEW STORAGE TYPES ENTERING THE MARKET

    The storage industry is moving quickly. Here’s what’s arriving in mainstream PCs right now or in the next one to two years.

    NVMe Gen 5 SSD Available Now

    This doubles the speed of today’s most common NVMe Gen 4 drives and reaches up to 14,000 MB per second. To put that in perspective, a large game like Elden Ring that takes up 45 GB would be fully read from the drive in about 3 seconds. It requires a newer motherboard Intel 12th generation or newer, or AMD Ryzen 7000 series or newer. It runs hot and needs a heatsink. Prices are premium right now but are dropping every few months.

    QLC NAND Bigger and Cheaper SSDs (Arriving 2025–2026)

    This is a new chip design that stores more data per chip without increasing the physical size of the drive. It’s what will make 4TB and 8TB SSDs affordable for everyday home users. If you currently own a large HDD just because SSDs at that size are too expensive, QLC NAND is what changes that equation over the next year or two.

    Computational Storage Drive, or CSD (Arriving 2025–2026)

    This is a storage drive with a small built-in processor. Instead of sending all data to your main CPU to be processed, the drive handles certain basic tasks on its own before passing results to your computer. This speeds up things like video editing exports, database queries, and AI tools that run locally on your PC. It’s particularly useful for content creators and developers.

    PCIe 5.0 M.2 Becoming Mainstream

    The M.2 slot is the connector that NVMe SSDs plug into on your motherboard. PCIe 5.0 is the new version of this connection, and it doubles the bandwidth available compared to PCIe 4.0. New gaming PCs and workstations are increasingly shipping with PCIe 5.0 as the default, which is what unlocks the full potential of Gen 5 SSDs. If you’re buying a new PC in 2025, look for this.

    HAMR Hard Drives Next-Generation HDD (Future / Enterprise)

    Seagate has developed a technology called Heat-Assisted Magnetic Recording, or HAMR. It uses a tiny laser to briefly heat the disk surface before writing data, which allows much more data to be stored per drive. Drives with 32TB and above are already shipping to businesses and data centers. These won’t appear in most home PCs for a few years, but they’ll be the go-to for people who need massive bulk storage at low cost think home media servers or large backup drives.

    DNA and Glass Storage Research Phase

    Microsoft and several research institutions are experimenting with storing data in synthetic DNA strands and in layers of etched glass. These technologies can theoretically store enormous amounts of data in a tiny physical space and last thousands of years without degrading. This is not something you’ll buy for your gaming PC in the near future, but it’s the direction long-term archival storage is heading.

    THE BOTTOM LINE

    Q: What should I actually buy if I’m building or upgrading a PC today?

    The smartest setup in 2025 is straightforward: get a 1TB NVMe SSD for Windows and your active games and apps, and add a 2 to 4TB HDD for everything else old photos, archived files, extra game installs you don’t play often. This gives you maximum speed where it matters and cheap space where speed doesn’t matter.

    If budget is tight and you can only do one thing, swap the HDD for even a 500GB SATA SSD. The improvement in how fast and responsive your PC feels every single day will be immediate and significant. It’s the one upgrade that affects every single thing you do on a computer, every single time you use it.

    SSD opens GTA V in 30 seconds. HDD takes 4 to 6 minutes. That same gap exists for every app, every boot, every file every day. If your PC has an HDD and feels slow, this is why.

  • SSD vs HDD, NVMe

    SSD vs HDD, NVMe

    Your computer stores everything on a drive Windows, your apps, your games, your files. The type of drive you have has a bigger impact on how fast your PC feels than almost anything else. Here’s what you need to know in plain English.

    ⚡ SSD Solid State Drive

    No moving parts. Works like a large USB stick reads data using chips. Instant, silent, and very fast.

    Moving partsNone
    Makes noiseNever
    Breaks from a dropRarely
    SpeedVery fast
    🕐 HDD Hard Disk Drive

    A spinning magnetic disk, like a vinyl record. A reading arm has to physically find your data each time.

    Moving partsYes always spinning
    Makes noiseYes, a light hum
    Breaks from a dropVery easily
    SpeedSlow

    🎮 Real performance numbers games and software

    These are real-world averages. The gap between SSD and HDD is not small it’s the difference between waiting and not waiting.

    Windows startup time

    SSD~8–12 seconds
    HDD~45–90 seconds

    Adobe Photoshop launch time

    SSD~4 seconds
    HDD~22–30 seconds

    GTA V load time into the game world

    SSD~30 seconds
    HDD~4–6 minutes

    Microsoft Excel opening a large 50MB file

    SSD~2 seconds
    HDD~12–18 seconds

    Call of Duty Warzone map loading screen

    SSD~25 seconds
    HDD~2–3 minutes (often crashes / kicked)

    Drive read speed how fast data reaches your software

    NVMe SSD3,500 MB/s
    SATA SSD550 MB/s
    HDD80–160 MB/s

    Think of MB/s like lanes on a highway. More lanes = more data reaching your software at once = faster everything.


    ?If SSD wins, why do people still buy HDDs?
    Because of storage size per rupee/dollar. A 4TB HDD (enough for 40+ big games) costs around 60–70% less per gigabyte compared to an SSD of the same size. If you have hundreds of movies, old photos, or archived files you rarely open, it makes perfect financial sense to store them on a cheap HDD. Speed only matters when you actually open a file parked data is just data.
    ?Does the type of SSD matter? What is NVMe?
    Yes not all SSDs are equal. SATA SSDs plug in like a regular hard drive. NVMe SSDs plug directly into your motherboard and use a much faster lane. An NVMe SSD is about 6× faster than a SATA SSD, and about 30–40× faster than a standard HDD. If your PC supports it, NVMe is always the better pick for your main Windows drive.
    ?Will an SSD make my old PC faster overall?
    Yes and it’s often the single biggest upgrade you can make to an old computer. If your PC is slow to start, slow to open apps, or freezes during multitasking, the HDD is most likely the bottleneck. Replacing it with an SSD can make a 7-year-old PC feel 3–4× more responsive. Your RAM and processor still matter, but a slow HDD is usually the biggest drag on everyday performance.
    ?Can software actually fail because of a slow HDD?
    Absolutely. Games like Cyberpunk 2077 and Fortnite now list an SSD as a minimum requirement. On an HDD, textures fail to load in time you see blurry walls or objects suddenly appearing mid-game. Warzone is well-known for kicking HDD players during loading because the game considers them “too slow to keep up.” This is becoming more common as games stream large files in real-time during gameplay.

    How they compare in price

    These are percentage comparisons to give you a sense of relative value not exact prices, which vary by brand and capacity. The key point: SSD prices have dropped sharply over the last 3 years.

    HDD
    Cheapest the baseline
    SATA SSD
    ~2–3× more per GB than HDD
    NVMe SSD
    ~3–4× more per GB than HDD
    NVMe Gen 5
    ~6–8× more per GB than HDD

    A solid 1TB NVMe SSD today costs roughly what a 1TB HDD cost in 2018. The gap is closing fast.


    New storage types entering the market

    The storage world is moving fast. Here’s what’s arriving in mainstream PCs right now and in the next 1–2 years.

    Available now
    NVMe Gen 5 SSD
    Doubles the speed of today’s common NVMe Gen 4. Reaches up to 14,000 MB/s. Requires a newer motherboard (Intel 12th gen+ or AMD Ryzen 7000+). Runs hot needs a heatsink. Premium priced but coming down fast.
    Arriving 2025–26
    QLC NAND bigger, cheaper SSDs
    New chip design that stores more data per chip. Makes 4–8TB SSDs affordable for everyday users. Great for people who want both speed and large storage without needing a separate HDD.
    Arriving 2025–26
    Computational Storage Drive (CSD)
    A drive with a small built-in processor. Instead of sending all data to your CPU, it handles basic tasks itself. Speeds up video editing, databases, and AI tools running locally on your PC.
    Becoming mainstream
    PCIe 5.0 M.2 Slot
    The connector that NVMe SSDs plug into. PCIe 5.0 doubles the bandwidth compared to PCIe 4.0. New gaming PCs and workstations are shipping with this as the default, unlocking the full speed of Gen 5 SSDs.
    Future / enterprise
    HAMR Hard Drives (next-gen HDD)
    Seagate’s new tech uses a tiny laser to heat the disk before writing, fitting far more data per drive. 32TB+ drives already shipping. Mostly for servers today, but will trickle into home PCs for mass bulk backup use.
    Research phase
    DNA & Glass Storage
    Microsoft and others are experimenting with storing data in synthetic DNA or etched glass theoretically lasting thousands of years. Not for gaming PCs anytime soon, but coming for archival and enterprise use.
    ?What should I actually buy if I’m building or upgrading a PC today?
    The sweet spot in 2025: a 1TB NVMe SSD for Windows and your main games/apps, plus a 2–4TB HDD for everything else (photos, old files, extra game installs). This gives you speed where it matters and cheap space where it doesn’t. If budget is tight, even a 500GB SATA SSD over an HDD is a massive improvement you’ll feel every single day.

    Bottom line: SSD opens GTA V in ~30 seconds. HDD takes 4–6 minutes. That same gap applies to every app, every boot, every file you open every single day. If you can only do one upgrade to a slow PC, replace the HDD with an SSD.