Author: CosmosGamer

  • PUBG: Battlegrounds Desktop

    PUBG: Battlegrounds Desktop

    Yes, PUBG is completely free on Steam and has been since January 2022. No purchase, no subscription, just download and drop in. PUBG went free-to-play in 2022 and its hardware requirements have remained largely unchanged since its early access days.

    Here’s everything you need to know before you install.

    How to Get It Free on Steam

    Head to the PUBG: Battlegrounds Steam page and hit “Play Game” it’s free, no catch. You’ll also find it free on Epic Games Store if you prefer that launcher.

    What’s locked behind the paid “BATTLEGROUNDS Plus” upgrade ($12.99 one-time)? Ranked mode, custom matches, and extra career stats. Everything else all maps, all modes, all weapons is free.

    System Requirements Minimum vs Recommended

    The minimum requirements for PUBG are: OS 64-bit Windows 10, CPU Intel Core i5-4430 or AMD FX-6300, RAM 8GB, GPU NVIDIA GeForce GTX 960 2GB or AMD Radeon R7 370 2GB, DirectX Version 11, Storage 40GB.

    The recommended requirements are: OS 64-bit Windows 10, CPU Intel Core i5-6600K or AMD Ryzen 5 1600, RAM 16GB, GPU NVIDIA GeForce GTX 1060 3GB or AMD Radeon RX 580 4GB, DirectX Version 11, Storage 50GB.

    Full Specs Comparison Table

    ComponentMinimumRecommended
    OSWindows 10 64-bitWindows 10 64-bit
    CPUIntel i5-4430 / AMD FX-6300Intel i5-6600K / AMD Ryzen 5 1600
    RAM8GB16GB
    GPUGTX 960 2GB / R7 370 2GBGTX 1060 3GB / RX 580 4GB
    DirectXVersion 11Version 11
    Storage40GB50GB
    NetworkBroadband internetBroadband internet

    What You Actually Get at Each Spec Level

    At minimum specs playable but rough. Running PUBG at minimum specs delivers average FPS of 40–50, dropping to 25–30 FPS during intense firefights. You’ll survive but the experience isn’t smooth enough for competitive play.

    At recommended specs this is where it gets good. A PC meeting recommended specs delivers average FPS of 60–80, with a maximum around 100 and a minimum of around 45 during intense fights. That’s the sweet spot for consistent, enjoyable gameplay.

    The real competitive sweet spot in 2026 is a GTX 1660 Super or RX 5600 XT. That combination with a modern 6-core CPU delivers consistent 80–100 FPS at 1080p on Medium-High settings smooth enough for competitive play without needing a high-end rig.

    Storage SSD Is Non-Negotiable

    Don’t install PUBG on an HDD if you can avoid it. PUBG’s large open-world maps like Erangel and Taego stream assets continuously HDD users frequently experience terrain pop-in and loading stutters mid-match.

    An SSD fixes both problems instantly faster load times and no mid-match texture pop-in that can cost you a firefight. Even a basic SATA SSD is a massive upgrade over a spinning drive for PUBG specifically.

    Best Settings for More FPS

    These are the settings that actually move the needle on performance:

    Turn the first-person FOV up to 103, turn off Motion Blur, Smooth Frame Rate, and V-Sync these cause input and visual lag that hurts gameplay, especially when the circle starts closing in.

    View Distance is the biggest single FPS setting in PUBG. View Distance affects how far terrain and objects render reducing it from Ultra to Medium significantly improves performance on outdoor maps without impacting close-range combat at all.

    Setting Shadows and Foliage to Very Low also helps make hiding opponents easier to spot while freeing up significant GPU headroom. It’s a competitive advantage and a performance gain at the same time.

    Quick Settings Reference for Low-End PCs

    SettingValueWhy
    V-SyncOffReduces input lag
    Motion BlurOffCleaner visuals, less GPU cost
    Smooth Frame RateOffUnlocks full FPS potential
    ShadowsVery LowBig FPS gain + easier to spot enemies
    FoliageVery LowFPS gain + competitive visibility
    View DistanceMediumBiggest single FPS improvement
    Anti-AliasingMedium or OffGPU headroom on older cards
    TexturesMedium minimumKeep at Medium going lower causes crucial details to blend into backgrounds
    FOV103Better situational awareness

    Which Map to Play on Low-End Hardware

    Not all PUBG maps run equally pick the right one for your PC. Erangel and Vikendi are the most demanding maps due to their large open vistas and detailed environments. Sanhok is more enclosed and typically runs 10–15% better if you’re on minimum-spec hardware, Sanhok is the most playable map.

    Start on Sanhok, learn the game, then move to bigger maps when you’re comfortable both with the gameplay and your FPS.

    Can You Play PUBG on 4GB RAM?

    Short answer no. PUBG’s official minimum is 8GB RAM and that’s a hard floor. On 4GB RAM, the game will struggle to load, crash frequently, and stutter constantly it’s below the supported threshold entirely.

    If you’re on 4GB RAM, upgrading to 8GB is the single most impactful hardware change you can make it’s inexpensive in 2026 and unlocks PUBG plus dozens of other modern titles that share the same 8GB minimum.

    Bottom line PUBG is free, accessible, and genuinely fun if your hardware meets the bar. It’s one of the more forgiving battle royale games in terms of minimum spec a GTX 960 technically gets you in the door. Get it free on Steam, install on an SSD, turn off shadows and motion blur, and drop into Sanhok first.
  • Age of Empires 2 DE Optimization Tips for Better Gameplay (2026 Edition)

    Age of Empires 2 DE Optimization Tips for Better Gameplay (2026 Edition)

    AoE2 DE is one of those games that looks simple until someone with 2,000 hours destroys your base in 10 minutes. The gap between a casual player and a good one comes down to PC settings, hotkeys, and economy discipline and all three are fixable right now.

    Here’s everything, in order.

    Part 1 PC Performance Optimization

    The Settings That Actually Move the Needle

    AoE2 DE is more CPU-dependent than GPU-dependent – large maps with 500 population units are CPU workloads, not graphics card workloads. Don’t waste time tweaking visual settings when your bottleneck might be elsewhere.

    Disable V-Sync, Anti-Aliasing, and Enhanced Graphics – these three settings have the biggest direct impact on FPS without affecting gameplay at all. Turn them off first before touching anything else.

    Map size and population cap are the biggest performance variables in the game. The larger the map and higher the population, the more it taxes your computer if you’re having performance problems, try creating a smaller map or capping population at 200 per team.

    Animate Fog and blood effects also eat GPU memory especially on integrated graphics where CPU and GPU share the same RAM pool. Turn off fog animations and reduce any settings that use GPU memory if you’re on a shared memory setup.

    Force High Performance Mode in Windows

    Windows doesn’t always use your GPU properly for AoE2 DE force it manually. From the Windows Start Menu, search for Graphics Settings → Browse → select AoE2DE_S.exe from your Steam folder → click Options and choose High Performance → save and relaunch.

    This single change fixes the “good PC, bad performance” problem that confuses a lot of players Windows quietly assigns the wrong GPU adapter to the game until you override it.

    The Threaded Optimization Fix

    If you’re getting stutter on an NVIDIA GPU, disable Threaded Optimization. Disabling threaded optimization in the NVIDIA Control Panel under Manage 3D Settings significantly reduces stutter and stabilises FPS before this fix, some users described the game as a slideshow.

    Go to NVIDIA Control Panel → Manage 3D Settings → Program Settings → AoE2DE → Threaded Optimization → Off. It’s counterintuitive but widely verified across the community.

    Network Optimisation for Multiplayer

    Multiplayer lag in AoE2 DE is often a network configuration issue, not a PC issue. Close other programs accessing the internet browsers, other game clients, streaming apps and limit other devices on your network during matches.

    Open these ports for the best connection quality: TCP Port 8888, UDP Port 9999, and Port 3478 (both UDP and TCP) forwarding these on your router eliminates most connection instability in multiplayer sessions.

    Graphics Settings Reference Table

    SettingRecommended ValueImpact
    V-SyncOffDirect FPS gain
    Anti-AliasingOffGPU headroom
    Enhanced GraphicsOffCPU and GPU relief
    Animate FogOffReduces memory usage
    Shadow QualityLow or OffCPU saving on large maps
    ResolutionNativeDrop to 75% if struggling
    Population Cap200 per teamReduces late-game CPU load
    Map SizeSmall/Medium for low-end PCsBiggest single performance variable

    Part 2 Gameplay Optimization: Play Like a Pro

    The One Rule That Explains 90% of Losses

    Never stop producing villagers ever. Ceasing production of villagers is what gets most players killed if you ever think “I wish I had more food,” the answer is always more villagers on food.

    Keep your Town Centre producing at all times. Right from the start keep the TC producing whether villagers or research and as soon as you reach Castle Age, build additional Town Centres to accelerate production further.

    Master the Dark Age Default First

    Every pro player has a “Dark Age default” a set opening they can execute on autopilot. Pro players have a set yet flexible method of blasting through the Dark Age they know what to prioritise and build, keeping the game plan consistent while adapting to the opponent.

    Start with the 23 Pop Archer build order and practice it 3–10 times a day against AI. The 23 Archers build is the easiest to learn and teaches the core economy loop that underpins every intermediate and advanced build order in the game. The specific units matter less than ingraining the economy habits.

    Build Order Benchmarks Know If You’re Improving

    Track these timestamps to know if your Dark Age is actually getting better:

    Clicking Feudal Age with 22 population at 8:07 is the maximum benchmark or 23 population at 8:35. Hitting Feudal Age with 12 to 14 farms before 15 minutes confirms your eco transition is working correctly.

    Research economic upgrades the moment you hit Feudal Age every second of delay on Loom, Double-Bit Axe, and Horse Collar compounds across the rest of the game.

    Hotkeys The Skill That Separates Everyone

    The single most important hotkey in AoE2 DE is the period key (.) The idle villager hotkey instantly selects your next idle villager so you can put them back to work without losing sight of your army it’s the most impactful single shortcut in the game.

    Learn these five hotkeys before anything else:

    HotkeyActionWhy It Matters
    HSelect Town CentreQueue villagers without clicking around
    . (period)Select idle villagerNever waste a villager second
    Ctrl + 1–9Assign control groupManage army and eco simultaneously
    1–9Select control groupInstant army access without camera move
    QEconomic build menuBuild drop-off points instantly

    Alt + Q opens the economic view instantly showing how many villagers you have on each resource for fast economic balancing without breaking your rhythm.

    Control Groups The Habit That Makes You Dangerous

    Assign your army to Ctrl+1 the moment you produce units. Control groups let you attack on one side of the map while simultaneously queuing villagers from your Town Centre this is the core skill separating intermediate from advanced players.

    Use Shift-click to queue multiple commands without babysitting units. Send your scout to explore, hold Shift and click multiple waypoints the scout follows the entire route while you focus on economy. This one habit alone doubles your effective map coverage in the Dark Age.

    Economy Distribution Don’t Stockpile Resources

    Resources sitting in your stockpile are wasted resources. Having lots of resources in stockpile is not good you have to spend them. Focus on 1 or 2 unit types and mass them, researching their upgrades and dedicating your economy to the resources those units need.

    The resource-to-unit mapping is simple: Archers need Wood and Gold build Lumber Camps and Gold Mines. Knights need Food and Gold build Farms and Gold Mines. Pick your unit, feed the right resources, don’t split equally across everything.

    Rushing Why It Works and When to Use It

    An early rush isn’t about winning instantly it’s about economic damage and map control. Scout Rush and Archer Rush are the most common early strategies the objective is to kill villagers, gain map control, and create an economic advantage that snowballs through the rest of the game.

    Killing even two or three villagers early puts your opponent permanently behind. If you kill villagers, develop your economy even further reach Castle or Imperial Age earlier and produce more units than the enemy can match, because more resources always equals more units.

    Best Beginner Civilisations to Learn With

    Don’t try to learn AoE2 on a complex civilisation. Huns, Britons, and Persians are the most beginner-friendly civilisations Huns don’t need houses saving significant wood for military production, Britons consume sheep faster keeping the Town Centre in constant villager production, and Persians start with extra resources allowing constant villager production from the very first seconds.

    Pick one of these three and stick with it for your first 50 games. Mastering a simple civilisation teaches you the game’s core systems switching civilisations is easy once the fundamentals are solid.

    Watch Replays The Free Coaching Nobody Uses

    Watching your own replays is the fastest improvement method in the game. Watching and analysing your replays and pro replays gives you an outside view of your economy gaps, idle time, and unit micro mistakes that are invisible while you’re playing.

    TheViper and Hera on YouTube are the community’s go-to pro players for learning. You can even download their hotkey profiles directly from the community using a pro player’s hotkey layout from the start builds the right muscle memory immediately rather than having to retrain habits later.

    The honest truth about AoE2 DE improvement: Economy first, hotkeys second, military third. Every game you lose to a stronger player is a game where their villagers outworked yours fix the villager production habit before anything else, and the rest follows naturally.

  • Helldivers 2 Optimization Tips for Better Gameplay (2026 Edition)

    Helldivers 2 Optimization Tips for Better Gameplay (2026 Edition)

    Whether you’re dying on Difficulty 7 or grinding Super Helldive, the gap between a good Helldiver and a great one comes down to settings, loadout logic, and mission discipline. Here’s everything you need PC performance first, then battlefield strategy.

    Part 1 PC Performance Optimization

    The Real FPS Killer Isn’t What You Think

    Most players attack shadow quality and textures first that’s the wrong approach for Helldivers 2. The game’s primary FPS killer is its particle simulation system every explosion, Terminid acid burst, and Automaton rocket impact generates hundreds of particles simultaneously, and in high-difficulty missions the particle load alone can cut frame rates by 30–40%.

    Target particles and volumetrics first, everything else second. That’s the order that actually moves the needle.

    The Exact Settings to Change

    Here’s the full breakdown tested and verified for 2026:

    SettingRecommended ValueWhy
    Render Scale85–90% + DLSS/FSR QualityThis is the single most important slider it controls internal resolution before upscaling
    Particle QualityMediumMedium still looks great Ultra tanks FPS during intense firefights exactly when you need frames most
    SSGI (Screen Space Global Illumination)OffTurning it off saves significant GPU headroom with minimal visible impact during actual gameplay
    Volumetric FogLow or OffOne of the biggest GPU costs with the least gameplay impact
    Texture QualityMatch your VRAMRunning textures above your VRAM limit causes stuttering as assets stream in and out
    Motion BlurOffUseless in fast combat, costs GPU cycles
    V-SyncOffDisabling V-Sync unlocks the full potential of your hardware use frame cap instead
    Shadow QualityMediumLess impact than particles but still worth dropping
    Depth of FieldOffZero gameplay value, real performance cost

    The Anti-Cheat Stutter Fix Nobody Talks About

    Helldivers 2 uses nProtect GameGuard, and it causes stutter that looks exactly like a GPU problem. The anti-cheat software performs periodic system scans that spike CPU usage players mistake this for a graphics bottleneck and waste time lowering visual settings that aren’t the actual cause.

    The fix: Add Helldivers 2 and GameGuard to your antivirus exclusion list. This alone eliminates the random mid-mission freeze spikes that no graphics setting change can fix.

    GPU Driver and Upscaling Tips

    Update your GPU driver Helldivers 2-specific optimisations are released regularly. NVIDIA and AMD release Helldivers 2-specific driver optimisations that can meaningfully improve stability and frame rates.

    If you have an RTX 40 series GPU, enable Frame Generation. If you have an NVIDIA RTX 40 series or newer, you can enable 2x frame gen at the driver level using the NVIDIA App it’s a great option with lower latency than third-party alternatives. On older cards, the Lossless Scaling app on Steam achieves similar results for a small cost.

    Part 2 Gameplay Optimization: Play Like a Pro

    Build Your Loadout With a Job System

    The biggest mistake players make is treating stratagems like a wishlist rather than a team role. Every Helldive loadout fills four stratagem slots assign each slot a job before picking specific items: Slot 1 for anti-heavy, Slot 2 for crowd control, Slot 3 for utility or support, Slot 4 for emergency response.

    A full squad has 16 stratagem slots total coordinate them. The most common mistake is everyone running the same three or four meta picks the squad ends up with eight copies of Eagle Airstrike, no dedicated anti-tank role, and no one covering crowd control.

    The Universal Starter Pack Works on All Factions

    If you don’t know where to start, use this. Eagle Airstrike + Orbital Precision Strike + Guard Dog Rover + Eagle 500KG Bomb covers Bug Hole and Fabricator clearance, heavy kills via OPS and 500KG, and passive chaff management via Rover it requires no team coordination and works at Difficulty 7–9 across every faction.

    Build from this foundation and swap out individual slots as you learn what each faction demands.

    Faction-Specific Loadout Logic

    Don’t bring the same build to every mission each faction punishes the wrong tools hard. Terminids are flesh and swarms fire and area control shine. Automatons are armour and range bring penetration and heavy hitters. Illuminate sit somewhere in between adaptability is key.

    Here’s the quick faction breakdown:

    FactionPrimary ThreatBest ToolsAvoid
    TerminidsSwarms + ChargersFire, area damage, Breaker shotgunSingle-target orbitals
    AutomatonsArmoured heaviesAutocannon, Railcannon, penetration weaponsFlamethrowers at range
    IlluminateShields + Voteless hordesAdaptable builds, arc weaponsSlow heavy weapons
    CyborgsShock troops + tanksHeavy stratagems, armour-stripping primariesLight area damage

    The Two Stratagems That Go In Almost Every Build

    These two form the backbone of the current meta regardless of faction or difficulty. The Eagle Airstrike is unlocked at Level 2 for 4,000 Requisition Slips it delivers six bombs in a straight line with Anti-Tank III armour penetration on direct hits, closes Bug Holes, and destroys Fabricators without walking up to them.

    The Orbital Precision Strike is the reliable heavy-kill option. Orbital strikes dominate for their reliability they land on a precise point regardless of terrain and handle armoured threats that primaries can’t crack. These two combined handle primary objectives in most missions across all factions.

    Save Your Big Stratagems Don’t Dump Early

    Orbital Lasers and cluster bombs are panic buttons, not openers. Large offensive stratagems are best saved for bottleneck zones or situations when your squad is pinned dumping them early without reason wastes their potential entirely.

    Use Eagles for consistent objective clearing. Save Orbitals for emergencies and elite threats. That discipline alone improves your Helldive completion rate significantly.

    Post-Patch 6.1.0 What Changed in March 2026

    Three things shifted the meta meaningfully this patch know them before you load in. The GL-21 Grenade Launcher lost its heavy armour penetration, flamethrowers now panic enemies on contact, and the Laser Cannon’s beam extended to 1,000m range transforming it from a close-range support option into a viable sniper-class stratagem on the bot front.

    Flamethrowers are now genuinely meta on Terminid missions. Bugs physically panic when set on fire Chargers break charge paths, Brood Commanders interrupt nearby formations, Hunters scatter. If your last flamethrower run was before March 2026, it’s a different weapon now.

    Mission Discipline The Habits That Separate Good Players

    Always destroy spawn structures immediately. Large red areas on the map indicate enemy base camps containing spawn structures Bug Holes for Terminids that continually generate enemies if left intact. Explosives are your best friend here. Leaving them active means fighting the same patrol ten times instead of once.

    Complete side objectives they’re not optional at high difficulty. Side objectives boost mission rewards and often provide powerful advantages activating SEAF artillery grants your team additional fire support for the rest of the mission. A team that clears side objectives consistently outperforms a team that doesn’t on every difficulty level.

    Don’t chase the meta blindly chase understanding. There is no single “best build.” Mission type matters: Defence missions want turrets and sustained fire, Search & Destroy missions want big explosives, Commando missions with limited call-ins make carryable persistent gear far more valuable.

    Know your mission type. Build for the faction. Coordinate your squad’s 16 slots. That’s the formula that clears Super Helldive not copying the current top loadout from Reddit.

  • GTA 6 Map Everything We Know About Leonida So Far

    GTA 6 Map Everything We Know About Leonida So Far

    The GTA 6 map is already the most analysed piece of unreleased gaming content in history. Over 16,000 community members have spent years dissecting every trailer frame, leaked coordinate, and road sign and what they’ve pieced together is extraordinary. Here’s everything we know right now.

    The Big Picture What Is Leonida?

    GTA 6 is set in Vice City and the wider fictional state of Leonida Rockstar’s version of Florida. The state of Leonida will consist of at least 5 counties, and according to Rockstar Games, players can expect the biggest and most immersive Grand Theft Auto experience ever made.

    This isn’t just one city with countryside around it. The map includes urban cities, swamplands, tropical archipelagos, mountain ranges, and inland lakes making it more geographically diverse than any GTA game before it.

    How Big Is It Really?

    The size numbers are genuinely staggering. GTA V takes roughly 3 minutes and 30 seconds to cross by car GTA VI takes approximately 6 minutes and 10 seconds, proving its vast scale.

    Community-driven mapping projects that correlate coordinates found in trailers and early development footage show Leonida’s landmass is easily 1.5x to 2x larger than Los Santos. And size isn’t even the most impressive part density is. GTA 6 is rumoured to feature 700+ enterable shops and locations, including nightclubs, motels, restaurants, pawn shops, supermarkets, fast food joints, gun stores, and a Vice City Metro Station.

    The 6 Confirmed Biomes Each One Is a Different Game

    GTA VI’s map is split into six distinct zones, each with its own unique look and feel representing the diverse ecosystem of the fictional state of Leonida. Here’s what each one brings:

    Vice City The Crown Jewel

    Vice City returns as the centrepiece of GTA 6, reimagined for the modern era packed with iconic neighbourhoods such as Ocean Beach, South Beach, Little Haiti, Little Havana, Venetian Islands, and Crosstown.

    The pastel hotels, art deco skylines, and bustling nightlife give Vice City its signature Miami-inspired flair. Players will explore major hubs like Vice City International Airport and the busy port, while trams and highways make travel seamless across the urban core.

    The Grassrivers GTA’s Everglades

    This is the biome nobody expected and everyone is excited about. The Grassrivers biome offers a massive, swampy expanse filled with unique wildlife and hidden “Florida Man” style random events.

    The swamps are teeming with alligators, flamingos, and dynamic predatory systems and airboats are a confirmed vehicle class specifically for navigating its shallow, muddy waterways. It’s unlike anything in GTA V’s map.

    The Leonida Keys Island Life

    The Leonida Keys bring a slice of island life to the GTA 6 map, offering a mix of laid-back beach vibes and dangerous waters complete with Jason’s starting apartment, lively bars, casual hangouts, and plenty of secrets lurking beneath the waves.

    Underwater exploration plays a major role here. The ocean boasts enhanced underwater exploration with sharks, turtles, and expansive reef systems.

    Mount Kalaga The Wilderness

    The northern reaches of the state offer a sanctuary of space Mount Kalaga, a national landmark, is a haven for hunting, fishing, and off-road exploration, with rich backwoods home to hillbilly mystics and paranoid radicals living beyond the gaze of officialdom.

    Think Blaine County but wilder, bigger, and with actual wildlife systems. It’s designed as a direct contrast to Vice City’s neon chaos.

    Ambrosia Biker Gang Territory

    Ambrosia’s dry heat makes it a hotspot for wildfires and the destruction caused by uncontrolled blazes is nothing compared to the chaos wrought by the local biker gangs that run this industrial town, full of factories that are sure to be fronts for nefarious activities.

    Expect cavernous factory shootouts and a distinctly different atmosphere from Vice City’s glamour. This is where things get genuinely dangerous.

    Port Gellhorn The Forgotten Coast

    This forgotten coast houses Leonida’s dark underbelly, filled with drug pushers, gangsters, and desperate residents with nothing to lose a once-popular vacation spot neglected and fallen into crime and poverty, now standing as a monument to the pitfalls of short-sighted greed.

    Its dry, bumpy terrain is confirmed to be perfect for dirt bikes and quad bikes. It’s GTA 6’s version of the rough side of town and it looks fascinating.

    The Secret Second State Gloriana

    There’s strong evidence of a second playable state that almost nobody is talking about. There is a rumoured second state Gloriana, inspired by Georgia spotted on in-game licence plates and potentially bordering Leonida to the north.

    Instead of releasing one massive map at launch, the base game will feature Vice City and Leonida while additional cities and regions will be added post-launch, with new cities and missions introduced over time through seasonal-style updates. Gloriana could be one of those post-launch expansions.

    How the Community Built the Map Before Rockstar Revealed It

    The fan mapping project behind the GTA 6 map is one of the most impressive community efforts in gaming history. Over 16,000 Discord members collaborated to triangulate locations, measure distances, and overlay landmarks using RAGE Engine coordinates embedded in leaked 2022 footage that gave exact in-game spatial data, while fans analysed 2,276 frames of Trailer 1 and all frames of Trailer 2 in 4K, identifying road signs, buildings, and skylines.

    The result? The unofficial GTA 6 mapping community has built what is considered to be 95–98% accurate to the final game. That’s an extraordinary achievement and it’s entirely player-built.

    Quick Biome Reference Table

    BiomeBased OnWhat’s There
    Vice CityMiami, FloridaNeon streets, beaches, art deco, nightlife
    The GrassriversFlorida EvergladesSwamps, gators, airboats, wildlife
    Leonida KeysFlorida KeysIslands, diving, boats, Jason’s apartment
    Mount KalagaFlorida wildernessHunting, off-road, forests, wildlife
    AmbrosiaIndustrial FloridaBiker gangs, factories, wildfires
    Port GellhornForgotten coast townsCrime, poverty, dirt bikes, motels

    Bottom line Leonida isn’t just a bigger Los Santos. It’s six completely different worlds stitched together with a density of interiors, wildlife, and NPC behaviour that no previous GTA map has attempted. November 19, 2026 can’t come fast enough.

  • How to Make Money Fast in GTA V Story Mode

    How to Make Money Fast in GTA V Story Mode

    Running low on cash in GTA V Story Mode is genuinely frustrating you can’t buy weapons, can’t upgrade cars, can’t do anything fun. The good news is there’s a clear path from broke to billionaire, and most players miss the biggest opportunity completely.

    Here’s every method, ranked from quick cash to serious wealth.

    Method 1 Rob Convenience Stores (Early Game)

    This is your starting income before anything else opens up. Walk in, aim at the cashier, grab the cash and run. Each store nets you anywhere from $600 to $2,000 depending on the location and how long you take.

    Pro tip shoot the cash register after the clerk empties it for extra loose bills. Smaller stores in residential areas have slower police response than downtown locations.

    Method 2 Steal and Sell Cars at LSC

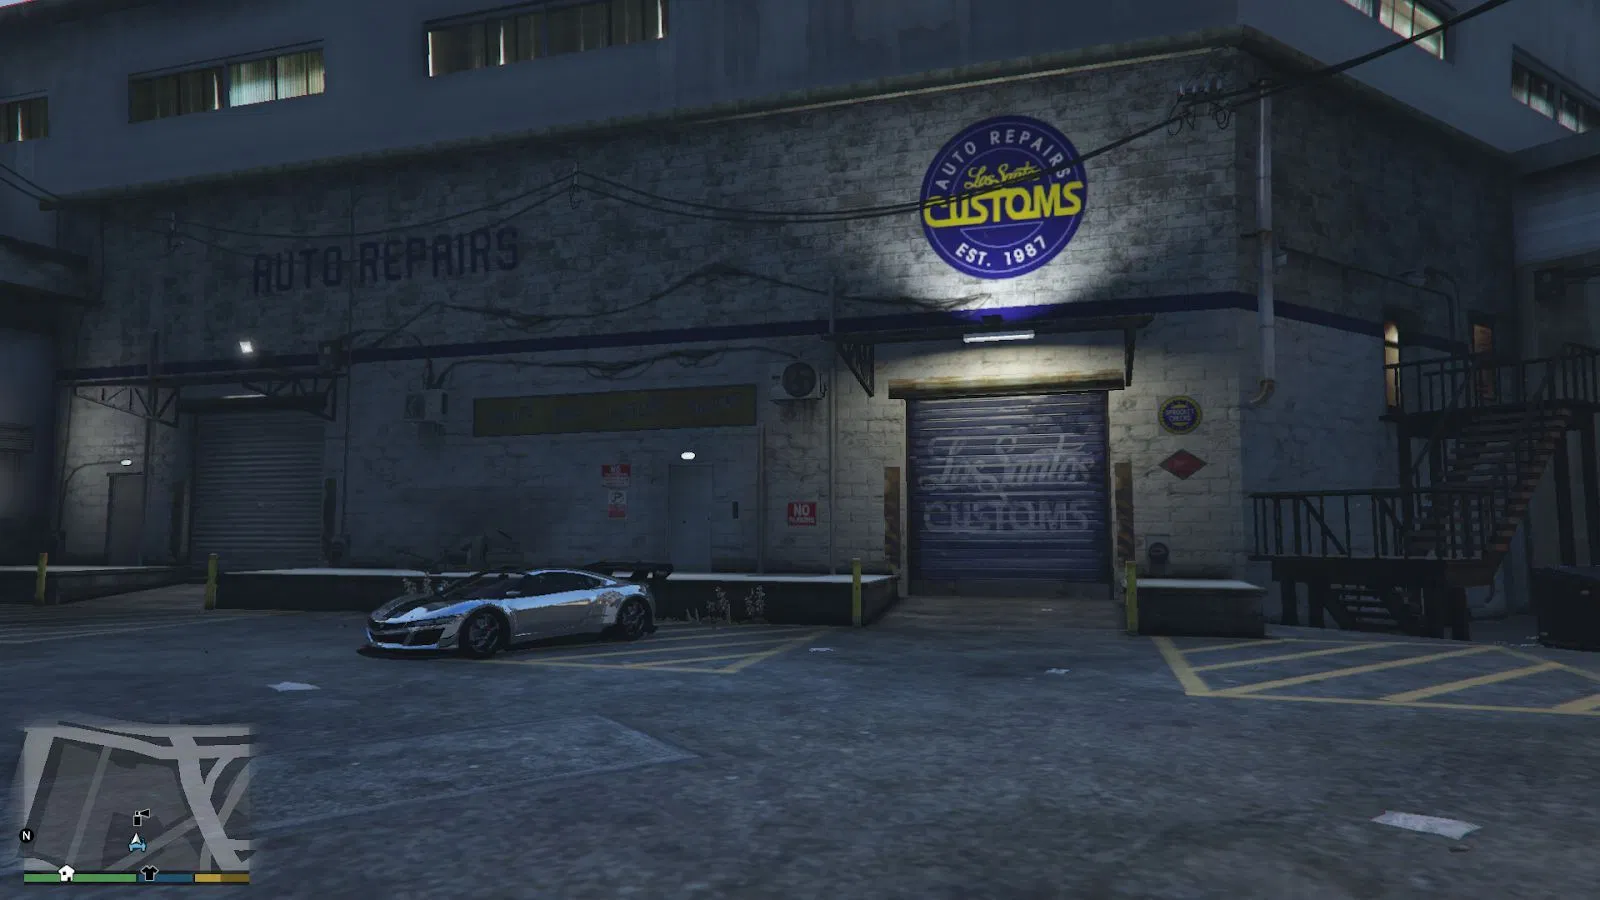
    Find a high-value car, drive it to Los Santos Customs, and sell it instantly. Stealing cars and selling them at Los Santos Customs nets around $5,000–$10,000 each.

    There’s a catch each character can only sell one car per in-game day. Switch between Michael, Franklin, and Trevor to maximise sales across all three.

    Method 3 Rob Armoured Trucks

    Armoured trucks randomly appear on the map as you drive around look for the blinking blue dot. Robbing them is a quick way to get $3,000–$8,000 per van.

    It’s worth noting these security vans have bulletproof tires and two guards protecting the money so come prepared with explosives to crack them open fast and get out before the police respond.

    Method 4 Hidden Package Farming (Underwater)

    This is the most underused early money method in the game. Scattered across the ocean floor are money briefcases containing anywhere from $7,000 to $25,000 and switching between characters right after picking one up instantly respawns it, allowing unlimited farming.

    You’ll need scuba gear or a submarine to reach most of them. It’s slow, but completely safe no wanted level, no shooting, just free money on the ocean floor.

    Method 5 Complete the Big Heists Properly

    The six story heists are your primary source of serious cash mid-game. The final heist, the Big Score earns $40 million per character. That’s the money you need to make the next method actually work.

    Crew choice matters more than most players realise. Hiring cheap crew members costs you money through mistakes and failures though some cheap crew members improve with experience, like Norm Richards who starts incompetent but becomes reliable after surviving The Jewel Store Job.

    Method 6 Lester’s Assassinations + Stock Market (The Big One)

    This is the method that turns millionaires into billionaires and most players waste it by doing it too early.

    The biggest mistake players make is rushing through Lester’s assassination missions early in the story. The stock market manipulation opportunities disappear if you don’t time things correctly. Complete the entire story first, then do all assassinations back to back with maximum capital invested.

    Here’s exactly what to invest in before each mission:

    Assassination MissionBuy BeforeSell AfterThen Buy
    The Hotel AssassinationBetta Pharmaceuticals (BET)At peakBilkington (BIL) rebound
    The Multi TargetDebonaire (DEB)At peakRedwood Cigarettes (RWC)
    The Vice AssassinationFruit Computers (FRT)At peakFacade (FAC)
    The Bus AssassinationNo investment needed
    The Construction AssassinationGold Coast (GCD)At peak

    Following this exact strategy with $40 million per character results in approximately $800 million to $2.1 billion per character this surpasses any other money-making method in the game.

    Method 7 Buy Properties for Passive Income

    Once you have serious cash, put it to work. You can buy several businesses in GTA V Story Mode including scrapyards, cab services, and other properties after ownership, each property generates regular income and some unlock exclusive missions with special perks.

    The best properties to buy early are the ones that generate income AND unlock missions like the Taxi Company for Franklin and the Scrapyard. Avoid just sitting on cash.

    Method 8 Street Races (Franklin)

    Franklin has a specific advantage here that the other characters don’t. Franklin has special missions from Hao where he can compete in illegal street races found across Los Santos.

    Win the race, collect the payout, repeat. It’s not the fastest money in the game but it’s genuinely fun and Franklin’s special ability (slow-motion driving) gives him a clear edge in tight races.

    Method 9 Bail Bond Missions (Trevor)

    Trevor has his own unique income stream through Maude’s Bail Bond missions. Maude will locate the area of someone in need of capture Trevor can maximise the money if he finds these targets and brings them back alive and breathing.

    Bringing targets back alive always pays more than killing them. Use Trevor’s special ability invincibility rage mode to subdue targets without accidentally killing them during the capture.

    Quick Earnings Reference

    MethodPayoutEffortBest For
    Store Robberies$600–$2,000LowEarly game pocket money
    Sell Stolen Cars$5,000–$10,000LowDaily passive income
    Armoured Trucks$3,000–$8,000MediumMid-game cash boost
    Hidden Packages$7,000–$25,000LowSafe early farming
    HeistsUp to $40MHighMain story progression
    Assassinations + Stocks$800M–$2.1BStrategicEnd game only
    PropertiesVaries weeklyNone after purchaseLong term passive
    Street Races$500–$10,000MediumFranklin specific
    Bail Bonds$10,000 aliveMediumTrevor specific

    The One Rule That Changes Everything

    Don’t touch Lester’s assassination missions until you’ve finished the entire story. This is the mistake that costs players billions not hundreds of thousands, actual billions.

    Completing assassinations with maximum capital ($40 million per character from The Big Score) creates wealth faster than any cheat could. Do the story. Do The Big Score. Invest everything. Then do the assassinations. That’s the sequence that turns GTA V Story Mode into a legitimate billionaire simulator.

  • Best Cars to Customize in GTA V

    Best Cars to Customize in GTA V

    Not every car is worth taking to Los Santos Customs. The best cars to customize are the ones with the most modification options, the best visual payoff, and solid performance to back it up. Here’s the community’s top picks both free and paid.

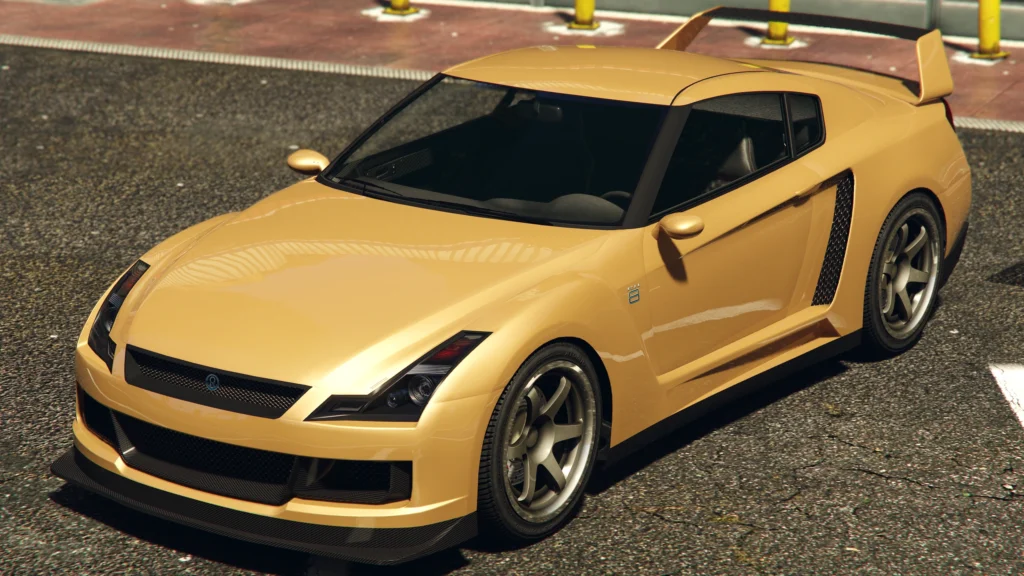
    1. Annis Elegy RH8 Best Free Car to Customize

    The Elegy RH8 is completely free just link your Rockstar Social Club account and grab it from Legendary Motorsport at no cost.

    It’s highly customizable and Rockstar also made it super-moddable players can completely transform their Elegy RH8 into the Elegy Retro Custom, which is inspired by the Nissan GT-R Skyline. In GTA Online you can even recreate Paul Walker’s iconic Skyline from 2 Fast 2 Furious livery and all.

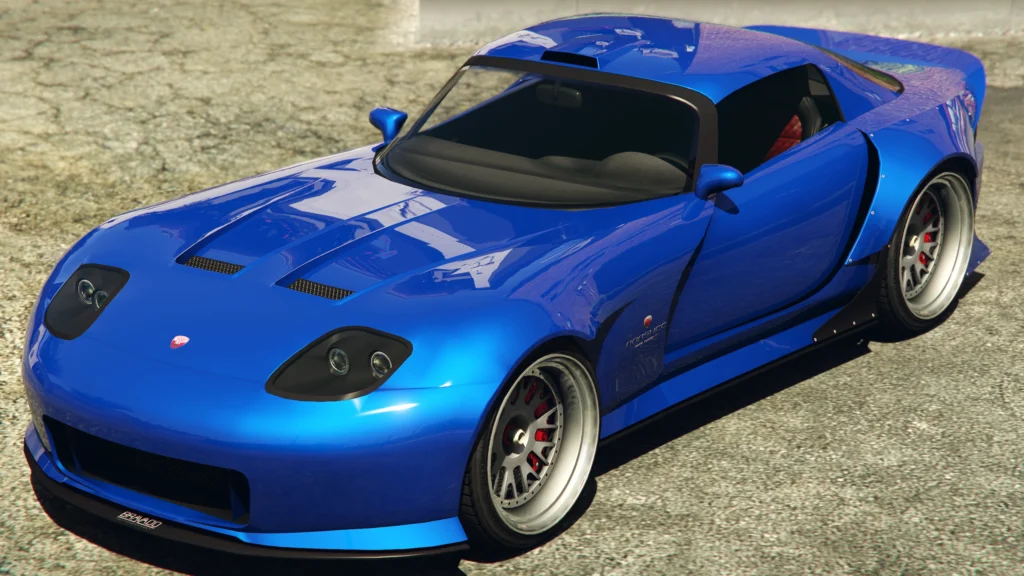
    2. Bravado Banshee 900R Best Sports Car

    The Bravado Banshee starts at just $105,000 base price and hits a top speed of 131 mph one of the fastest customizable cars in the game.

    It’s been a GTA staple since day one for good reason. The Banshee 900R has a powerful engine that handles both high-speed races and tight corners, and can be heavily customized in GTA Online to fit any style.

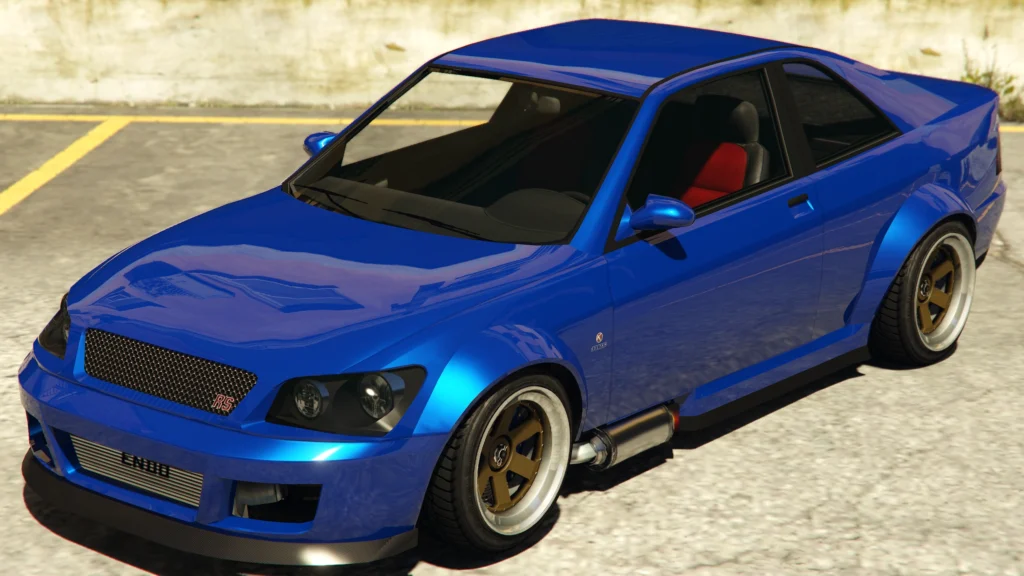
    3. Karin Sultan RS Best Bang for Buck

    The Sultan starts at just $12,000 base price you can even steal it off the street and upgrading it to the Sultan RS turns it from a sports car into a supercar class vehicle entirely.

    That class change alone makes it one of the most unique upgrades in the game. Players can go with multiple builds a rally car look or a clean street build making it one of the most versatile customization platforms available.

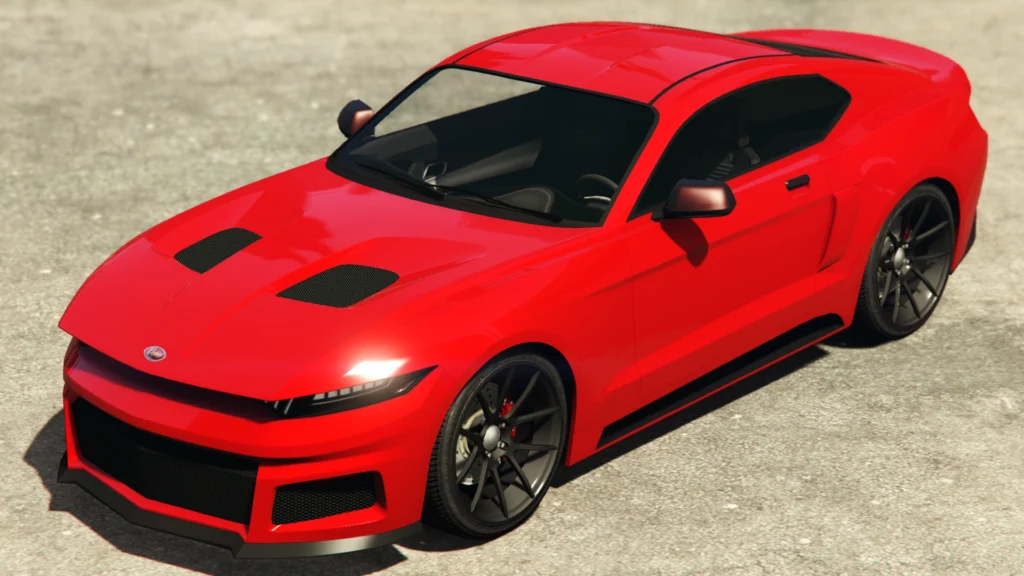
    4. Vapid Dominator GTX Best Muscle Car

    The Dominator GTX is the muscle car the customization community keeps coming back to. It comes with a whole host of unique parts including the ability to change the hood to feature a glass window that lets you see the engine even when the hood is down.

    Players can personalise fenders, grills, add mudguards, and apply a vanity hood it’s one of the most visually distinctive builds you can create in the entire game.

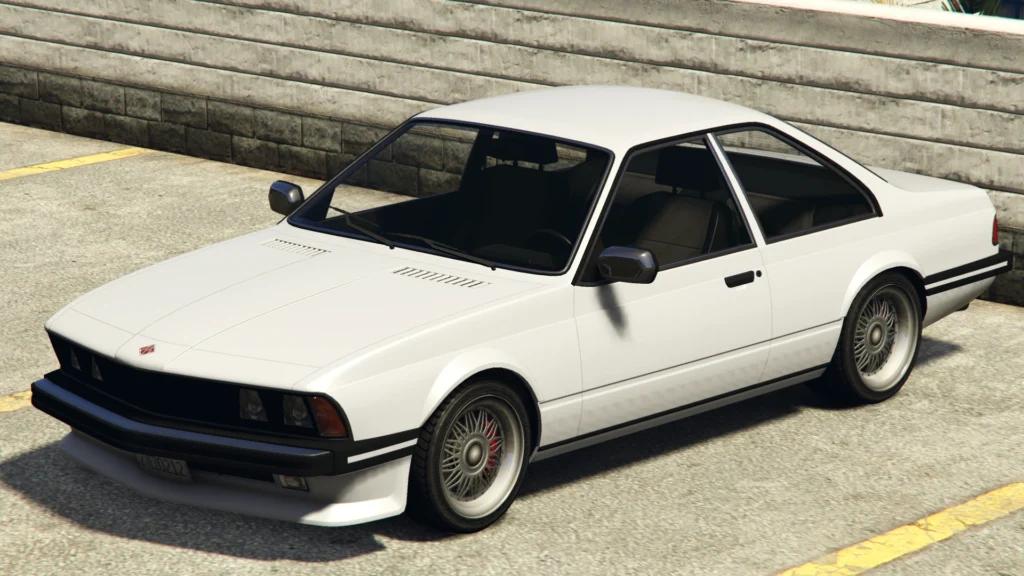
    5. Übermacht Zion Classic Best Budget Luxury

    Priced at $812,000, the Zion Classic comes with over 75 customization options from bumpers to paint jobs making it a genuinely affordable option compared to other luxury models.

    75+ options is the highest raw customization count in its price bracket. It’s the car for players who want a premium-looking build without spending multiple millions.

    6. Übermacht Sentinel Classic Widebody Best Drift Build

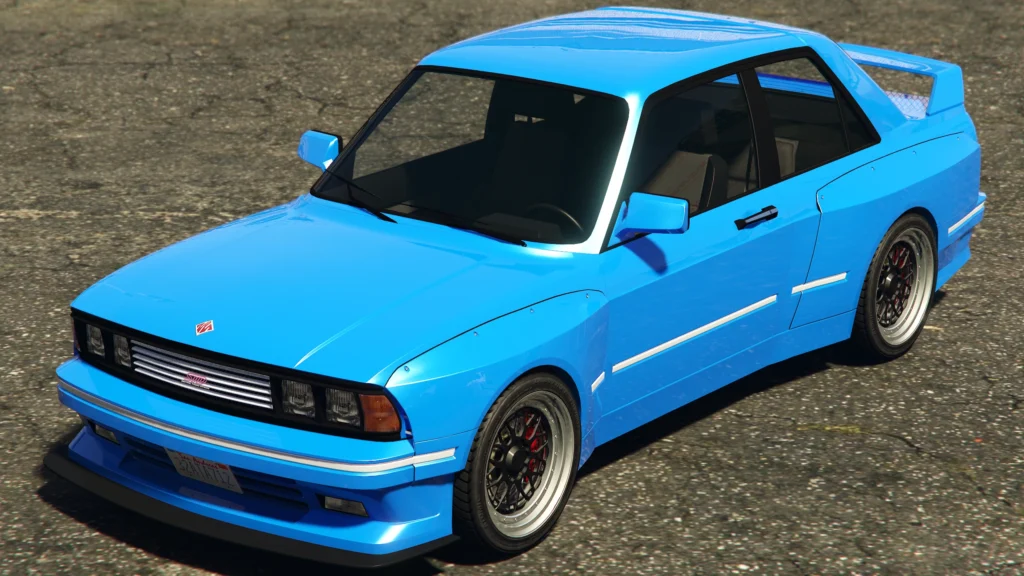
    At $650,000 base price, the Sentinel Classic is based on the BMW E30 M3 and with the Widebody upgrade it becomes a drift-ready beast with improved performance and handling.

    It’s consistently ranked as one of the best vehicles for drift races in the community. The widebody kit transforms its silhouette completely one of the most dramatic visual upgrades available at any price point.

    7. Pfister Comet Retro Custom Best Porsche Build

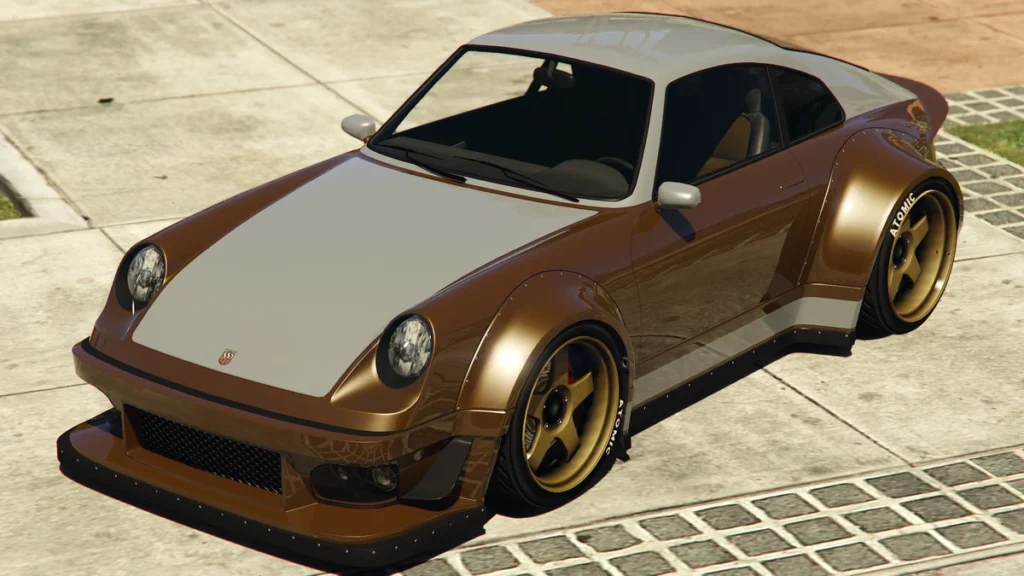
    Based on the Rauh-Welt Porsche 911 930, the Comet starts at $100,000 and the Retro Custom upgrade brings improved speed, handling, and an iconic widebody kit.

    If you’re a Porsche fan, this is as close as GTA V gets. The widebody kit is one of the most detailed body modifications in the game and the car’s handling rewards skilled drivers.

    Quick Reference Table

    CarBased OnStarting PriceBest For
    Annis Elegy RH8Nissan Skyline GT-RFreeBest starter, maximum value
    Bravado Banshee 900RDodge Viper$105,000Speed + style
    Karin Sultan RSLexus IS300$12,000Budget supercar build
    Vapid Dominator GTXFord Mustang$125,000Muscle car enthusiasts
    Übermacht Zion ClassicBMW 6 Series$812,000Most options per dollar
    Sentinel Classic WidebodyBMW E30 M3$650,000Drift builds
    Pfister Comet Retro CustomPorsche 911 930$100,000Porsche fans

    The honest starting point for anyone? Grab the Elegy RH8 for free first max it out, see what customization feels like in GTA V, and then decide what direction your garage goes from there. You’ll spend zero dollars and end up with one of the most recognisable builds in the game.

  • Los Santos Customs Locations in GTA V

    Los Santos Customs Locations in GTA V

    Los Santos Customs (LSC) is your one-stop shop for everything vehicle customization in GTA V. Look for the spray can icon on your map that’s your destination.

    How Many Locations Are There?

    There are a total of four branches of Los Santos Customs in San Andreas three located in Los Santos and one in Blaine County.

    On your map, look for the spray can icon all four show up clearly and you can set a waypoint directly to the nearest one.

    All Four LSC Locations

    1. LS International Airport there’s an LSC right near the airport, ideal for quick modifications before or after missions or a quick getaway. Most players use this one first since it’s easy to find early in the game.

    2. Burton, Los Santos sits in the city centre near Rockford Hills. This is the most convenient location if you’re operating downtown and need a quick respray or repair between missions.

    3. La Mesa, Los Santos located in the industrial east side of Los Santos near the docks. Great if you’re coming in from the east side of the map and don’t want to drive across town.

    4. Harmony, Blaine County the rural location out near Sandy Shores. The Harmony branch of Los Santos Customs can be purchased by Franklin for $349,000 and once bought, Hao will no longer charge Franklin for modifications. This is the best long-term investment in story mode free upgrades for life.

    What Can You Actually Do There?

    Los Santos Customs allows players to modify vehicles with resprays, armor, brakes, engine upgrades, and much more as well as horns including stock horn, truck horn, cop horn, clown horn, musical horns, and holiday content horns.

    Here’s the full breakdown of what’s available:

    Visual Customisation:

    • Resprays primary colour, secondary colour, metallic, matte, pearlescent, and chrome finishes
    • Body Kits spoilers, bumpers, side skirts, custom hoods
    • Wheels rims, tyre type, tyre smoke colour
    • Windows tint levels from limo black to light smoke
    • Neon Lights undercar lighting in multiple colours
    • Headlights xenon upgrades and colour changes
    • Liveries custom wraps on eligible vehicles
    • Horns standard to novelty and musical options

    Performance Upgrades:

    • Engine increases acceleration and top speed
    • Transmission smoother gear shifts
    • Turbo major boost to acceleration
    • Suspension affects handling and ride height
    • Brakes shorter stopping distance
    • Armour reduces damage taken in combat

    What Vehicles Can’t Be Customised?

    All cars and motorbikes can be upgraded in GTA V however, aircraft, bicycles, police cars, fire engines, ambulances, taxis, FIB vehicles, and military vehicles are not customisable.

    Basically if it’s a civilian car or bike, you can mod it. If it belongs to the government or emergency services, you can’t.

    The Bonus Trick Most Players Miss

    Entering Los Santos Customs with a wanted level clears it instantly. Drive in hot, pay for a basic respray, and walk out clean with zero stars. It’s the fastest and cheapest wanted level wipe in the game.

    Also worth knowing Los Santos Customs will also repair vehicles if required. You don’t have to only go there to mod it doubles as the best repair shop on the map.

    Story Mode Tip Free Modifications for Life

    Franklin can purchase the Harmony Los Santos Customs shop for $349,000 after completing the mission Nervous Ron. Once bought, every single car modification at that location is completely free for Franklin no charge, forever.

    It pays for itself quickly. If you’re playing Story Mode, this is one of the best property investments in the game.

    LSC in GTA Online Extra Features

    In GTA Online, various types of car parts are unlocked as players rank up progressive performance upgrades are unlocked by winning races. The more you race and rank up, the more customisation options open up.

    You can also sell personal vehicles at LSC. Any personal vehicle purchased in GTA Online and later sold at Los Santos Customs will net 60% of the new cost and 50% of the value of any applied customisation.

    Quick Reference Table

    Location Area Best For
    LS International Airport Southwest Los Santos Early game, airport missions
    Burton Central Los Santos City centre convenience
    La Mesa East Los Santos East side operations
    Harmony Blaine County Free mods (Franklin only after purchase)

    Bottom line Los Santos Customs is the only place to customise your vehicle in GTA V, and with four locations spread across the map you’re never far from one. Buy the Harmony branch as Franklin the moment you can afford it $349,000 upfront pays for itself within a few visits.

  • Where to Find Rare Collectibles and Hidden Items in GTA V

    Where to Find Rare Collectibles and Hidden Items in GTA V

    GTA V has an absurd amount of hidden stuff buried across Los Santos and Blaine County. Most players finish the story and miss 80% of it. Here’s every major collectible category, what you get, and where to look.

    🔪 Letter Scraps 50 Total

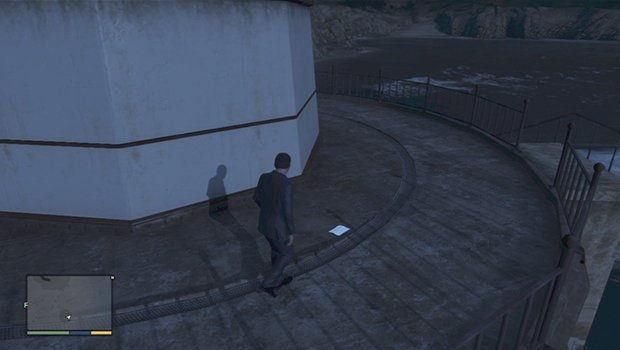
    There are 50 Letter Scraps scattered across Los Santos and Blaine County. Collecting all fifty reveals the truth behind the murder of actress Leonora Johnson, and unlocks the mission “A Starlet in Vinewood” for Franklin.

    These are hidden on walls, fences, and buildings easy to miss if you’re not on foot and looking closely.

    🛸 Spaceship Parts 50 Total

    A total of 50 Spaceship Parts can be found in Los Santos and Blaine County. They’re tied to Omega’s mission chain and required for the Space Docker vehicle reward one of the most unique cars in the game.

    Most parts are tucked in obscure corners of the map rooftops, underwater, cliff edges. You’ll need a submarine and scuba gear for the underwater ones.

    📦 Hidden Packages 15 Total

    11 Hidden Packages can be found in the ocean, mostly around shipwrecks, while 4 can be found in the Altruist Camp after completing the Altruist Cult Shootout with Trevor. They look like briefcases and award players with money ranging from $7,000 to $25,000 each. Most are deep enough to require a Scuba Suit.

    The 4 Altruist Camp packages are worth $25,000 each but you have to survive the shootout first.

    🌵 Peyote Plants 27 in Story Mode

    There are 27 Peyote Plants in GTA 5. If a player has completed the game 100%, including The Last One side-mission and found all 27 Peyote Plants, Golden Peyote Plants will appear one in a different location for each day of the week.

    Consuming a Peyote Plant turns your character into a random animal one of GTA V’s most bizarre and beloved features. The Golden Peyote chain is the rarest version and unlocks Sasquatch content.

    🐒 Monkey Mosaics 50 Total

    There are 50 Monkey Mosaics in GTA 5. Once all the mosaics have been photographed, the player will receive monkey outfits delivered to Trevor’s wardrobe 4 shorts, 5 tank tops, and 3 dresses.

    These are spray-painted on walls across the map and can only be photographed, not picked up. You need to switch to Michael first to unlock this mission.

    🃏 Playing Cards 54 Total (GTA Online)

    There are 54 Playing Cards in GTA Online, added with the Diamond Casino & Resort update. Collecting all 54 rewards chips, RP, a unique High Roller Outfit, and an exclusive bonus for Red Dead Online.

    They’re hidden across the entire map inside buildings, on rooftops, tucked behind objects. Some are inside the Diamond Casino itself.

    🎭 Action Figures 100 Total (GTA Online)

    There are 100 Action Figures scattered throughout the game. The owner of the Hardcore Comic Store in West Vinewood will send you a message explaining someone stole his collection each figure you find rewards $1,000 and 1,000 RP instantly, with a $50,000 bonus and unique rewards for finding all 100.

    The rewards include a new hairstyle and the Impotent Rage outfit worth hunting if you’re an Online regular.

    📡 Signal Jammers 50 Total (GTA Online)

    There are 50 Signal Jammers around the city to destroy. Destroying all 50 unlocks Avi Schwartzman as a heist crew member one of the best expert-level hackers available for the Diamond Casino Heist.

    The blinking red light makes them easier to spot at night. They’re mounted on buildings, towers, and bridges across the entire map.

    🏴‍☠️ Shipwrecks Daily (GTA Online)

    One Shipwreck treasure chest spawns daily in one of 30 possible locations around the shoreline of Los Santos. Collecting 7 rewards you with “The Frontier” outfit.

    Each chest gives $20,000 and 200 RP one of the best daily money-making collectibles in the game.

    🏝️ Cayo Perico Treasure Chests Daily (GTA Online)

    You can find two Treasure Chests around Cayo Perico every single day. There are 19 possible locations 10 on land and 9 underwater. They spawn at a different location every day, but emit sounds to help you locate them.

    Each chest gives $15,000 and 1,000 RP easy daily income if you’re already running Cayo Perico heists.

    🎬 Movie Props 10 Total (GTA Online)

    There are 10 Movie Props to collect for Solomon Richards. Collecting all 10 unlocks the Alien outfit.

    These are scattered across Los Santos and tied to the Los Santos Summer update. Not the biggest reward, but the Alien costume is genuinely iconic in GTA Online sessions.

    Quick Reference Table

    CollectibleAmountKey Reward
    Letter Scraps50Unlocks Leonora Johnson mission
    Spaceship Parts50Space Docker vehicle
    Hidden Packages15$7,000 – $25,000 cash each
    Peyote Plants27 (story) / 76 (online)Turn into animals
    Monkey Mosaics50Monkey outfits for Trevor
    Playing Cards54High Roller Outfit + RDR2 bonus
    Action Figures100$50,000 + Impotent Rage outfit
    Signal Jammers50Avi Schwartzman heist crew member
    ShipwrecksDaily (30 locations)The Frontier outfit
    Cayo Perico Chests2 daily$15,000 + 1,000 RP per chest
    Movie Props10Alien outfi

    The honest advice? Don’t try to collect everything in one run it’ll burn you out fast. Pick one or two chains that reward something you actually want and work through those first. The Signal Jammers for Avi and the Playing Cards for the High Roller Outfit are the two most worth doing if you’re an active GTA Online player.

  • Where Is the Military Base in GTA 5?

    Where Is the Military Base in GTA 5?

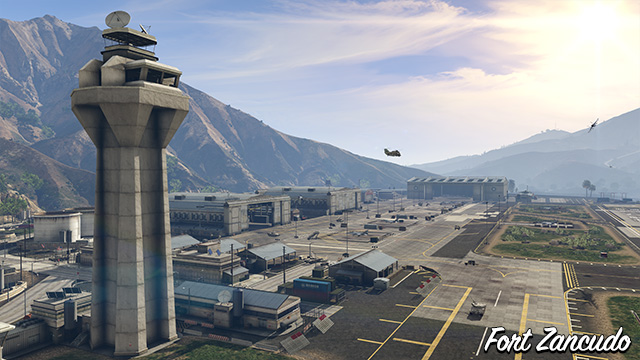
    Quick answer there is only one military base in GTA 5, and it’s called Fort Zancudo.

    Fort Zancudo is the only military base in Grand Theft Auto V and in the HD Universe so far. If you’ve been hunting for a second base somewhere, you’re not missing anything this is it.

    Where Exactly Is Fort Zancudo?

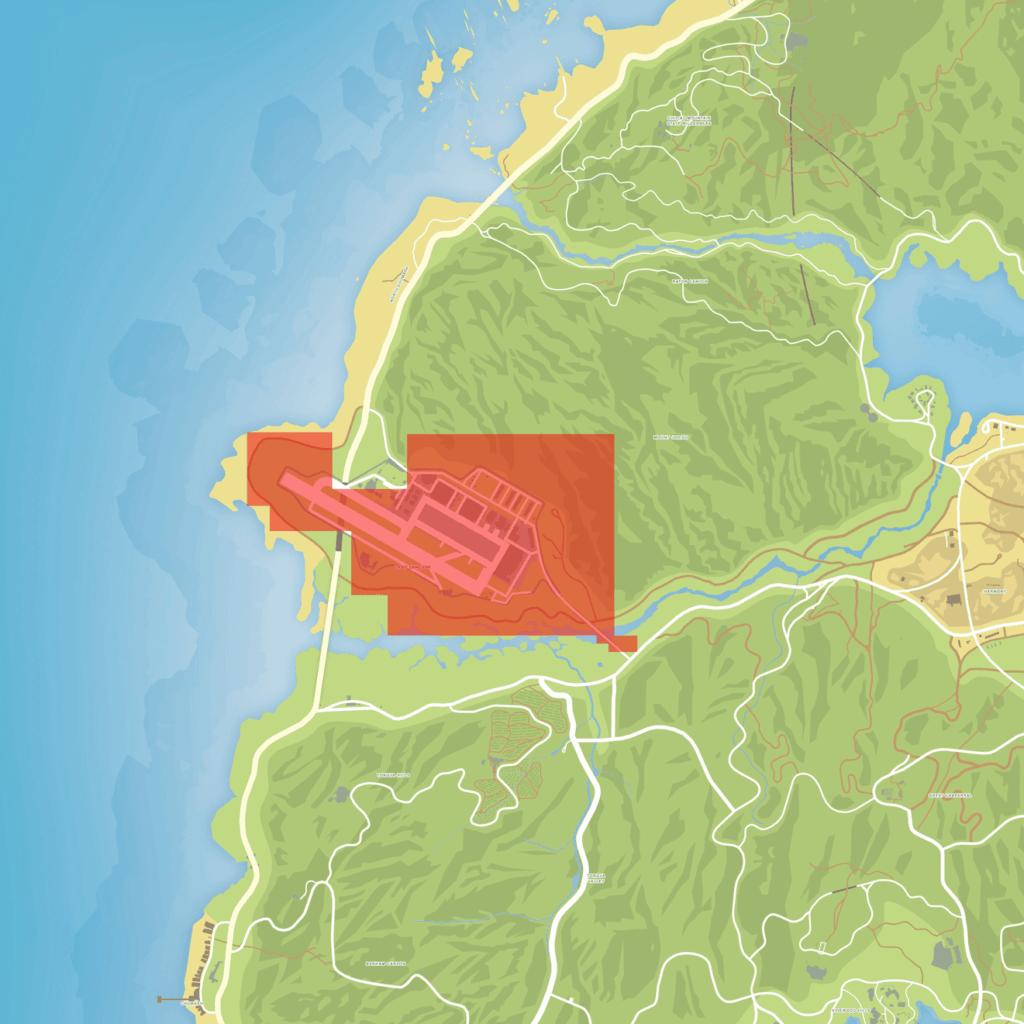
    The GTA V military base is marked on the map as “Lago Zancudo,” just south of the North Chumash beach and southwest of Mount Josiah, with the Lago Zancudo swamps and the town of Harmony nearby.

    The tricky part? It doesn’t show up on the standard in-game map. You’ll only see it on the satellite view look for the runway tip touching the northwest shoreline.

    The easiest landmark to use: find the Great Ocean Highway tunnel on the west coast, and the base sits directly above it.

    What’s Inside the Base?

    Fort Zancudo features one main airstrip, a secondary airstrip, three large hangars, several smaller hangars, a munitions depot, rows of blockhouses, a fire and rescue station, a refinery, an Air Traffic Control tower, and a main office.

    The vehicles are the real prize. The three main reasons players raid Fort Zancudo are the P-996 LAZER fighter jet, the Rhino tank, and the Buzzard attack chopper all of which cost millions to buy legitimately in GTA Online.

    Fort Zancudo’s fleet is composed mainly of standard issue military vehicles including the Rhino, Cargobob, Buzzard, P-996 LAZER, and the Titan.

    What Happens When You Go In?

    Don’t expect a warm welcome. Entering Fort Zancudo’s airspace by plane or helicopter will put a 2-star wanted level on the player, and a radio warning will be issued shortly after, the wanted level increases to 4 and guided missiles will be launched.

    On the ground it’s even worse. If the player enters the base by ground undetected, a four-star wanted level will be obtained shortly after being spotted by personnel this sounds the alarm and mobilises anyone on site, whether in a vehicle or not.

    The Three Ways to Get In

    1. Drive through the checkpoint

    fast bikes and supercars can sometimes slip through before guards react. High risk, low survival rate.

    2. Use the highway ramp

    There are conveniently placed rock formations that can serve as a ramp as you leave the highway tunnel close to Mount Chiliad at speed, this will send your car flying over the barriers and into the military base.

    3. Parachute in

    Fly up high and parachute onto the base. The jets will shoot down your aircraft if you linger in restricted airspace, but they’ll ignore you once you exit it and parachute down. Most experienced players use this method.

    The Easy Way In GTA Online Only

    If you’d rather not get shot at, buy a hangar. Since the 2017 Smugglers Run update, players have been able to buy hangars within Fort Zancudo in GTA Online if they do so, they will be granted access to the base and the military personnel will not be hostile towards the player.

    Three hangars are available, ranging from around $2 million to $3.25 million on the Maze Bank Foreclosures website. Expensive, but it means free base access for life. Although, should the player attempt to steal a vehicle or fire a weapon, the soldiers will still attack.

    What About the NOOSE Headquarters?

    GTA 5 also has a secondary law enforcement compound worth knowing about the NOOSE HQ. The easiest way of finding the NOOSE headquarters is to travel on the highway leading out of Los Santos to the east, and taking the first exit on your left a short ways out.

    The big difference from Fort Zancudo? You won’t get a wanted level for going here. Located to the east outside of the city of Los Santos, you’ll find an armed Buzzard helicopter waiting on the roof of the main building and you won’t accrue any wanted levels for accessing this location. Free Buzzard, no heat. Most players don’t know this exists.

    Quick Reference

    Location Type Wanted Level Best Loot
    Fort Zancudo Military base 4-star instantly P-996 LAZER, Rhino Tank, Cargobob
    NOOSE HQ Law enforcement None Buzzard helicopter

    Bottom line

    Fort Zancudo is the only true military base in GTA 5. It’s dangerous, heavily guarded, and absolutely worth raiding at least once. Just bring armour, have an exit plan, and know exactly which vehicle you’re going for before you step through that gate.

  • What You Need to Build a PC for GTA 6 and What It’ll Actually Cost You

    What You Need to Build a PC for GTA 6 and What It’ll Actually Cost You

    Let’s be upfront about something before we dive in. Rockstar has not officially released PC system requirements for GTA 6. The console version launches November 19, 2026 the PC version is expected to follow in 2027 or later, and the official specs haven’t dropped yet.

    What we do have is a solid picture built from the RAGE engine’s history, the PS5’s hardware baseline, trailer analysis, and the community’s best predictions. Everything below is the most informed estimate available right now and it’s enough to start planning a build with confidence.

    The Expected System Requirements

    Minimum Specs Getting Into Leonida

    This is the floor. Taking everything into account the game’s trailers, the chipsets inside current-gen consoles, and all the latest gameplay leaks the estimated minimum specs to get GTA 6 running are an Intel Core i5-6600K or equivalent CPU, an NVIDIA GeForce GTX 1660 GPU, and 12GB of RAM.

    At minimum specs you’re looking at 1080p on lower settings, playable but not pretty. This isn’t the experience Rockstar designed GTA 6 for it’s just enough to load into Vice City without the game refusing to start.

    Storage is non-negotiable even at minimum. You must not try to run GTA 6 on an old Hard Disk Drive. The game uses asset streaming to load the world as you move through it, and an HDD simply cannot read data fast enough to keep up with a supercar driving at 200mph down the highway. An SSD will almost certainly be required, not just recommended, with 150GB+ expected for storage.

    Recommended Specs The Actual Experience

    This is where GTA 6 starts looking like GTA 6. To play the title at 1080p or even 2K, a graphics card like an NVIDIA GeForce RTX 3080 or AMD Radeon RX 6800 XT will be required, matched with an equally powerful Intel Core or AMD CPU.

    CPU requirements jump significantly at the recommended tier. Every pedestrian walking down the street, every car changing lanes, and every police AI reaction is calculated by your processor. If your CPU is too weak, it doesn’t matter if you have an RTX 4090 your game will lag in busy city centres. A minimum of 8 cores is recommended, as quad-core CPUs are effectively dead for AAA gaming in 2026.

    VRAM is the number to watch most closely in 2026. Modern open-world titles with high-resolution textures are hungry for memory if your card only has 8GB of VRAM, you might struggle to run textures on “High” without severe stuttering. If you are buying a new GPU for GTA 6, aim for 12GB of VRAM minimum.

    The Full Specs Comparison Table

    Component Minimum Recommended
    OS Windows 10 64-bit Windows 11
    CPU Intel Core i5-6600K / AMD Ryzen 5 2600 Intel Core i7-10700K / AMD Ryzen 7 5800X
    RAM 12–16GB 32GB DDR5 (dual channel)
    GPU NVIDIA GTX 1660 / AMD RX 5700 NVIDIA RTX 3080 / AMD RX 6800 XT
    VRAM 8GB 10–12GB minimum
    Storage 150GB NVMe SSD 150GB+ NVMe Gen 4 SSD
    DirectX DirectX 12 DirectX 12 Ultimate

    What It’ll Cost to Build Minimum Tier

    Fair warning before the prices: RAM is the ugly surprise in 2026. DDR5 memory prices have exploded, with a 32GB kit that sold for around $100–$200 in October 2025 now starting at $350 if it’s even in stock retailers are taking advantage of the DRAM shortage. DDR4 has also seen significant price hikes, with 32GB kits that used to cost $60–$90 now running $150–$180. Plan your RAM budget accordingly.

    Here’s the realistic cost breakdown for a minimum-capable GTA 6 build:

    Component Example Choice Estimated Price Range
    CPU AMD Ryzen 5 5600 / Intel i5-12400 $100 – $150
    GPU NVIDIA GTX 1660 Super / RTX 3060 $180 – $280
    RAM 16GB DDR4-3200 (2×8GB) $150 – $180
    Motherboard B550 (AMD) / B660 (Intel) $90 – $130
    Storage 500GB NVMe SSD (for GTA 6 only) $55 – $80
    PSU 550W 80+ Bronze $60 – $80
    Case Mid-tower with airflow $50 – $80
    CPU Cooler Budget tower cooler $25 – $40

    Minimum Build Total: roughly $700 – $1,000. That’s the honest number in May 2026, accounting for current RAM pricing. The 2026 “RAMpocalypse” the community’s term for the current DDR5 spike means DDR4 is actually the smarter play for a budget build right now, since you can grab a high-quality 32GB DDR4-3200 kit for around $55 compared to significantly more for DDR5.

    What It’ll Cost to Build Recommended Tier

    This is the build that actually does GTA 6 justice. 1080p high settings, stable 60 FPS, the reflections in Vice City’s puddles looking the way Rockstar intended them to look.

    Component Example Choice Estimated Price Range
    CPU AMD Ryzen 7 7800X3D / Intel i7-13700K $350 – $450
    GPU NVIDIA RTX 4070 / AMD RX 7800 XT $500 – $600
    RAM 32GB DDR5-6000 (2×16GB) $300 – $380
    Motherboard B650 AM5 (AMD) / Z790 (Intel) $180 – $250
    Storage 1TB NVMe Gen 4 SSD $80 – $120
    PSU 750W 80+ Gold $100 – $130
    Case Mid-tower with mesh front $80 – $120
    CPU Cooler 240mm AIO or quality tower $60 – $100

    Recommended Build Total: roughly $1,650 – $2,150. The RTX 4070 and Ryzen 7 7800X3D are consistently cited as the sweet spot combination. The sweet spot for GTA 6 in 2026 is the RTX 4070 paired with a Ryzen 7 7800X3D for 1440p 60 FPS performance.

    Why the X3D chip specifically? AMD’s X3D chips like the Ryzen 7 7800X3D are the gold standard for GTA 6 their massive L3 cache is perfect for handling the chaos of a Rockstar open world. Every NPC, every vehicle, every AI decision is exactly the kind of workload that X3D cache technology was built for.

    The Hidden Costs Nobody Puts in the Build List

    A build total and a ready-to-play total are two different numbers and the gap is bigger than most guides admit.

    Every “gaming PC build” article ignores the real costs that push the actual spend higher: a Windows licence, a monitor, keyboard, mouse, and a WiFi adapter if your motherboard doesn’t include one. A 1440p 144Hz IPS monitor alone adds a significant amount you cannot game on a PC without one, and a great GPU driving a terrible monitor wastes your investment.

    Here’s what you’re actually adding on top of the build:

    Extra Estimated Cost
    Windows 11 licence $100 – $140
    1080p 144Hz monitor $150 – $220
    1440p 144Hz monitor $250 – $400
    Keyboard + Mouse $60 – $120
    Headset $40 – $100
    WiFi adapter (if needed) $25 – $40

    Add $375 – $800 to your build total for a complete setup, depending on what peripherals you already own and what monitor resolution you’re targeting.

    Overall Cost Summary

    Build Tier PC Components Full Setup Est.
    Minimum (1080p Low) $700 – $1,000 $1,100 – $1,800
    Recommended (1080p High / 1440p) $1,650 – $2,150 $2,050 – $2,950
    Ultra (4K / Max Settings) $3,000 – $4,000+ $3,500 – $5,000+

    One Thing to Keep in Mind

    GTA 6 PC requirements will be officially confirmed by Rockstar before the PC launch which means if you’re building specifically for the game, you have time. The console release is November 2026. A GTA 6 PC release date has not been set, but the port is expected to arrive up to a year after the initial Xbox and PlayStation release.

    Building in late 2026 or early 2027 is actually ideal timing RAM prices may stabilise, Rockstar will have confirmed the actual specs, and any early PC port performance issues will be known. Future-proofing is a myth that hardware companies love instead of overspending now, build smart at mid-range and use the savings for a GPU upgrade in 2–3 years.

    The minimum build gets you in the door. The recommended build gets you the game. Only you know which one is worth it.