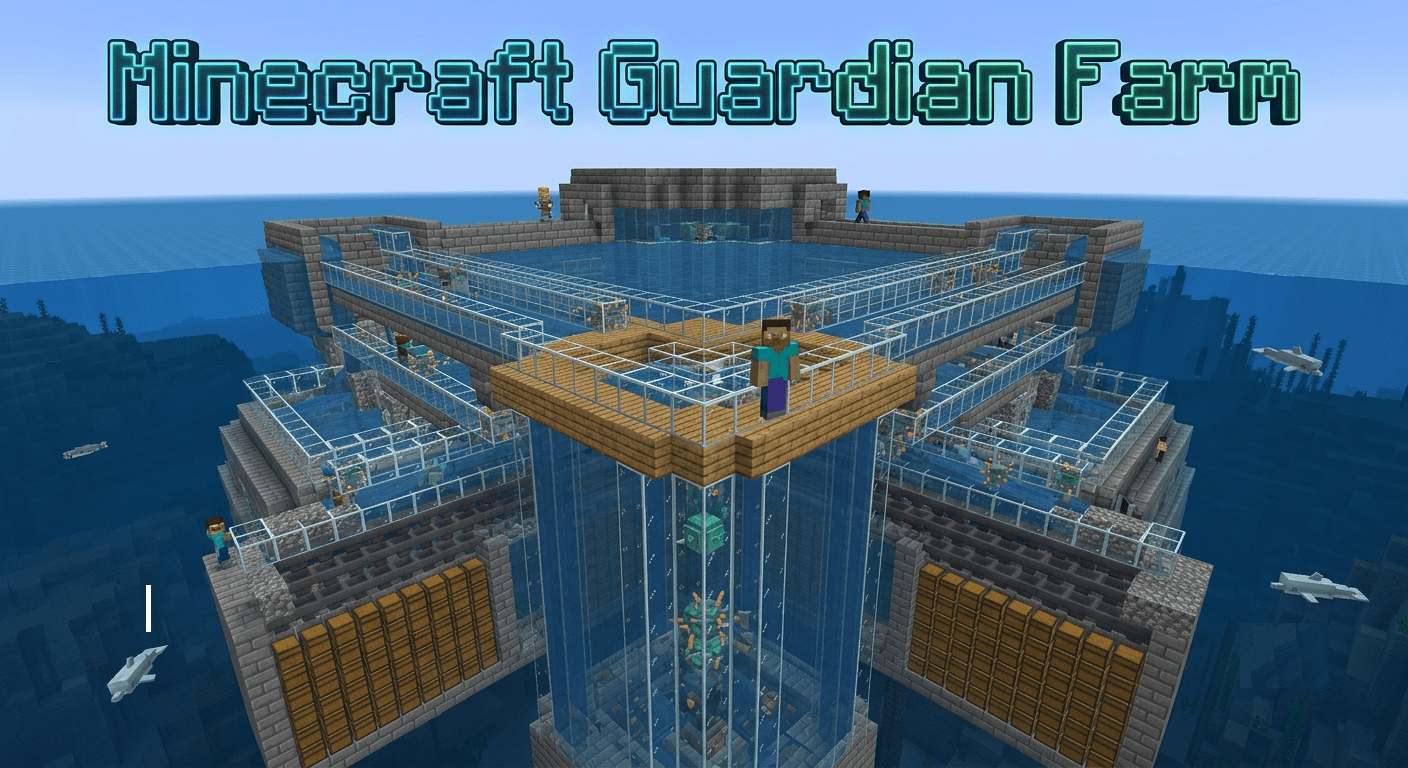
Guardian farms are among the most rewarding automated farms in Minecraft, producing Prismarine, Sea Lanterns, XP, and fish passively. The catch is the setup cost. This is the most labour-intensive farm you will ever build in Minecraft but the output makes every hour of preparation worth it. A properly built guardian farm produces 10,000+ Prismarine Shards per hour and is one of the best XP farms in the game.
Here is everything you need to know.
What Guardians Actually Are
Guardians are pufferfish-like hostile mobs that spawn in and around ocean monuments. By farming them, players can obtain valuable ingredients such as prismarine shards, crystals, and fish. The Elder variant also drops sponges.
The Elder Guardian is the boss version three of them inhabit every Ocean Monument and must be defeated before your farm runs efficiently. Before creating a farm, the player may need to conquer an ocean monument, depending on the farm design.
Why Build a Guardian Farm
No other farm produces Prismarine it is only obtainable here. Prismarine Shards, Prismarine Crystals, Sea Lanterns, and Dark Prismarine are all exclusive to Ocean Monument loot and Guardian drops. If you want to build anything using these materials at scale, the guardian farm is the only realistic option.
The XP output is extraordinary. Each piglin drops 5-10 XP best XP source in vanilla outside of grinder farms. Guardian farms produce similar XP density at very high throughput, making them one of the most efficient enchanting fuel sources in the game.
Step 1: Find the Ocean Monument
You cannot build a guardian farm without finding an Ocean Monument first. Guardians only spawn in Ocean Monuments, which can only be found in deep ocean biomes. Players can either explore randomly to stumble upon one, or use the command /locate monument to get the coordinate of the nearest Monument.
The fastest methods for finding one:
The Trident with Impaling V is the best underwater weapon. It deals 17.5 damage per hit to aquatic mobs. Second best is a Sharpness V Netherite Sword at 11 damage. Bows and crossbows don’t work underwater. Have these ready before approaching the monument.
Trade with a Cartographer Villager for an Ocean Explorer Map. It marks the nearest Ocean Monument on your map directly the fastest legitimate method that does not involve commands.
I would recommend finding a monument that has the most flat area surrounding it, as it will minimize the need for land removal later on.
Step 2: Understand the Spawn Volume
Before building anything, understand exactly where Guardians can and cannot spawn. Guardians spawn in water blocks within a 58×24×58 volume defined horizontally by the base of the monument and vertically from the floor level of the monument (usually, if not always Y=39) up to just above the decorative structure at the top (usually, if not always Y=61).
Every water block inside that volume is a potential spawn point. This is why the farm works you redirect natural spawns into your collection system. Putting a roof over the water spawning area will increase the spawning rate, as they usually don’t spawn in water blocks that have a view of the sky.
Step 3: Defeat the Elder Guardians
Kill all three Elder Guardians before building anything. Elder Guardians inflict Mining Fatigue III a debuff that makes breaking blocks almost impossibly slow. As long as any Elder Guardian is alive, every attempt to drain or build the farm will be severely hampered.
Entering without Night Vision potions is the most common mistake on a first monument run. Bring Night Vision potions, a strong sword or Trident with Impaling, full armour, and plenty of food. The Ocean Monument is dark, disorienting, and full of Guardians shooting laser beams at you while you navigate underwater corridors.
Collect every Sponge you find. Invisibility potions work against the guardians if the user isn’t wearing any armor, but guardians will notice them if they get very close. Use Invisibility potions while navigating to the Elder Guardian rooms if your armour is not strong enough to tank the Guardian laser damage comfortably.
Step 4: Drain the Monument (The Big Job)
This is the most time-consuming part of the entire project and it cannot be skipped for a proper farm.
Build a wall around the monument (around 87 full stacks will be needed; sand or gravel may be preferred as they can be placed from above to fall to the sea floor), and then use sand or gravel to fill in the inside.
Here are the four main draining methods the community uses:
Sand or Gravel Fill Method: Drop sand or gravel from the surface gravity carries it to the seafloor automatically, displacing water as it falls. Stack your walls first, then fill from above. It uses a lot of sand but requires the least precision.
Sponge Method: Build a wall as above, then use sponges to progressively remove the water. Partitioning may be used to allow for manageable areas to be cleared, or pistons may be used to push sponges into the water simultaneously across the width of the monument. Dry sponges absorb up to 65 water blocks each dry them in a furnace and repeat.
Lava Method: Build a ring, flood the inside with lava to turn a layer of water to stone, extend the ring down, mine out the stone, and repeat. This has the advantage of a much lower initial resource cost, although the mining will take a long time and will use a large number of pickaxes to mine all of the stone out.
Flammable Fill Method: Build a wall around the monument, fill the water with flammable materials like leaves or wooden planks, and light it up. Fastest fill method but requires enormous amounts of flammable material.
The honest recommendation: Use the sand fill method for the outer walls and sponges for clearing the interior rooms. It balances speed and resource cost better than any single method alone.
Step 5: Spawn Proof Nearby Areas
Before your farm can work at maximum efficiency, nearby mob spawning must be eliminated.
If the design is to kill guardians with fall damage or to have the player AFK near the bottom of the farm, all undersea caves (and any nearby islands) within a 128-block radius will need to be lit, slabbed, or flooded to prevent other hostile mobs from filling the mob cap. Alternatively, an AFK spot high above the monument (Y=160 to Y=170) may be used so only the monument is within the 128-block-radius sphere.
The AFK spot above the monument is the easier solution. An essential aspect of the build is the AFK (Away From Keyboard) spot, which should ideally be at a Y-level of 163, right about the middle of the ocean monument. Building your AFK platform at that height ensures only the monument’s bounding box is within your 128-block simulation sphere nothing else competes with the guardian spawn cap.
Step 6: Choose Your Farm Design
There are three realistic farm designs for most survival players. Choose based on your resource availability and how much complexity you want to manage.
Design 1: No-Drain Soul Sand Farm (Easiest)
These No Drain Guardian farms are time efficient as they use the new 1.13 mechanics of soul sand to launch guardians upwards into a chamber that then directs them in various ways to a kill chamber, often using both lava and gravity. The size of the soul sand section can vary from just a small square to the full 56×56 area of the monument, with the bigger area giving greater drops and yields. The area from the monument floor to the surface must be completely clear to avoid any blocking of the guardians’ ascent to the chamber which is often situated at the ocean surface.
Who it is for: Players who do not want to drain the monument at all. You place Soul Sand on the monument floor the bubble columns it creates push Guardians upward into a surface-level kill chamber. Output is lower than a drained design but setup time is dramatically shorter.
The critical note: Note that large blocks of bubble columns can massively lower your FPS unless particles are set to minimal. Set particles to Minimal in your video settings before running this design.
Design 2: Drained Monument Standard Farm (Best Balance)
Drain the monument area Use sponges to remove all water within and around the monument’s bounding box. Build a spawning platform Replace the monument with water channels at Y=62 where Guardians can spawn. Funnel with water Use water streams to push spawned Guardians to a central point. Kill chamber Magma blocks, campfires, or lava for automated killing. Collection Hoppers + chests below the kill chamber collect all drops.
Who it is for: Most survival players who want good output without the complexity of portal-based designs. After draining, replace the monument space with a grid of water channels that funnel Guardians toward a central drop shaft. At the bottom of the drop shaft, magma blocks or a lava layer handles the kill automatically.
Design 3: Portal-Based Farm (Maximum Output)
The design comprises 20 portals with a two-block gap between each, where the Guardians will spawn. Waterlogged stairs allow the water to flow towards the portals, and the Guardians are almost instantly teleported to the nether.
The zombified piglins are attracted to the turtle egg in front of the portal and will fall to the killing chamber. Guardians teleported through the portal end up in a Nether-side killing chamber where the player finishes them manually.
Who it is for: Late-game players who want maximum throughput. This now produces 600,000 Items Per Hour in Survival Minecraft. The Project Took a total of 49 HOURS and the end result is CRAZY! That output number is for the most optimised version realistic community builds produce 200,000 to 400,000 items per hour, still extraordinary.
The Kill Chamber: Most Important Detail
This is where most first-time builds go wrong. A drop shaft pull piglins to a central hole. Falling more than 24 blocks kills zombified piglins outright; tune the height so survivors land at very low health for a one-hit kill, rather than dying mid-fall (a fall death skips the player-only loot).
The same rule applies to Guardians. A drop of more than 24 blocks kills them from fall damage alone but fall kills give you fewer drops than player kills. Tune your drop shaft to exactly 23 blocks so Guardians arrive with 1 to 2 hearts remaining. One swing of a Looting III sword finishes them and collects maximum loot.
Use Looting III on every kill run. A zombified piglin has a 2.5% chance to drop a gold ingot. With Looting III, that chance increases to 5.5%. That’s more than double. Guardian drop rates improve similarly with Looting III Prismarine Shard drops increase significantly and the rare Prismarine Crystal drop becomes meaningfully more common.
What You Need Before Starting
Gather these materials before approaching the monument:
| Item | Amount | Purpose |
|---|---|---|
| Night Vision Potions | 20 minimum | Underwater visibility throughout the build |
| Water Breathing Potions | 20 minimum | Extended underwater work sessions |
| Sponges | 100 to 200 | Monument draining |
| Sand or Gravel | 87 full stacks | Perimeter walls and fill |
| Netherite or Diamond Sword | 1 with Looting III | Kill chamber weapon |
| Trident with Impaling V | 1 | Underwater combat |
| Full Diamond Armour | Aqua Affinity + Depth Strider | Underwater movement and survival |
| Doors or Trapdoors | 32 | Air pocket creation during build |
| Hoppers | 16 to 32 | Item collection system |
| Chests | 8 to 16 | Item storage |
| Magma Blocks | 64 | Kill chamber floor |
| Soul Sand | 64 (no-drain design) | Bubble column push |
Aqua Affinity on your helmet is non-negotiable. Without it, breaking blocks underwater takes 5 times longer. The entire build requires breaking hundreds of blocks underwater Aqua Affinity is the single most important enchantment for the construction phase.
Output by Design Type
| Farm Design | Prismarine Shards Per Hour | XP Output | Complexity |
|---|---|---|---|
| No Drain Soul Sand | 3,000 to 5,000 | Medium | Beginner |
| Drained Standard Farm | 10,000 to 15,000 | High | Intermediate |
| Portal Based Farm | 50,000 to 200,000+ | Extreme | Advanced |
| Optimised Full Build | 600,000 items/hr total | Extreme | Expert |
Java vs Bedrock: Key Differences
Java Edition players should break through the ceiling and build directly on top of the Nether bedrock roof (around Y=128) to completely bypass cave spawns and unwanted mobs. Bedrock Edition players cannot, since the roof is the build height limit there.
For Bedrock Edition players: Bedrock players usually rely on a dug-out cavern near the ceiling or a portal-cycling design instead. The No-Drain Soul Sand design and the standard drained farm both work on Bedrock with the same mechanics. Portal-based designs require adjustments since Bedrock portal mechanics differ from Java.
Common Mistakes and How to Fix Them
| Mistake | What Happens | Fix |
|---|---|---|
| Elder Guardians not killed | Mining Fatigue III makes building impossible | Kill all three before starting any construction |
| No Night Vision potions | Cannot see anything during underwater build | Brew 20+ potions before approaching |
| Drop shaft too long (24+ blocks) | Guardians die from fall damage, reduced loot | Tune to exactly 23 block drop |
| No Looting III sword | Dramatically reduced Prismarine and Crystal drops | Enchant before farming sessions |
| AFK spot too low | Other mobs fill the mob cap, farm output drops | AFK at Y=163 to Y=170 above monument |
| Particles not set to Minimal | Soul Sand bubble columns tank FPS to single digits | Set video particles to Minimal |
| Not spawn-proofing nearby caves | Hostile mobs fill mob cap instead of Guardians | Slab, light, or flood within 128 block radius |
The honest truth about guardian farms: Guardian farms will take a sizable amount of resources. Still, the payoffs are well worth the investment as players will receive plenty of benefits from the farm and can come back to collect from it at fairly frequent regularity.
Build the No-Drain Soul Sand version first if you are new to this. Get familiar with the monument, learn how Guardian spawning works, and collect Prismarine for your builds. Then when you are ready for the full commitment, drain it completely and build the standard drained design.
There is no shortcut through the draining phase but there is nothing more satisfying in Minecraft than standing above a drained Ocean Monument you transformed into a fully automated Prismarine factory. Do the work once and collect the rewards indefinitely.