Tag: Minecraft

  • Minecraft Guardian Farm: The Complete Build Guide (2026)

    Minecraft Guardian Farm: The Complete Build Guide (2026)

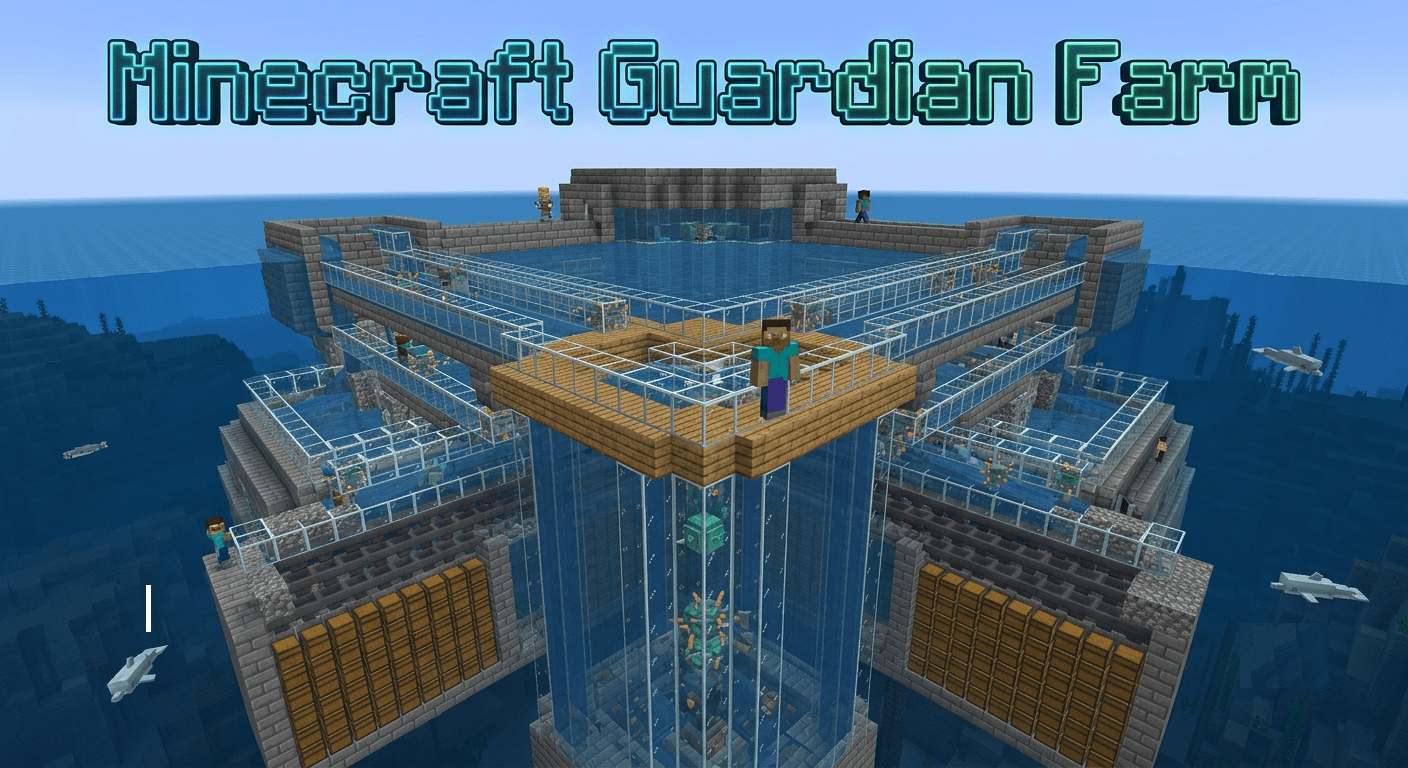
    Guardian farms are among the most rewarding automated farms in Minecraft, producing Prismarine, Sea Lanterns, XP, and fish passively. The catch is the setup cost. This is the most labour-intensive farm you will ever build in Minecraft but the output makes every hour of preparation worth it. A properly built guardian farm produces 10,000+ Prismarine Shards per hour and is one of the best XP farms in the game.

    Here is everything you need to know.

    What Guardians Actually Are

    Guardians are pufferfish-like hostile mobs that spawn in and around ocean monuments. By farming them, players can obtain valuable ingredients such as prismarine shards, crystals, and fish. The Elder variant also drops sponges.

    The Elder Guardian is the boss version three of them inhabit every Ocean Monument and must be defeated before your farm runs efficiently. Before creating a farm, the player may need to conquer an ocean monument, depending on the farm design.

    Why Build a Guardian Farm

    No other farm produces Prismarine it is only obtainable here. Prismarine Shards, Prismarine Crystals, Sea Lanterns, and Dark Prismarine are all exclusive to Ocean Monument loot and Guardian drops. If you want to build anything using these materials at scale, the guardian farm is the only realistic option.

    The XP output is extraordinary. Each piglin drops 5-10 XP best XP source in vanilla outside of grinder farms. Guardian farms produce similar XP density at very high throughput, making them one of the most efficient enchanting fuel sources in the game.

    Step 1: Find the Ocean Monument

    You cannot build a guardian farm without finding an Ocean Monument first. Guardians only spawn in Ocean Monuments, which can only be found in deep ocean biomes. Players can either explore randomly to stumble upon one, or use the command /locate monument to get the coordinate of the nearest Monument.

    The fastest methods for finding one:

    The Trident with Impaling V is the best underwater weapon. It deals 17.5 damage per hit to aquatic mobs. Second best is a Sharpness V Netherite Sword at 11 damage. Bows and crossbows don’t work underwater. Have these ready before approaching the monument.

    Trade with a Cartographer Villager for an Ocean Explorer Map. It marks the nearest Ocean Monument on your map directly the fastest legitimate method that does not involve commands.

    I would recommend finding a monument that has the most flat area surrounding it, as it will minimize the need for land removal later on.

    Step 2: Understand the Spawn Volume

    Before building anything, understand exactly where Guardians can and cannot spawn. Guardians spawn in water blocks within a 58×24×58 volume defined horizontally by the base of the monument and vertically from the floor level of the monument (usually, if not always Y=39) up to just above the decorative structure at the top (usually, if not always Y=61).

    Every water block inside that volume is a potential spawn point. This is why the farm works you redirect natural spawns into your collection system. Putting a roof over the water spawning area will increase the spawning rate, as they usually don’t spawn in water blocks that have a view of the sky.

    Step 3: Defeat the Elder Guardians

    Kill all three Elder Guardians before building anything. Elder Guardians inflict Mining Fatigue III a debuff that makes breaking blocks almost impossibly slow. As long as any Elder Guardian is alive, every attempt to drain or build the farm will be severely hampered.

    Entering without Night Vision potions is the most common mistake on a first monument run. Bring Night Vision potions, a strong sword or Trident with Impaling, full armour, and plenty of food. The Ocean Monument is dark, disorienting, and full of Guardians shooting laser beams at you while you navigate underwater corridors.

    Collect every Sponge you find. Invisibility potions work against the guardians if the user isn’t wearing any armor, but guardians will notice them if they get very close. Use Invisibility potions while navigating to the Elder Guardian rooms if your armour is not strong enough to tank the Guardian laser damage comfortably.

    Step 4: Drain the Monument (The Big Job)

    This is the most time-consuming part of the entire project and it cannot be skipped for a proper farm.

    Build a wall around the monument (around 87 full stacks will be needed; sand or gravel may be preferred as they can be placed from above to fall to the sea floor), and then use sand or gravel to fill in the inside.

    Here are the four main draining methods the community uses:

    Sand or Gravel Fill Method: Drop sand or gravel from the surface gravity carries it to the seafloor automatically, displacing water as it falls. Stack your walls first, then fill from above. It uses a lot of sand but requires the least precision.

    Sponge Method: Build a wall as above, then use sponges to progressively remove the water. Partitioning may be used to allow for manageable areas to be cleared, or pistons may be used to push sponges into the water simultaneously across the width of the monument. Dry sponges absorb up to 65 water blocks each dry them in a furnace and repeat.

    Lava Method: Build a ring, flood the inside with lava to turn a layer of water to stone, extend the ring down, mine out the stone, and repeat. This has the advantage of a much lower initial resource cost, although the mining will take a long time and will use a large number of pickaxes to mine all of the stone out.

    Flammable Fill Method: Build a wall around the monument, fill the water with flammable materials like leaves or wooden planks, and light it up. Fastest fill method but requires enormous amounts of flammable material.

    The honest recommendation: Use the sand fill method for the outer walls and sponges for clearing the interior rooms. It balances speed and resource cost better than any single method alone.

    Step 5: Spawn Proof Nearby Areas

    Before your farm can work at maximum efficiency, nearby mob spawning must be eliminated.

    If the design is to kill guardians with fall damage or to have the player AFK near the bottom of the farm, all undersea caves (and any nearby islands) within a 128-block radius will need to be lit, slabbed, or flooded to prevent other hostile mobs from filling the mob cap. Alternatively, an AFK spot high above the monument (Y=160 to Y=170) may be used so only the monument is within the 128-block-radius sphere.

    The AFK spot above the monument is the easier solution. An essential aspect of the build is the AFK (Away From Keyboard) spot, which should ideally be at a Y-level of 163, right about the middle of the ocean monument. Building your AFK platform at that height ensures only the monument’s bounding box is within your 128-block simulation sphere nothing else competes with the guardian spawn cap.

    Step 6: Choose Your Farm Design

    There are three realistic farm designs for most survival players. Choose based on your resource availability and how much complexity you want to manage.

    Design 1: No-Drain Soul Sand Farm (Easiest)

    These No Drain Guardian farms are time efficient as they use the new 1.13 mechanics of soul sand to launch guardians upwards into a chamber that then directs them in various ways to a kill chamber, often using both lava and gravity. The size of the soul sand section can vary from just a small square to the full 56×56 area of the monument, with the bigger area giving greater drops and yields. The area from the monument floor to the surface must be completely clear to avoid any blocking of the guardians’ ascent to the chamber which is often situated at the ocean surface.

    Who it is for: Players who do not want to drain the monument at all. You place Soul Sand on the monument floor the bubble columns it creates push Guardians upward into a surface-level kill chamber. Output is lower than a drained design but setup time is dramatically shorter.

    The critical note: Note that large blocks of bubble columns can massively lower your FPS unless particles are set to minimal. Set particles to Minimal in your video settings before running this design.

    Design 2: Drained Monument Standard Farm (Best Balance)

    Drain the monument area Use sponges to remove all water within and around the monument’s bounding box. Build a spawning platform Replace the monument with water channels at Y=62 where Guardians can spawn. Funnel with water Use water streams to push spawned Guardians to a central point. Kill chamber Magma blocks, campfires, or lava for automated killing. Collection Hoppers + chests below the kill chamber collect all drops.

    Who it is for: Most survival players who want good output without the complexity of portal-based designs. After draining, replace the monument space with a grid of water channels that funnel Guardians toward a central drop shaft. At the bottom of the drop shaft, magma blocks or a lava layer handles the kill automatically.

    Design 3: Portal-Based Farm (Maximum Output)

    The design comprises 20 portals with a two-block gap between each, where the Guardians will spawn. Waterlogged stairs allow the water to flow towards the portals, and the Guardians are almost instantly teleported to the nether.

    The zombified piglins are attracted to the turtle egg in front of the portal and will fall to the killing chamber. Guardians teleported through the portal end up in a Nether-side killing chamber where the player finishes them manually.

    Who it is for: Late-game players who want maximum throughput. This now produces 600,000 Items Per Hour in Survival Minecraft. The Project Took a total of 49 HOURS and the end result is CRAZY! That output number is for the most optimised version realistic community builds produce 200,000 to 400,000 items per hour, still extraordinary.

    The Kill Chamber: Most Important Detail

    This is where most first-time builds go wrong. A drop shaft pull piglins to a central hole. Falling more than 24 blocks kills zombified piglins outright; tune the height so survivors land at very low health for a one-hit kill, rather than dying mid-fall (a fall death skips the player-only loot).

    The same rule applies to Guardians. A drop of more than 24 blocks kills them from fall damage alone but fall kills give you fewer drops than player kills. Tune your drop shaft to exactly 23 blocks so Guardians arrive with 1 to 2 hearts remaining. One swing of a Looting III sword finishes them and collects maximum loot.

    Use Looting III on every kill run. A zombified piglin has a 2.5% chance to drop a gold ingot. With Looting III, that chance increases to 5.5%. That’s more than double. Guardian drop rates improve similarly with Looting III Prismarine Shard drops increase significantly and the rare Prismarine Crystal drop becomes meaningfully more common.

    What You Need Before Starting

    Gather these materials before approaching the monument:

    ItemAmountPurpose
    Night Vision Potions20 minimumUnderwater visibility throughout the build
    Water Breathing Potions20 minimumExtended underwater work sessions
    Sponges100 to 200Monument draining
    Sand or Gravel87 full stacksPerimeter walls and fill
    Netherite or Diamond Sword1 with Looting IIIKill chamber weapon
    Trident with Impaling V1Underwater combat
    Full Diamond ArmourAqua Affinity + Depth StriderUnderwater movement and survival
    Doors or Trapdoors32Air pocket creation during build
    Hoppers16 to 32Item collection system
    Chests8 to 16Item storage
    Magma Blocks64Kill chamber floor
    Soul Sand64 (no-drain design)Bubble column push

    Aqua Affinity on your helmet is non-negotiable. Without it, breaking blocks underwater takes 5 times longer. The entire build requires breaking hundreds of blocks underwater Aqua Affinity is the single most important enchantment for the construction phase.

    Output by Design Type

    Farm DesignPrismarine Shards Per HourXP OutputComplexity
    No Drain Soul Sand3,000 to 5,000MediumBeginner
    Drained Standard Farm10,000 to 15,000HighIntermediate
    Portal Based Farm50,000 to 200,000+ExtremeAdvanced
    Optimised Full Build600,000 items/hr totalExtremeExpert

    Java vs Bedrock: Key Differences

    Java Edition players should break through the ceiling and build directly on top of the Nether bedrock roof (around Y=128) to completely bypass cave spawns and unwanted mobs. Bedrock Edition players cannot, since the roof is the build height limit there.

    For Bedrock Edition players: Bedrock players usually rely on a dug-out cavern near the ceiling or a portal-cycling design instead. The No-Drain Soul Sand design and the standard drained farm both work on Bedrock with the same mechanics. Portal-based designs require adjustments since Bedrock portal mechanics differ from Java.

    Common Mistakes and How to Fix Them

    MistakeWhat HappensFix
    Elder Guardians not killedMining Fatigue III makes building impossibleKill all three before starting any construction
    No Night Vision potionsCannot see anything during underwater buildBrew 20+ potions before approaching
    Drop shaft too long (24+ blocks)Guardians die from fall damage, reduced lootTune to exactly 23 block drop
    No Looting III swordDramatically reduced Prismarine and Crystal dropsEnchant before farming sessions
    AFK spot too lowOther mobs fill the mob cap, farm output dropsAFK at Y=163 to Y=170 above monument
    Particles not set to MinimalSoul Sand bubble columns tank FPS to single digitsSet video particles to Minimal
    Not spawn-proofing nearby cavesHostile mobs fill mob cap instead of GuardiansSlab, light, or flood within 128 block radius

    The honest truth about guardian farms: Guardian farms will take a sizable amount of resources. Still, the payoffs are well worth the investment as players will receive plenty of benefits from the farm and can come back to collect from it at fairly frequent regularity.

    Build the No-Drain Soul Sand version first if you are new to this. Get familiar with the monument, learn how Guardian spawning works, and collect Prismarine for your builds. Then when you are ready for the full commitment, drain it completely and build the standard drained design.

    There is no shortcut through the draining phase but there is nothing more satisfying in Minecraft than standing above a drained Ocean Monument you transformed into a fully automated Prismarine factory. Do the work once and collect the rewards indefinitely.
  • How to Build a Creeper Farm in Minecraft: The Complete Guide

    How to Build a Creeper Farm in Minecraft: The Complete Guide

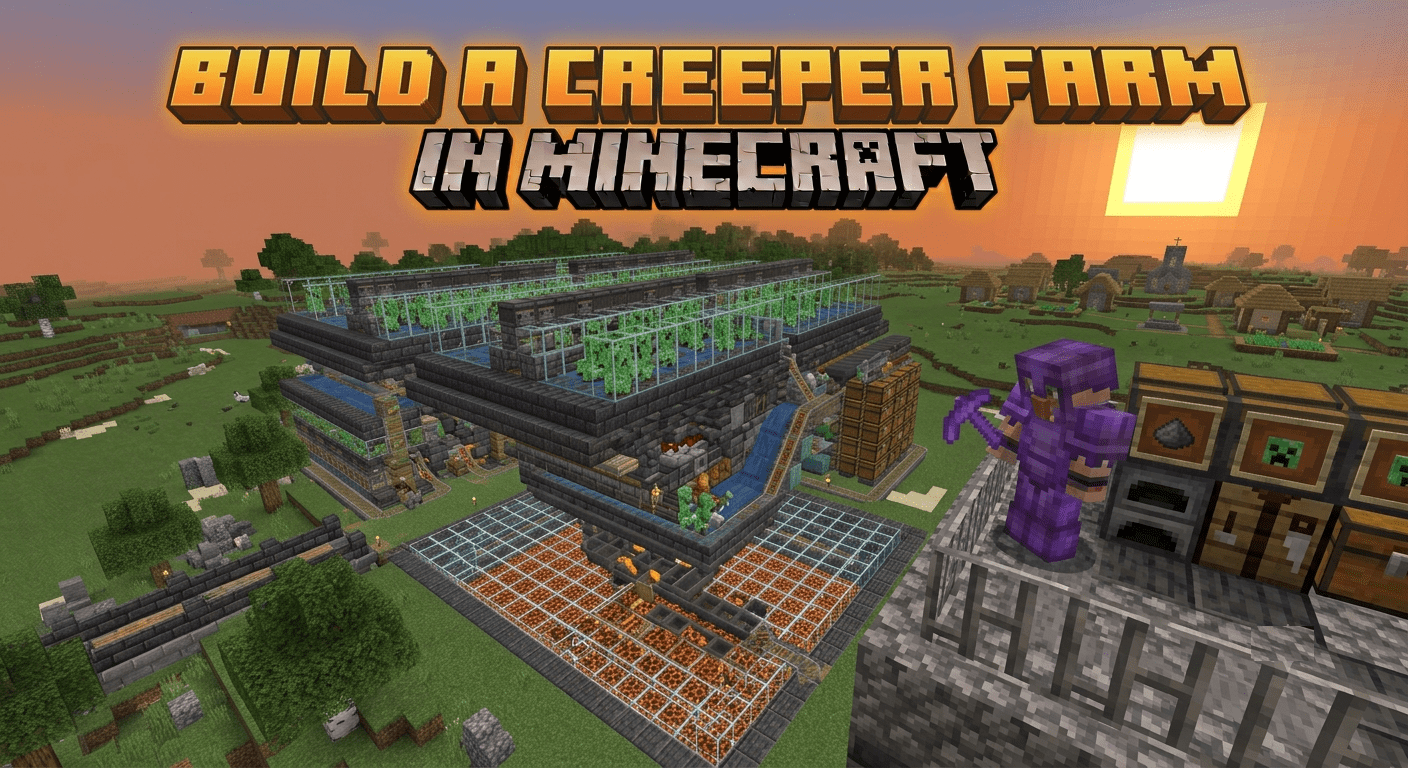
    Gunpowder eats into your TNT, rockets, and splash potions faster than most people expect, and hunting creepers by hand at night is slow and honestly a little dangerous. A dedicated creeper farm fixes that completely no explosions near your base, no risk, just steady gunpowder while you’re off doing something else. Here’s exactly how to build one.

    What You’ll Need

    ItemPurpose
    Solid building blocksPlatform and walls for the spawning area
    TrapdoorsLowers ceiling height so only creepers can spawn
    A cat (tamed)Scares creepers, pushing them toward the drop point
    CampfireOptional passive kill method, no explosion risk
    Looting III swordFor manual kills with much better gunpowder rates
    Hoppers + chestAutomatic loot collection
    SlabsRoof and floor spawn-proofing

    Step 1: Understand How Creeper Spawning Works

    1. Since the 1.18 update, creepers need a light level of 0 to spawn, the same as most other hostiles.
    2. Creepers are slightly smaller than zombies and skeletons, which is the trick the whole farm design is built around.
    3. Placing trapdoors on a 2-block-high ceiling lowers the effective height to about 1 13/16 blocks tall enough for creepers, too short for most other hostiles. This trick does not work on Bedrock Edition.
    4. Creepers are naturally afraid of cats, and will actively flee from them, which farm designs use to herd creepers toward a drop shaft without any redstone at all.

    Step 2: Pick a Farm Type

    Farm TypeDifficultyBest For
    Cat-based hourglass farmEasy-ModerateNo redstone needed, reliable early-to-mid game gunpowder
    Redstone timer + glass pillar farmModerate-HardHigher output, more consistent pushing mechanism

    If you’d rather skip redstone entirely, the cat-based design gets you a fully working farm with just building blocks, trapdoors, and one tamed cat.

    Step 3: Build the Cat-Based Creeper Farm

    1. Pick a location high in the sky, ideally 120+ blocks above the ground, since monsters spawn within a 128-block radius and height reduces spawn competition.
    2. Build a platform in a rough hourglass shape, roughly 13×16 blocks, narrowing toward the center where the drop shaft sits.
    3. Cover the roof with trapdoors on a 2-block ceiling so only creepers (and other small mobs) can spawn.
    4. Place a tamed cat near the center of the hourglass creepers will flee from it toward the narrow drop point.
    5. Build a water channel at the drop point leading to your kill chamber below.
    6. Add slabs around the collection basin to block unwanted spawns from competing for the mob cap.

    Step 4: Set Up the Kill Chamber

    1. For a fully passive option, have creepers fall onto a campfire this kills them safely without any explosion risk and lets gunpowder drop straight into hoppers below.
    2. For better rates, use a drop height of about 22 blocks, which leaves creepers at roughly half a heart, then finish them manually with a Looting III sword.
    3. Place hoppers directly beneath the kill point, feeding into a chest, so drops are collected automatically either way.

    Step 5: Improve Your Rates

    1. Light up caves and dark areas within 128 blocks of the farm, since unlit spaces nearby compete for the same mob cap.
    2. Build your AFK spot high above the farm rather than right next to it, which increases pack-spawning behavior.
    3. If you’re staying up there a while, bring a bed or build a small shelter to avoid phantoms after a few in-game days.

    Troubleshooting: Common Situations and How to Fix Them

    SituationLikely CauseHow to Fix It
    Zombies and skeletons keep spawning instead of creepersCeiling height wasn’t lowered correctly with trapdoorsConfirm the trapdoor ceiling trick is built right this doesn’t work on Bedrock at all
    Creepers aren’t moving toward the drop pointNo cat placed, or it’s too far from the spawn areaAdd a tamed cat near the center so creepers actively flee toward the shaft
    Farm barely produces anythingNearby caves are stealing spawns via the mob capLight up dark caves and open areas within 128 blocks
    Creepers explode near the collection areaKill chamber isn’t fully passive and something aggravated themSwitch to a campfire kill method, which avoids explosions entirely
    Getting drops but low quantity per killNot using Looting IIISwitch to a Looting III sword for manual finishing hits
    Snow golems keep dying near the farmThey were placed too close to live creepersKeep snow golems at least 3 blocks away from any creeper at all times
    Farm works on Java tutorial, fails on BedrockCeiling-height spawn trick doesn’t apply to BedrockLook for a Bedrock-specific creeper farm design instead
    Output is fine but you also wanted charged creepersCharged creepers require a lightning strike, not a farm mechanicUse a Channeling trident during a thunderstorm on an exposed creeper instead

    Java vs Bedrock: Know Before You Build

    EditionNotes
    JavaTrapdoor ceiling-height trick works reliably to filter out other hostiles
    BedrockThe same trapdoor trick does not function the same way Bedrock-specific designs are needed

    What the Community Keeps Debating

    There’s a recurring split between cat-based designs and redstone timer designs. The cat method is simpler and needs no redstone at all, while timer-based builds using glass pillars and a push mechanism tend to produce more consistent output for players willing to put in the extra wiring.

    Charged creepers come up constantly too, mostly because people assume you need a dedicated charged-creeper farm to get mob heads. In practice, most players now agree it’s far easier to just throw a Channeling trident during a thunderstorm at a creeper from a regular farm than to build one of the old, expensive charged-creeper-specific setups.

    Final Thoughts

    A creeper farm is one of the safest, most satisfying builds in the game once it’s running no risk to your base, no exploding surprises, just gunpowder piling up in a chest. Start with the cat-based hourglass design if you want something simple, and don’t forget to check nearby caves if your output ever feels lower than it should.

  • How to Build a Villager Breeder in Minecraft: The Complete Guide

    How to Build a Villager Breeder in Minecraft: The Complete Guide

    If you want a real trading hall or a working iron farm, you need a steady supply of villagers, and hoping to stumble across enough of them in the wild just doesn’t cut it. A villager breeder solves that by turning two villagers into an endless population source. Here’s how to actually build one that works.

    What You’ll Need

    ItemPurpose
    At least 3 bedsRequired for breeding to trigger (2 villagers + 1 spare)
    2+ adult villagersThe actual breeding pair
    Food (bread, carrots, potatoes, or beetroot)Makes villagers “willing” to breed
    Fences or solid wallsKeeps villagers contained and safe
    Composter (optional)Lets a farmer villager auto-collect crops
    Water stream or 1-block gapMoves babies out without letting adults escape

    Step 1: Understand How Villager Breeding Actually Works

    1. Breeding needs more valid beds than villagers in the space the classic setup is 3 beds for 2 adults.
    2. Each bed needs clear headroom above it, since a baby villager needs room to physically claim it.
    3. Villagers only breed once they’re “willing,” a hidden status flag triggered by having enough food in their inventory or by trading with you.
    4. A farmer villager working near a composter and crop plot will automatically share food with nearby villagers, which is why farmer-based setups are the standard for hands-off breeders.

    Step 2: Pick a Breeder Type

    Breeder TypeDifficultyBest For
    Manual feed breederEasyGetting your first few villagers fast
    Farmer-fed automatic breederModerateLong-term, self-sustaining population growth

    Start manual if you just need a handful of villagers right now. Move to the farmer-fed version once you want the breeder running without you tossing food every few minutes.

    Step 3: Build a Manual Breeder

    1. Build an enclosed room roughly 3×3 or 3×4, big enough for adults to move without wandering off.
    2. Place 3 beds along one wall, making sure each has proper open space above it.
    3. Move two adult villagers into the room using boats or minecarts.
    4. Throw food directly at the villagers bread, carrots, potatoes, or beetroot all work.
    5. Watch for green sparkles, which signal willingness, followed by heart particles when breeding starts.
    6. A baby spawns and claims the spare bed automatically.

    Step 4: Build a Farmer-Fed Automatic Breeder

    1. Set up a 3×3 farm plot of carrots or potatoes that a farmer villager can reach.
    2. Place a composter just outside the breeder room and put an unemployed villager next to it to lock in the farmer profession.
    3. Add your 3 beds inside the breeder room as usual, then move two additional unemployed villagers in as the breeding pair.
    4. Let the farmer harvest and automatically toss excess crops to the breeders willingness will trigger on its own from there.
    5. Cut a 1-block gap at floor level leading to a water stream, sized so babies fit through but adults can’t follow.
    6. Let the water carry babies into a separate holding area or nursery chamber.

    Step 5: Handle the Babies

    Babies don’t inherit professions at birth, so you’ll need to assign work later. Place a job site block within 48 blocks of a grown villager to give it a profession, or break and replace the block to reset its trades entirely.

    Troubleshooting: Common Situations and How to Fix Them

    SituationLikely CauseHow to Fix It
    Villagers won’t touch thrown foodThe mobGriefing gamerule is turned offTurn mobGriefing back on, or accept that automated feeding won’t work with it disabled
    Breeder worked, then suddenly stoppedThe new baby is now counted against your spare bed capacityAdd more beds, or move babies out faster so a spare bed stays open
    One villager keeps wandering offIt claimed a different bed or workstation somewhere nearbyEnclose the breeder fully so no outside beds or job sites are reachable
    No willingness sparkles despite feedingFood isn’t reaching the required thresholdCheck you’re using an accepted food type and enough of it a few pieces isn’t always enough
    Babies keep getting stuck with the adultsNo proper baby-sized exit gap was builtAdd a 1-block gap or water stream sized for babies only
    Breeding is painfully slowThe farmer isn’t producing food fast enoughAdd more farm plots, or feed the breeders manually as a supplement
    Villagers seem trapped near a wild villageAnother village exists within roughly 80 blocksMove the breeder farther away, or isolate it from any nearby villages entirely
    Breeder works on Java tutorial, fails on BedrockBed/workstation detection and linking behave differently between editionsFollow a build made specifically for your edition, not a generic cross-platform one

    Java vs Bedrock: Know Before You Build

    EditionNotes
    JavaBed and village-linking mechanics are well documented and consistent
    BedrockSame core rules, but bed/workstation detection is more failure-prone and a frequent source of stuck villagers

    What the Community Keeps Getting Wrong

    The single most common complaint traces back to the mobGriefing gamerule. Plenty of server owners disable it to stop creepers and endermen from causing damage, not realizing villagers are bundled into that same setting so their farmer stops harvesting and the whole breeder quietly dies without any obvious redstone problem.

    There’s also an ongoing debate about manual feeding versus farmer automation. Some players prefer just tossing carrots at two villagers to get a breeder online fast, while others insist a proper farmer-and-composter setup is worth the extra build time since it keeps running without any babysitting.

    Final Thoughts

    A villager breeder isn’t flashy, but it’s the foundation everything else trading halls, iron farms, curing zombie villagers for discounts ends up depending on. Start manual to get your first few villagers moving, then upgrade to a farmer-fed setup once you’re ready to let it run itself.

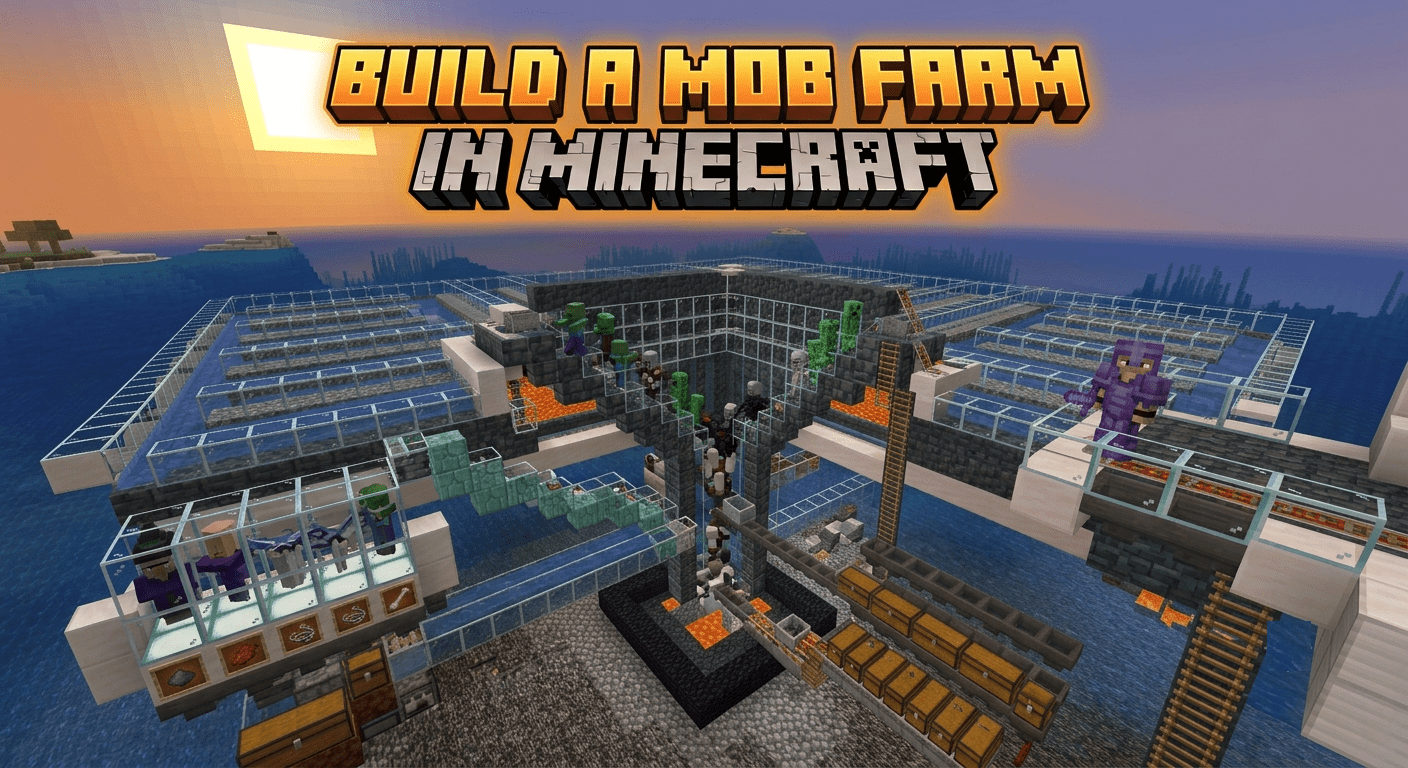
  • How to Build a Mob Farm in Minecraft: The Complete Guide

    How to Build a Mob Farm in Minecraft: The Complete Guide

    Every serious Minecraft world eventually needs a steady source of XP and general drops bones, string, gunpowder, arrows, rotten flesh, all the stuff you burn through constantly. A mob farm solves that in one build, and it’s usually the first automation project most players tackle before moving on to anything fancier. Here’s exactly how to build one, step by step.

    What You’ll Need

    ItemPurpose
    Water bucketsCreates channels that push mobs toward the kill point
    Trapdoors or slabsBlocks spawns on the roof and directs mob movement
    Hoppers + chestsAutomatic loot collection
    Torches (temporary)Used while building, then removed before the farm goes live
    A sword (any enchant helps)Needed for the finishing hit that grants XP
    Building blocksFor the spawning platform and surrounding structure

    Step 1: Understand How Mob Spawning Actually Works

    1. Hostile mobs need a block light level of 0 to spawn, and on the surface, a sky light level of 7 or lower too.
    2. Mobs won’t spawn within a roughly 24-block radius of you, but they can spawn out to about 128 blocks away.
    3. There’s a hard limit on how many hostile mobs can exist at once this is the mob cap around 70 per player on Java and roughly 200 globally on Bedrock.
    4. Critically, XP only drops if you (or a tamed wolf) land the final hit. Fall damage or traps alone will still give item drops, but no experience.

    Step 2: Pick a Farm Type

    Farm TypeDifficultyBest For
    Spawner farmEasyEarly game, if you’ve found a dungeon
    Dark room towerModerateNo spawner needed, scales much higher

    If you’ve stumbled on a dungeon with a spawner already, build around that first it’s cheap and requires zero redstone. If not, the dark room tower works anywhere and scales far better long term.

    Step 3: Build a Spawner Farm (If You Have One)

    1. Find a dungeon spawner, usually a small cobblestone room between Y=0 and Y=50, spawning zombies, skeletons, or spiders.
    2. Light the room temporarily with torches so mobs stop spawning while you build.
    3. Dig a water channel that funnels mobs from the spawner room toward a central drop point.
    4. Build a roughly 22-block drop, which brings mobs down to about half a heart without killing them.
    5. Add a small finishing chamber at the bottom where a single hit kills them and grants XP.
    6. Remove the temporary torches once construction is done so spawning resumes.

    Step 4: Build a Dark Room Tower (No Spawner Needed)

    1. Pick a location high in the sky or over an ocean, away from caves and other dark spaces.
    2. Stack multiple 3-block-high dark chambers, since taller towers with more spawning floors produce more mobs.
    3. Seal every gap completely no torches, glowstone, or light leaks anywhere inside.
    4. Place slabs on top of each level’s roof so mobs can’t waste spawns up there instead of the intended floor.
    5. Run water channels across each platform to sweep mobs toward a central drop shaft.
    6. Let the shaft funnel everything down into one finishing chamber, positioned close enough for repeated manual hits.

    Step 5: Position Your AFK Spot Correctly

    Stand roughly 24 to 32 blocks from the spawning platforms. Too close and mobs can’t spawn at all; too far and they may despawn before reaching your kill chamber.

    Troubleshooting: Common Situations and How to Fix Them

    SituationLikely CauseHow to Fix It
    Farm barely produces any mobsUnlit caves nearby are eating the mob capLight up every dark space within 128 blocks of the farm
    Getting drops but no XPMobs are dying from fall damage or traps aloneRebuild the chamber so you land the actual finishing hit yourself
    Spawns stopped completely after buildingA stray torch or light leak got left inside the chamberWalk every level and check for forgotten light sources
    Mobs spawning on the roof instead of the floorNo slab or barrier on top of the platformCap every platform with slabs to block roof spawns
    Farm worked before, now feels slowerNew caves or structures got explored/lit nearby, shifting mob cap competitionRe-check your 128-block radius for new dark areas
    Trident killer design copied from Java doesn’t workBedrock handles trident mechanics differentlyUse a Bedrock-specific kill method, like a campfire or magma block chamber
    Mobs pile up and despawn before reaching the kill zoneAFK spot is too far from the drop shaftMove closer, ideally within the 24–32 block sweet spot
    Only getting one mob type (e.g., all zombies)Farm is built off a single-type spawner instead of a general dark roomBuild a separate dark room tower if you want variety alongside the spawner farm

    Java vs Bedrock: Know Before You Build

    EditionNotes
    JavaMob cap of ~70 per player; semi-automatic manual-hit designs are the standard
    BedrockGlobal mob cap of ~200; trident-pushing mechanisms can simulate automatic player kills for XP

    Copying a farm design straight from one edition to the other is one of the most common mistakes people run into. Trident killers in particular behave completely differently on Bedrock, so it’s worth confirming a tutorial was actually built for your edition before investing hours into it.

    What the Community Keeps Debating

    There’s an ongoing back-and-forth about whether it’s worth building a spawner farm first or skipping straight to a dark room tower. The spawner camp argues it’s faster to get running and needs zero redstone, while the dark-room camp points out it scales much higher once you’re ready to commit the extra materials.

    The other recurring theme is how often people discover the mob cap issue the hard way. A farm that looks perfectly built can still trickle out almost nothing, and the fix lighting up unrelated caves dozens of blocks away isn’t something most players think to check first.

    Final Thoughts

    A mob farm is the build that quietly changes how the rest of your world plays out. Start with a spawner farm if you’ve got one, graduate to a dark room tower once you want more scale, and always double-check your surroundings for light leaks before assuming the design itself is broken.

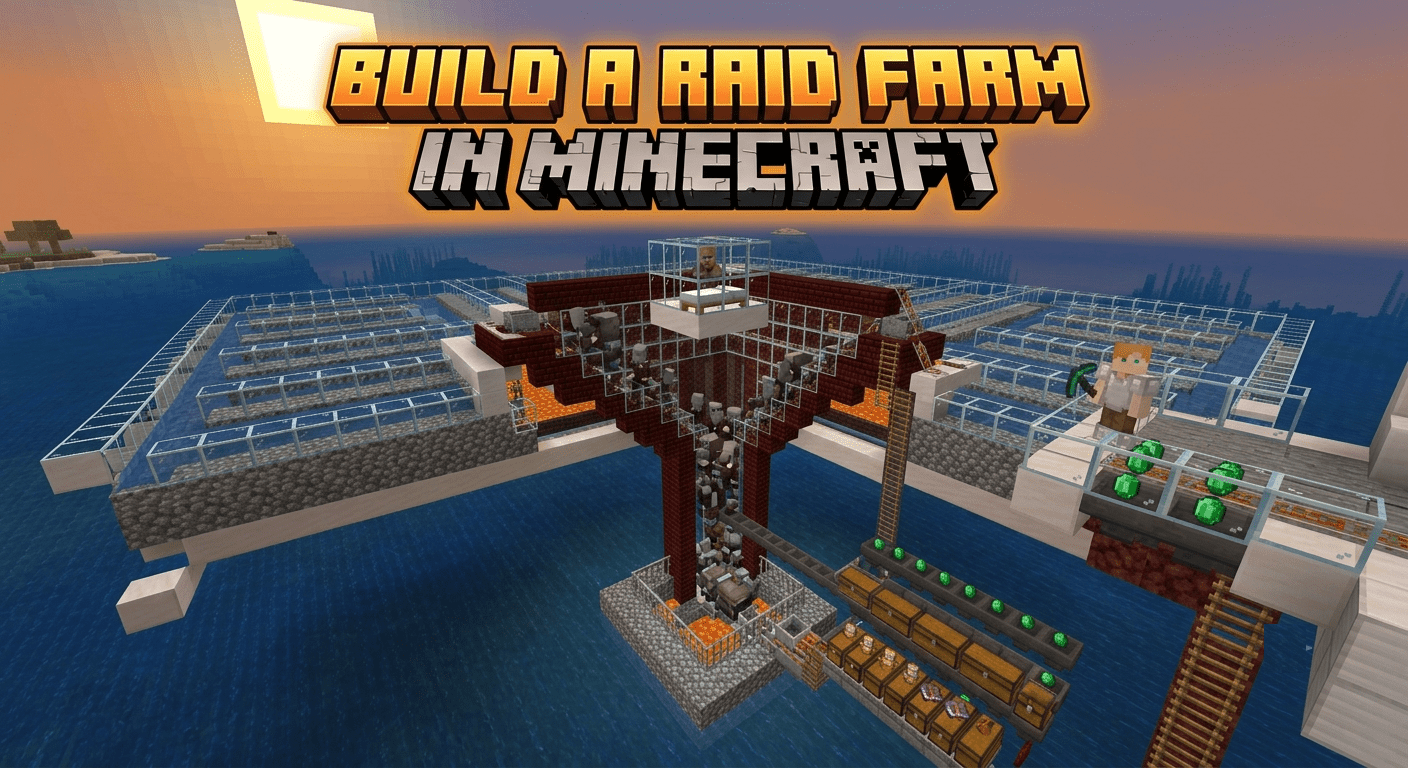
  • How to Build a Raid Farm in Minecraft: The Complete Guide

    How to Build a Raid Farm in Minecraft: The Complete Guide

    If totems of undying and unlimited emeralds sound appealing, a raid farm is where you’re headed next. It’s one of the most rewarding builds in the game, but also one of the most misunderstood, especially after recent mechanic changes shook up how raids actually trigger. This guide breaks down everything you need, step by step.

    What You’ll Need

    ItemPurpose
    Ominous Bottle(s)Required to trigger Raid Omen and start a raid
    A village (1 bed + 1 villager minimum)Raids can only be triggered inside a village
    Sweeping Edge swordPrevents evokers from summoning vexes and reduces witch potion chaos
    Iron golem or armor stand baitAttracts raiders into your kill zone
    Hoppers + chestsAutomatic loot collection
    Bell (optional)Lets you visually track incoming raid waves
    Redstone for a raid engineNeeded for advanced, sustained farms

    Step 1: Understand How Raids Actually Work

    1. A raid only starts when you have the Raid Omen effect and step into a village.
    2. Raid Omen currently comes exclusively from drinking an Ominous Bottle, which you get by defeating raid captains or opening vaults in Trial Chambers.
    3. Once triggered, the raid spawns 5 waves of increasingly dangerous mobs pillagers and vindicators first, then witches, ranged units, and finally mixed waves with ravagers and evokers.
    4. Each wave takes roughly 20–40 seconds to fully spawn, and totems of undying mostly show up in waves 3 through 5.
    5. If you wander too far from the Raid Omen player, the raid pauses, so your farm needs to keep you within range while staying safe.

    Step 2: Secure a Steady Supply of Ominous Bottles

    Since Ominous Bottles are now the only way to trigger a raid, most serious raid farms start with a pillager outpost trap.

    1. Find a pillager outpost and set up a golem-bait or tripwire trap to lure pillagers and captains into a kill zone.
    2. Kill raid captains specifically they’re the ones with a banner, and they drop the Ominous Bottles you need.
    3. Store your bottles somewhere accessible, since you’ll be drinking one every time you want to restart a raid.

    Step 3: Pick a Farm Type

    Farm TypeDifficultyBest For
    Basic hole trapEasyCasual raid loot, early-to-mid game
    Raid engine (stacking) farmHardLong AFK sessions, mid-to-late game
    Multi-player coordinated farmVery HardEndgame servers with friends, maximum totems/hour

    If you’re new to raid farming, start with the basic hole trap. Save the redstone-heavy raid engine for once you understand wave timing and want to automate the whole cycle.

    Step 4: Build the Basic Raid Farm

    1. Choose or create a village with at least one bed and one villager.
    2. Build a spawning platform on solid ground where raiders are forced to spawn remember, they can’t spawn on leaves, scaffolding, or liquid.
    3. Add a funnel system, like a hole with trapdoors, that channels spawned raiders down into a kill chamber.
    4. Drink your Ominous Bottle while standing in the village to trigger Raid Omen and start the raid.
    5. Use a bell near your chamber to visually track each wave as it approaches.
    6. Finish off raiders with your Sweeping Edge sword as they funnel through, and let hoppers collect the drops.

    Step 5: Set Up a Raid Engine for Sustained Farming

    Once the basic version feels too manual, a raid engine automates the repeat cycle for you.

    1. Set up a group of villagers on job site blocks, usually composters, spaced roughly one chunk apart.
    2. Use pistons to interact with the job sites and observers to detect the changes, cycling them to reset the raid state.
    3. Add a redstone clock that matches the 30-second Raid Omen duration, timing when the next bottle gets used and when your funneling system opens.
    4. Keep a small Ominous Bottle farm running alongside this, since 1.21+ raid engines burn through bottles faster than older designs did.

    Troubleshooting: Common Situations and How to Fix Them

    SituationLikely CauseHow to Fix It
    Raid won’t trigger at allYou don’t actually have Raid Omen, or you’re not in a real villageConfirm you drank an Ominous Bottle and that the location counts as a proper village
    Raid pauses mid-waveYou’ve moved too far from the Raid Omen playerBuild your AFK spot closer to the village center, within raid range
    Evokers summon vexes or witches spam potionsYou’re not using Sweeping EdgeSwitch to a sword enchanted with Sweeping Edge before engaging raiders
    Loot keeps disappearingDrops are despawning before collectionSpeed up your hopper/collection system Java drops despawn after 5 minutes
    Raid ends in defeat unexpectedlyToo many raiders escaped or died outside the raid contextTighten your funnel so raiders can’t wander off before reaching the kill zone
    Old stacking farm stopped working after an updateMechanic changes broke the previous trigger methodRebuild the raid engine around Ominous Bottles instead of the old instant Bad Omen trigger
    Server lags badly during raidsToo many entities dying at once, particles and sounds piling upBuild the farm 500+ blocks from spawn, or in another dimension if playing on a busy server
    Getting decent loot but no totemsYou’re ending raids before wave 3Let the raid run its full course totems mainly drop in waves 3–5

    Java vs Bedrock: Know Before You Build

    EditionNotes
    JavaFull raid engine support, faster AFK-able designs, Ominous Bottles obtainable the same way
    BedrockSpecial mob drops during raids (emeralds, enchanted books, iron gear) but some efficiency tricks, like holding a looting sword in the offhand while drinking a bottle, aren’t possible

    This gap has actually become a recurring point of discussion in the community. Plenty of players have pushed back on the idea that raid farms are “overpowered,” arguing that Bedrock players already can’t reach the same efficiency Java players get from optimized engines, so further nerfs would hit the two editions unevenly.

    The Bigger Debate: Was the Ominous Bottle Change a Good Idea?

    Since Bad Omen became something you have to choose to drink instead of getting it automatically from a captain kill, opinions in the community have been pretty split. Some players appreciate the extra control it gives over when a raid starts, since accidentally triggering one used to catch people off guard.

    Others feel it took away some of the tension the mechanic used to have, comparing it to needing “consent” from the player before illagers retaliate. Either way, most agree on one thing: any raid farm tutorial that doesn’t build around Ominous Bottles is outdated and needs a redesign to work in current versions.

    Final Thoughts

    A raid farm is one of the best ways to stockpile totems of undying and emeralds, but it’s also one of the builds most affected by recent mechanic changes. Get comfortable with the Ominous Bottle cycle first, start with a simple hole trap, and only move to a full raid engine once you’re ready to commit to the redstone.

  • How to Build a Gold Farm in Minecraft: The Complete Guide

    How to Build a Gold Farm in Minecraft: The Complete Guide

    Gold is one of those resources you never have enough of once you hit the Nether. You need it for powered rails, golden apples, and bartering with piglins, and mining it by hand just isn’t worth your time. This guide walks you through everything you need to build a working gold farm, from the basics to the endgame builds the community keeps buzzing about.

    What You’ll Need

    Gather these before you head into the Nether, so you’re not making trips back and forth mid-build.

    ItemPurpose
    Glass or slabsSpawn-proofing so only piglins spawn on your platform
    Hoppers + chests/minecartAutomatic loot collection
    TrapdoorsFunneling piglins toward the drop point
    Sword with Looting IIIRoughly doubles nugget/flesh output per kill
    Ender pearlsNeeded if you’re going up to the Nether roof
    ObsidianRequired for portal-wall style farms

    Step 1: Understand How the Farm Actually Works

    1. Every gold farm is built around the zombified piglin, which spawns naturally in dark areas of the Nether.
    2. When killed, it drops gold nuggets, rotten flesh, and occasionally a gold ingot or golden sword.
    3. The goal is to concentrate spawns in one place and funnel the mobs into a kill zone.
    4. The Nether Wastes biome has the highest spawn weight of any Nether location, making it the best base for almost every design.

    Step 2: Pick a Farm Type for Your Stage

    Not every player needs the same farm. Match the build to where you are in the game.

    Farm TypeDifficultyRough OutputBest For
    Simple platformEasyLow–moderateEarly game, first stack of gold
    Nether roof farmHardHighMid–late game, steady large supply
    Portal-wall farmVery hardUp to ~1,600 gold blocks/hourEndgame, dedicated builders

    If you just built your first Nether portal, start with the simple platform farm. Save the roof and portal-wall builds for once you’re geared up and patient enough for the redstone work.

    Step 3: Build the Simple Platform Farm

    1. Clear a large, flat area in the Nether Wastes, at least 20×20 blocks.
    2. Keep the ceiling low and dark so piglins are the mobs most likely to spawn there.
    3. Seal off any nearby caves or open spaces that could let other mobs spawn instead.
    4. Place a trapdoor or water-stream system at the edges to funnel piglins toward one drop point.
    5. Use fall damage or a narrow one-block gap to move piglins down into a holding area without killing them.

    Step 4: Set Up the Kill Chamber

    This step matters more than it used to. Gold ingots, golden swords, and XP now only drop when you or your tamed wolf land the final hit, so a passive kill method alone won’t give you the good loot anymore.

    1. Build a small chamber where piglins land at low health after the fall.
    2. Position yourself (or your wolf) so every piglin can be finished off manually.
    3. Use your Looting III sword for every kill to maximize nugget and flesh drops.
    4. Add a hopper minecart or hopper line underneath to auto-collect everything.

    Step 5: Upgrade to a Nether Roof or Portal-Wall Farm

    Once the basic farm feels too slow, it’s time to move up.

    Nether roof farm:

    1. Head to Y-200 or higher and use an ender pearl trick to slip through the bedrock ceiling.
    2. Build your spawning platform on the roof, where spawn rates noticeably improve.
    3. Add a slab or glass roof above your platform to block ghast spawns.
    4. Route piglins into the same style of manual kill chamber from Step 4.

    Portal-wall farm:

    1. Stack dozens of Nether portals together in a wall formation.
    2. Set up a piston or flying-machine system to force-tick the portals rapidly.
    3. Funnel spawned piglins toward a central kill point using turtle eggs or a similar attractant.
    4. Finish each kill manually to keep the good drops flowing at scale.

    Common Mistakes the Community Keeps Bringing Up

    The biggest one is relying on old tutorials that assume passive kills still drop full loot. That mechanic was patched out, so any guide that doesn’t mention a manual kill chamber is outdated.

    The second common issue is poor spawn-proofing. Light leaking into unintended areas or leftover spawnable surfaces nearby will quietly tank your farm’s output, even if the redstone itself is built perfectly.

    Java vs Bedrock: Know Before You Build

    EditionRecommended Approach
    JavaMore flexibility – portal-ticking mega-farms work reliably
    BedrockStick to large natural-spawn platforms; portal-ticking designs are unreliable

    Spawning mechanics genuinely differ between the two editions, so a design that works on one can fail completely on the other. Always build from a tutorial made for your specific edition.

    Troubleshooting: Common Situations and How to Fix Them

    Even a well-planned farm runs into problems once it’s actually running. Here’s what usually goes wrong and how to sort it out.

    SituationLikely CauseHow to Fix It
    Almost no piglins are spawningNearby caves or open spaces are stealing the mob capSeal off surrounding areas so your platform is the only valid spawn surface
    Piglins die from the fall before you can hit themDrop height is too tallShorten the fall so they land alive at low health, ready for a finishing hit
    You’re only getting nuggets and flesh, no ingots or XPThe killing blow isn’t landing from you or your wolfRebuild the chamber so every piglin is close enough for a manual hit, not passive damage
    Ghasts keep spawning on your roof farmNo ceiling above the platformAdd a full slab or glass roof to block ghast spawn checks
    A whole horde turns hostile and rushes you at onceOne angered piglin alerts every other piglin nearbyFight from a narrow, defensible kill chamber, and keep good armor on even for “AFK” farms
    Output feels way lower than tutorials promiseYou’re outside simulation distance or the farm isn’t fully loadedAFK closer to the farm, or check your simulation/render distance settings
    Portal-wall farm barely spawns anythingNot enough portals are ticking fast enoughAdd more portals to the wall or speed up your piston/flying-machine ticking mechanism
    Game lags or crashes near the farmToo many entities stacked in one spotKeep kill chamber cycles fast so piglins don’t pile up, and avoid oversized single-chamber designs
    Farm worked on one edition but not the otherFollowing a tutorial built for the wrong editionMatch your build to a guide made specifically for Java or Bedrock, not a generic one

    Final Thoughts

    A well-built gold farm turns one of Minecraft’s most annoying resources into something you barely think about again. Start simple, upgrade once you outgrow it, and always double-check that your kill chamber is set up for manual finishing hits that one detail trips up more people than anything else.

  • Minecraft Stronghold: The Complete Guide

    Minecraft Stronghold: The Complete Guide

    The Stronghold is the most important structure in all of Minecraft. It is not the most dangerous, not the most impressive looking, and not the most rewarding to loot but it is the one structure that every player who wants to complete the game must find. Without it, the Ender Dragon fight never happens. The credits never roll. The game is never technically finished.

    Here is everything you need to know about it.

    What Is a Stronghold?

    A Stronghold is a hidden underground structure that holds the End Portal, making it essential if you want to reach the End and fight the Ender Dragon. You will not find it sitting on the surface like a village or a desert temple. It spawns deep underground with multiple libraries, corridors, prison cells, and secret rooms to navigate.

    The stronghold is the only place where an End Portal can be found. That single fact makes it mandatory. Every other structure in Minecraft is optional. This one is not.

    How Many Strongholds Exist Per World

    Java Edition and Bedrock Edition handle this completely differently and the difference matters.

    In Java Edition, strongholds are distributed across 8 concentric rings centered on the world origin. Ring 1 is closest and easiest to find with Eyes of Ender the first stronghold you encounter is almost always in Ring 1, within roughly 3,000 blocks of spawn. Java Edition generates a total of 128 strongholds per world.

    In Bedrock Edition, there are only 3 Strongholds per world in total, and each has an End Portal room. That means on Bedrock, every trip needs to count. You have three shots at finding the portal Java players have 128.

    In Bedrock Edition, there are 3 extra strongholds at least 453 blocks away from the world origin, which tend to be close to the 453-block boundary and are guaranteed to generate below meeting points of a village. If you find a village in Bedrock Edition, there is a good chance a Stronghold sits directly underneath it.

    Where Exactly Do They Generate

    There is no fixed depth and that is what makes them hard to find. Strongholds generate at any Y level, mostly underground, and prefer to generate in biomes above sea level but generate underwater if necessary. They can even spawn at bedrock level, cutting through the bedrock itself.

    Most strongholds concentrate around Y0 to Y-16 in typical terrain. Strongholds adapt to terrain they can be partially exposed in ravines or completely buried under mountains. Check your Y-coordinate while searching. Press F3 on Java Edition or enable coordinates in Bedrock Edition settings.

    Ravines do not overwrite strongholds rather, a stronghold can occasionally be found exposed by a ravine. If you ever spot mossy stone bricks inside a ravine wall, start digging immediately.

    Step 1: Craft the Eyes of Ender

    You cannot find a Stronghold without Eyes of Ender they are the only navigation tool for this structure.

    Each Eye of Ender requires one Ender Pearl and one Blaze Powder. The only way to get Ender Pearls is to defeat Endermen the tall, dark mobs that teleport around and pick up blocks. When you hit them or look into their eyes, they will teleport away and charge you repeatedly.

    Blaze Powder comes from Blaze Rods, which you get by killing Blazes inside Nether Fortresses. This means finding the Stronghold requires completing the Nether first there is no shortcut around it.

    Eyes of Ender have a 20% chance of breaking when thrown. Bring at least 15 to be safe you need 12 for the portal and a few extras for navigation. Never go looking for a Stronghold with less than 15 Eyes in your inventory.

    Step 2: Follow the Eyes of Ender

    This is the intended survival method for finding a Stronghold and the one every player uses on their first run.

    Throw an Eye of Ender into the air and follow the direction it travels. It leads you to the nearest stronghold, which spawns between Y-levels -32 and 48 underground.

    Here is the exact process that works:

    Throw your first Eye of Ender and note the direction it flies. Walk roughly 200 to 300 blocks in that direction. Throw another Eye and check if the direction has changed. Keep walking and throwing every few hundred blocks until the Eye starts floating downward instead of forward.

    When the Eye floats downward instead of forward, you are standing directly above the stronghold. Dig down carefully the stronghold is typically between Y 0 and Y 40. Find the portal room by exploring the stronghold corridors to locate the End Portal room.

    The speedrunner triangulation method uses just 2 Eyes. Throw an Eye at your starting position and note the direction. Walk perpendicular to the Eye’s direction, then throw another Eye. The intersection point of both directions is where the stronghold sits. This saves Eyes of Ender for filling the portal frames later.

    Step 3: Navigating the Maze Inside

    Finding the Stronghold is only half the battle. Getting to the End Portal room inside it is the other half.

    Once inside a Minecraft Stronghold, you will find the place is essentially a maze. There are winding hallways, spiral staircases to follow, and a couple of different rooms you can come across that make it hard to keep track of where you have been. Place torches on the right-hand side wall as you travel with this method, you can know where you have been already as you get lost in the area.

    The torch method is the simplest navigation system in the game. Torches always go on your right wall going forward. When you are backtracking, torches are on your left wall. You can never get permanently lost using this technique.

    While walking around the stronghold, you can find libraries full of bookshelves and spiderwebs, various chests hidden throughout the area, and the End Portal room. Along the way, mobs like zombies and skeletons are likely to spawn in the dark corridors, so be sure to light them up as you travel. Some of the stone bricks around the structure will be infested with silverfish, so be careful what blocks you break or you can have a horde of silverfish attacking you.

    What Is Inside a Stronghold

    The Stronghold is one of the most complex structures in Minecraft most players only find the portal room and leave without exploring properly. Here is every room type and what it contains:

    Room TypeWhat Is InsideWorth Visiting?
    End Portal RoomEnd Portal, Silverfish Spawner, lava poolEssential
    Library (Small)Bookshelves, cobwebs, 1 chestYes, books and loot
    Library (Large, 2 floors)More bookshelves, cobwebs, 2 chestsDefinitely yes
    Prison CellIron bars, sometimes a chestCheck for loot
    Storage RoomSingle chest, stone bricksQuick loot stop
    Spiral StaircaseNavigation between floorsLandmark for orientation
    Fountain RoomStone brick fountain, decorativeNavigation landmark
    CorridorsConnecting rooms, random mob spawnsLight them as you go

    The two-floor library is the best non-portal room in the entire Stronghold. It contains the most chests and the highest concentration of bookshelves which you can break for the books to build your own enchanting setup back at base.

    The End Portal Room

    This is what every Minecraft player is searching for the gateway to the final boss fight.

    When you find the portal room in a Stronghold, it is highly likely that it will be incomplete. If you look at the top of it, there will be slots in the portal frame where you can insert an Eye of Ender into each block. Once all 12 slots have an Eye of Ender, the middle portion of the portal will activate and become very dark and starry.

    Each portal frame has a 10% chance to generate containing an Eye of Ender already placed. On average, 0 to 3 slots are pre-filled, but some seeds generate frames with 4 to 5 Eyes already in place. Count the pre-filled slots immediately when you enter the room each one means one fewer Eye you need to supply.

    The Silverfish Spawner in the portal room is your first priority. Destroy it before doing anything else. Silverfish are small, fast, and attack in swarms fighting them while also trying to fill portal frames in a cramped room above lava is exactly as bad as it sounds.

    The Scouting Run Strategy

    Every experienced Minecraft player does two trips to the Stronghold not one. Once you have located the Stronghold and confirmed the End Portal room, resist the urge to immediately activate the portal and fight the Dragon. Instead, use this first visit as a scouting and looting run. The Stronghold’s chests contain Golden Apples, enchanted books, Ender Pearls, and iron and gold ingots. Collect everything before you commit to the End battle.

    Leave without activating the portal on your first visit. Go back to base, craft enough Eyes of Ender to fill all empty portal frame slots, stock up on food, enchant your armour and weapons, and bring Beds for the Dragon fight. Return fully prepared on your second visit and activate the portal then.

    This two-trip approach has a dramatically higher success rate than rushing straight into the End the moment you find the portal room.

    What to Bring Into the Stronghold

    Come prepared the corridors are dark, full of mobs, and deeper underground than most players expect.

    ItemAmountWhy
    Eyes of Ender15 to 20Navigation and portal activation
    Diamond or Iron Sword1 enchantedMobs and Silverfish
    Full ArmourIron minimum, diamond preferredMultiple mob encounters
    PickaxeIron or diamond with EfficiencyDigging in and navigating stone
    FoodFull stackLong exploration session
    Torches64 minimumNavigation and mob prevention
    Water Bucket1Emergency lava protection
    Bow with Arrows1 with 64 arrowsRanged mob control in corridors

    Do not forget a water bucket. Lava exists in the End Portal room and occasionally elsewhere in the Stronghold. One accidental step means losing everything you are carrying if you have no water nearby.

    Common Mistakes Every First-Timer Makes

    Throwing Eyes of Ender too frequently. Walk 200 to 300 blocks between throws. Throwing every 10 blocks burns your supply before you get close to the Stronghold.

    Activating the portal without preparation. The Ender Dragon fight on a first visit with unprepared gear ends in a respawn and a long walk back through the Stronghold. Scout first, fight second.

    Ignoring the Silverfish Spawner. Destroy it the moment you enter the portal room. Every second it remains active is another Silverfish that can knock you into the lava pool below the portal.

    Breaking infested stone blocks accidentally. Break stone bricks carefully some contain Silverfish that attack when the block breaks. If you hear a high-pitched chittering sound while mining in a Stronghold, stop immediately and switch to a sword.

    Not looting the libraries. The two-floor library contains some of the best early-game enchanted book loot available before the Nether. Skipping it to rush to the portal room wastes genuinely valuable resources.

    Quick Reference: Stronghold by Edition

    FeatureJava EditionBedrock Edition
    Total per world128 strongholds3 main, unlimited total
    Nearest to spawn1,408 to 2,688 blocksAt least 160 blocks away
    Under villagesNo guaranteed linkYes, 3 extra strongholds under villages
    Generation depthY -32 to Y 48Y -32 to Y 48
    Portal frames pre-filled0 to 12 (10% chance each)0 to 12 (10% chance each)
    Missing portal room possibleVery rareRare but documented

    The Stronghold is the turning point of every Minecraft survival world. Everything before it is preparation. Everything after it is endgame. Finding it, navigating it properly, and leaving without activating the portal until you are genuinely ready is the difference between completing Minecraft and dying to the Ender Dragon with three hearts left.

    The Eyes of Ender will take you there. The torch on the right wall will guide you through it. Everything else is just making sure you come back twice.