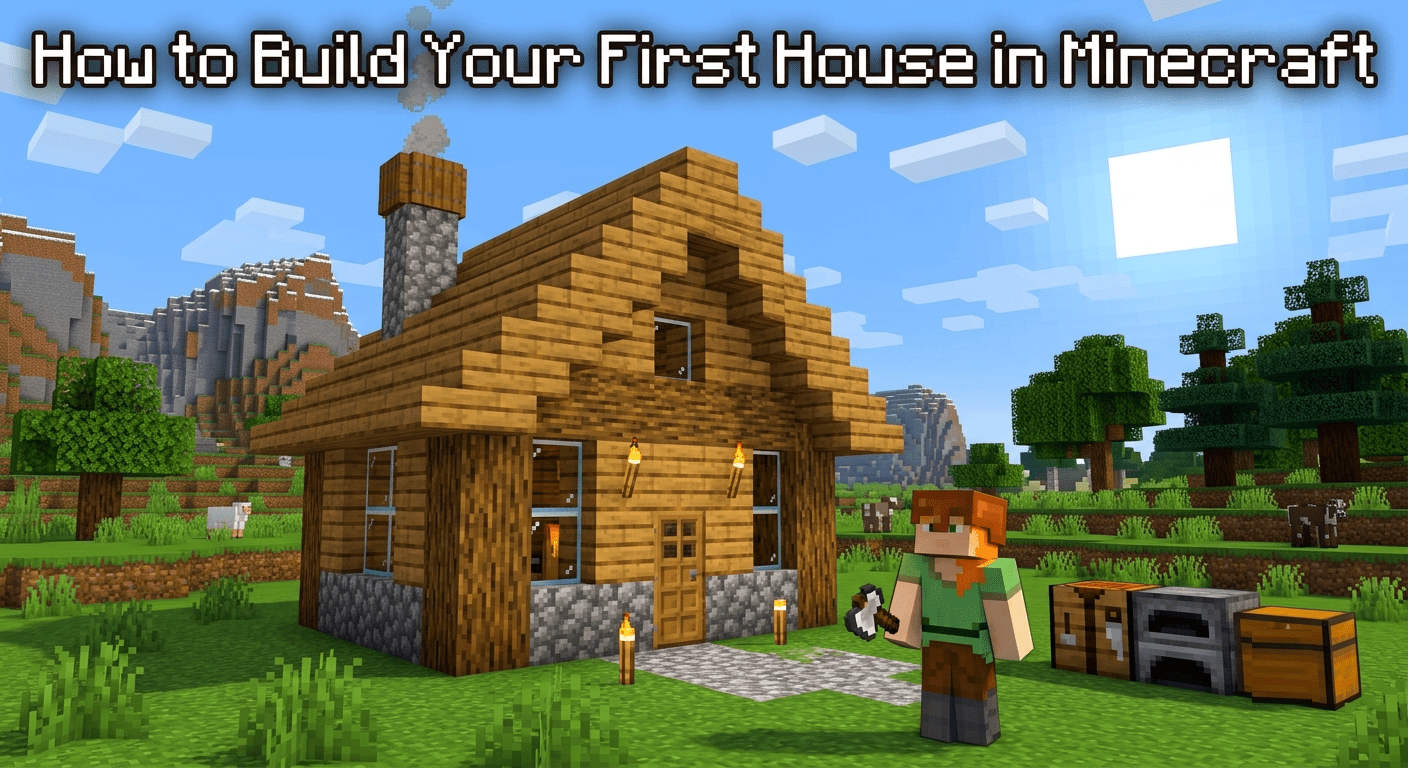
Every Minecraft player builds the same first house. Four dirt walls, a hole to crawl through, absolutely no windows, and the quiet dignity of having survived Night 1. That dirt box is the right call survival beats aesthetics every time. But here’s where most players go wrong: they never upgrade it.
A proper Minecraft house is not a cosmetic project. It is your crafting hub, storage system, spawn anchor, and first line of defence. This guide takes you from that dirt box to a real home step by step.
Before You Place a Single Block
Pick your location carefully this decision affects everything that comes after. Your first permanent base needs trees nearby for wood, exposed stone or a hillside for mining, water within reasonable distance, and flat ground to build on comfortably.
Building into a hillside is the smartest move for a first home. The terrain becomes three of your walls automatically, cutting your material cost in half. You only need to build the front face and the roof everything else already exists.
If you want to practice before committing, build in Creative Mode first. You can also experiment with different building styles and materials, and since flying is available in Creative, you can check your build from every angle before transferring the design to your survival world.
What Materials to Collect Before You Start
Core materials for a starter house include spruce logs, cobblestone, stone bricks, and oak planks all obtainable within the first day. Essentials comprise one bed, double chests, furnaces, and 6 to 8 torches to furnish any beginner house design.
Here’s the realistic shopping list for an 8×8 starter house:
| Material | Amount | Purpose |
|---|---|---|
| Oak or Spruce Logs | 1 stack (64) | Walls, pillars, floor |
| Oak Planks | 2 stacks | Interior floor, walls |
| Cobblestone | 1 stack | Foundation, blast resistance |
| Glass Panes | 16 to 32 | Windows |
| Oak or Spruce Stairs | 32 | Roof |
| Oak Slabs | 16 | Roof top layer |
| Torches | 16 minimum | Lighting everywhere |
| Oak Fence | 16 | Perimeter and decoration |
| Door | 1 to 2 | Entry point |
Always collect 3x more than you think you need. Running out of cobblestone halfway through a roof is the most frustrating beginner experience in the game.
Step 1: Lay the Foundation
A common beginner size is a 7×7 or 9×9 base start here and scale later. The foundation is the most important structural element of your house. Mark the outline first, then fill it in completely. This ensures your structure remains stable and visually consistent.
Create an 8×8 frame on the ground. Use Oak Logs for the four corners and fill the lines between them with Cobblestone. Fill the entire floor inside the frame with Oak Planks.
You can optionally dig one block into the earth so the walls appear to rise from the ground rather than sit on top of it. It is a small detail that makes the build feel grounded and intentional rather than dropped onto the surface.
Step 2: Build the Walls
Build your perimeter walls up to 4 blocks high. This gives you enough headroom to move around comfortably inside and prevents spiders from climbing over the top.
Use different blocks at the corners this is the single technique that eliminates the flat box problem. At each corner, use a different block from your wall material a cobblestone pillar against a wood-plank wall, or a stone brick column against a cobblestone wall. This single technique eliminates the “flat box” problem that plagues most beginner builds without adding any real complexity.
Leave openings for your door and windows as you build. A door opening is 2 blocks tall and 1 block wide. Window openings look best at 2 blocks wide and 1 to 2 blocks tall, positioned at eye level on the wall.
Step 3: Add Windows Properly
Use glass panes, not full glass blocks. Glass panes connect to adjacent blocks and fill only the centre of the space, giving a proper framed window look.
Never leave windows open without glass. Some players skip glass entirely in early game. It is an open invitation to mobs like skeletons that can attack you from a distance through open gaps in your walls.
Windows serve two purposes light during the day and visibility at night. Being able to see approaching mobs before they reach your door gives you time to prepare. Position windows on multiple sides of the house so you have sightlines in every direction.
Step 4: Build the Roof
The roof is where most first-time builders give up and just slap a flat layer of planks on top. That works functionally but looks terrible. Use slabs for minimalistic builds or stairs for depth and detail.
The staircase roof method is the easiest way to get a proper pitched roof on a first build:
Start by placing a row of stairs along the top edge of your longest wall, angled outward. Move one block inward and one block upward and repeat. Continue until both sides meet in the middle. Seal the top with slabs. Cap the two triangular end faces of the roof with the same blocks as your walls.
The outside portion of the roof can use stone stairs, while the inside uses spruce the spruce compliments the stone well. The roof can be tricky, but if you stagger the stairs on the outside, the inside is easy. Finish off the top with spruce slabs.
Add a chimney for instant character. Use bricks stacked 2 to 3 blocks above the roofline, place a trapdoor on the side for detail, and put a campfire inside the chimney opening. It produces smoke that rises from the roof and makes your house look genuinely lived in.
Step 5: Material Upgrades Over Time
Your house should evolve as you progress never stay on the material you started with. Here is the upgrade path that the building community consistently recommends:
Day 1 Wood. It is fast to collect and immediately available. Use it for your emergency shelter. Day 2 to 3 Cobblestone. Once you are surviving and have a mine started, switch to cobblestone for any permanent structure. Cobblestone has a blast resistance of 6, making it resilient against creeper explosions and unlike wood, it will not burn. Week 1 and beyond Stone Bricks. Stone bricks require an extra step smelt cobblestone into stone, then craft four stone into four stone bricks but the visual upgrade is significant.
Replace wall sections gradually rather than demolishing everything at once. Swap out one wall per session as your cobblestone stockpile grows. Your house improves continuously without requiring a full rebuild.
Step 6: Interior Layout – Function First
A starter house has one job: keep you alive through the first few nights while you gather resources. That means it needs a door, full lighting inside and on the perimeter, a bed, a crafting table, a furnace, and a chest. Everything else is optional.
Here is the interior layout that makes your house actually work:
The storage wall should occupy one full wall. Dedicate one full wall to double chests two chests placed side by side open as a single large storage unit. Aim for at least four double chests in a starter house, organised by category: one for wood and building materials, one for stone and ores, one for food and farming items, one for tools and gear.
Place item frames on each chest and put a representative item inside the frame. It is the fastest inventory system in vanilla Minecraft and takes two minutes to set up.
The crafting station should sit adjacent to your storage wall crafting table, furnace, and later a smoker and blast furnace side by side. Keep it compact so you can access everything from one spot.
Place your bed away from the walls with space on all sides so you can get in and out quickly without getting stuck on furniture during a night emergency.
Step 7: Lighting – More Important Than You Think
Lighting in Minecraft is not decoration. It is defence. Hostile mobs spawn in areas where the light level drops below 8. Every dark corner inside your house, every unlit wall outside, every shadow under your porch roof is a potential mob spawn point.
One detail beginners often miss: furnaces emit light, but that light does not prevent mob spawning. A bed placed in a dark corner away from furnace light can still be a mob spawn point if the surrounding light level drops below 8. Light your entire interior every corner, every ceiling not just the centre of the room.
Place torches every 7 blocks outside your house in every direction to create a mob-free perimeter. Extend this lighting to cover any farm areas, pathways, or outbuildings nearby. The larger your lit perimeter, the safer your base becomes.
Step 8: The Details That Transform a Box Into a Home
The first 80% of a build takes 20% of the time. The last 20% of detail work takes 80% of the time but it is what separates a functional box from something you are genuinely proud of.
Add a porch. Extend the roof two blocks outward from your front wall and support it with fence posts. Add a fence railing along the edge. It takes five minutes and completely changes how the front of your house reads.
Add landscaping. Bushes, flowers, and even a small farm can liven up a simple house. Place flower pots on windowsills, add oak leaf bushes at the corners of the building, and put a stone path leading from your door to your farm. These details are free and immediate.
Use trapdoors as decorative elements. Use stairs as shelves for storage, trapdoors as window shutters, or campfires (extinguished) for chimney effects. Trapdoors on windows look like shutters. Placed on the floor next to walls they look like floor vents. Creativity with non-obvious block uses is what separates good builds from great ones.
The Mistakes Every First-Time Builder Makes
Building too small. A 5×5 interior feels fine until you add storage, a bed, a crafting station, and a furnace then there is no room to move. Make your first house at least 7×7 interior minimum.
Using only one block type. A single-material wall looks flat and unfinished. Mixing spruce logs with stone bricks, or cobblestone with oak planks, creates visual depth that makes even a simple house look intentional.
Skipping the roof detail. A flat roof is the fastest sign of a beginner build. Spending an extra ten minutes on a staircase roof changes how the entire structure reads from a distance.
Not lighting the perimeter. Lighting the inside of your house is not enough. Mobs spawn outside and walk through your door the moment you open it. Light everything within 20 blocks of your walls.
Quick Build Reference
| Phase | What to Do | Time Needed |
|---|---|---|
| Pick location | Flat ground near trees, stone, water | 5 min |
| Gather materials | 1 stack logs, 1 stack cobblestone, glass, torches | 15-20 min |
| Foundation | 8×8 frame with log corners and cobblestone fill | 5 min |
| Walls | 4 blocks high, different corner blocks, door and window gaps | 10 min |
| Windows and door | Glass panes, door placed in gap | 5 min |
| Roof | Staircase method with slab top | 10-15 min |
| Interior | Bed, crafting table, furnace, chest wall | 10 min |
| Lighting | Torches every 7 blocks inside and outside | 5 min |
| Details | Porch, chimney, landscaping, item frames on chests | 20-30 min |
The honest truth about building in Minecraft: your first house will not be your best house. A project in Minecraft is rarely finished you will keep discovering new blocks and materials you want to incorporate. Do not hesitate to tear things down and rebuild them. Start functional, upgrade continuously, and let the house grow with your skills. That is how every great Minecraft base actually gets built.
Leave a Reply